A Fold-Away Changing Table for the Bathroom
/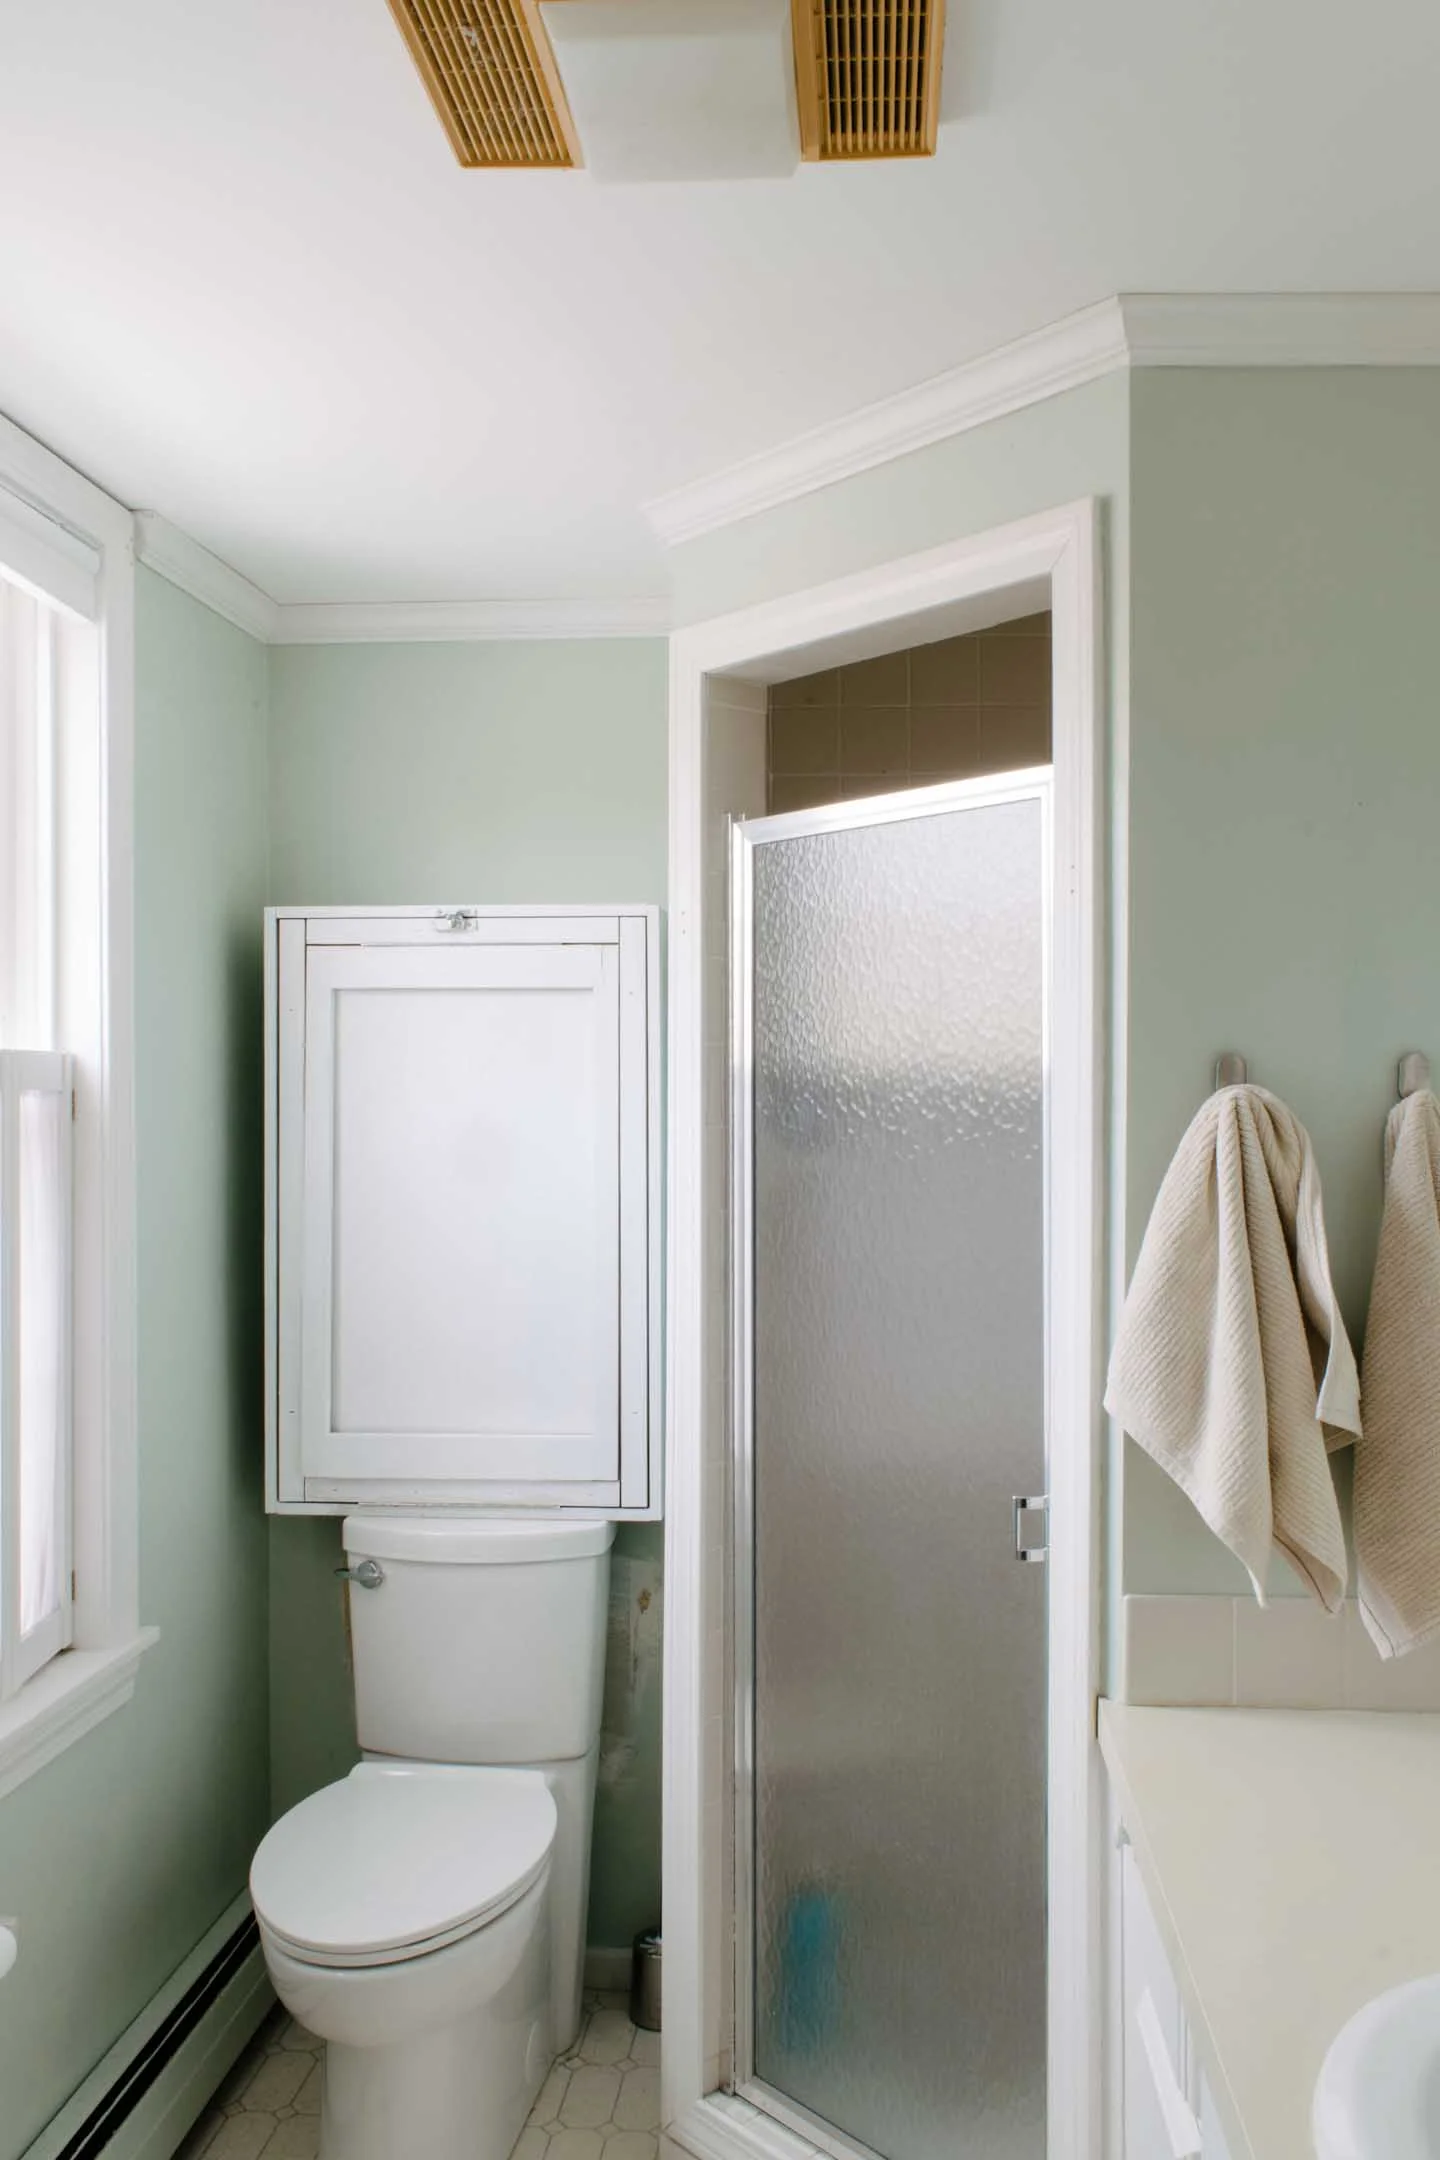
One of our favorite space saving solutions was this fold-away changing table we made for the bathroom, and we decided to use it again.
Read MoreOne of our favorite space saving solutions was this fold-away changing table we made for the bathroom, and we decided to use it again.
Read MoreIn this case it meant the Colonial electrical needed some serious work before it would even be insured.
Read MoreWell it has been one CRAZY year for our family. One year ago we began our blog to highlight our lifestyle of living in a small house.
Read MoreHere we have 11 things you can get the mama-to-be that will help ease her mind and rejuvenate her body both pre and post labor.
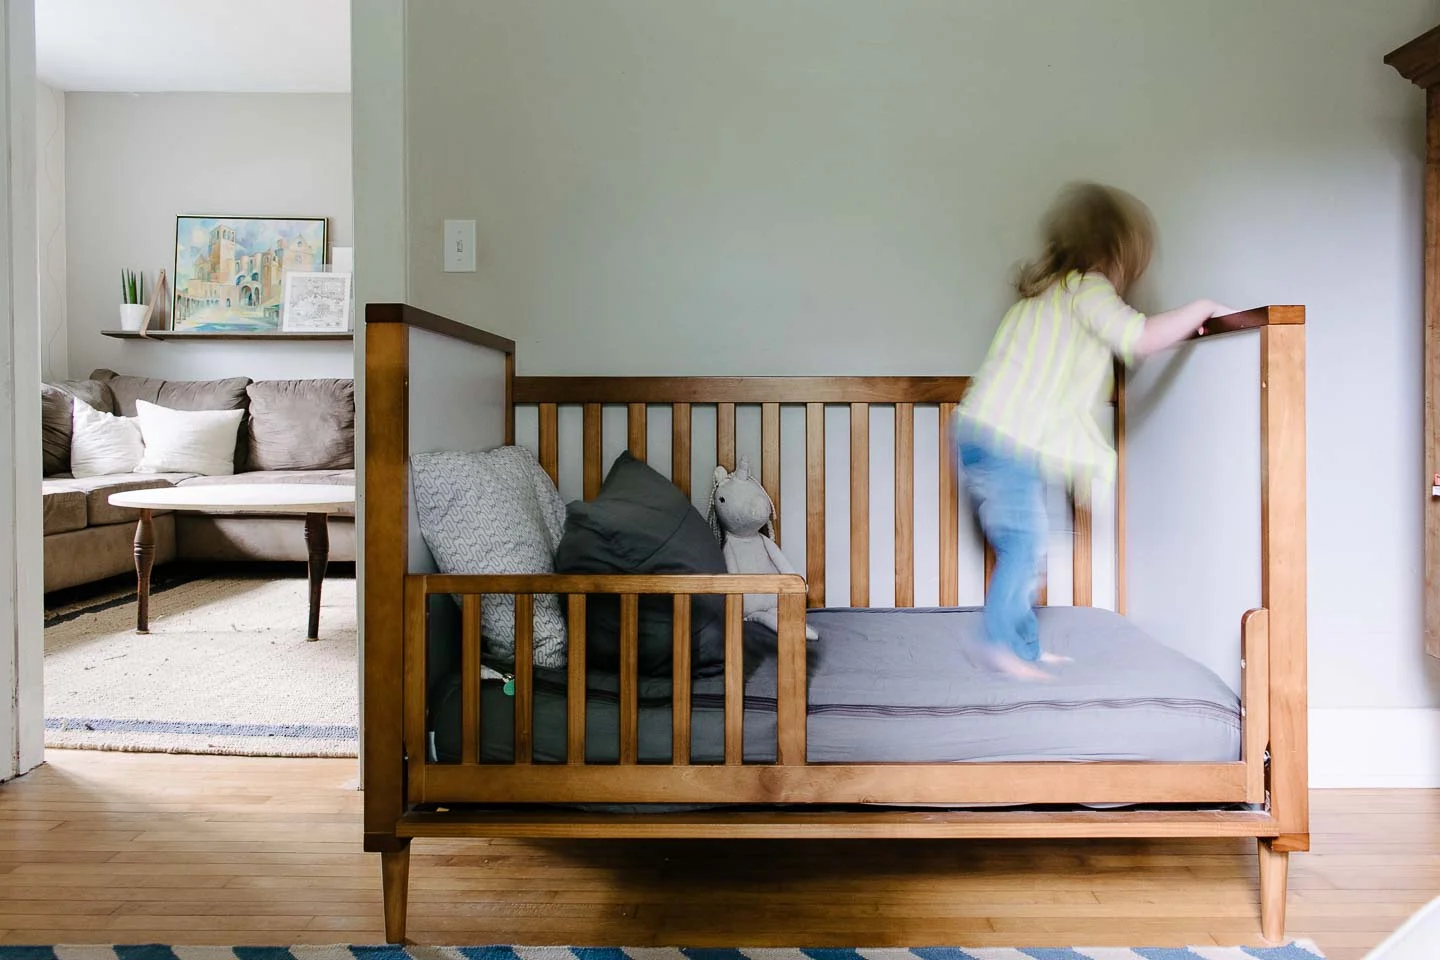
Read MoreI snapped pictures of our daughters room right before packing it up for the move but just haven’t had the chance to reveal the photos. So without further ado we finally have the small toddler room reveal!
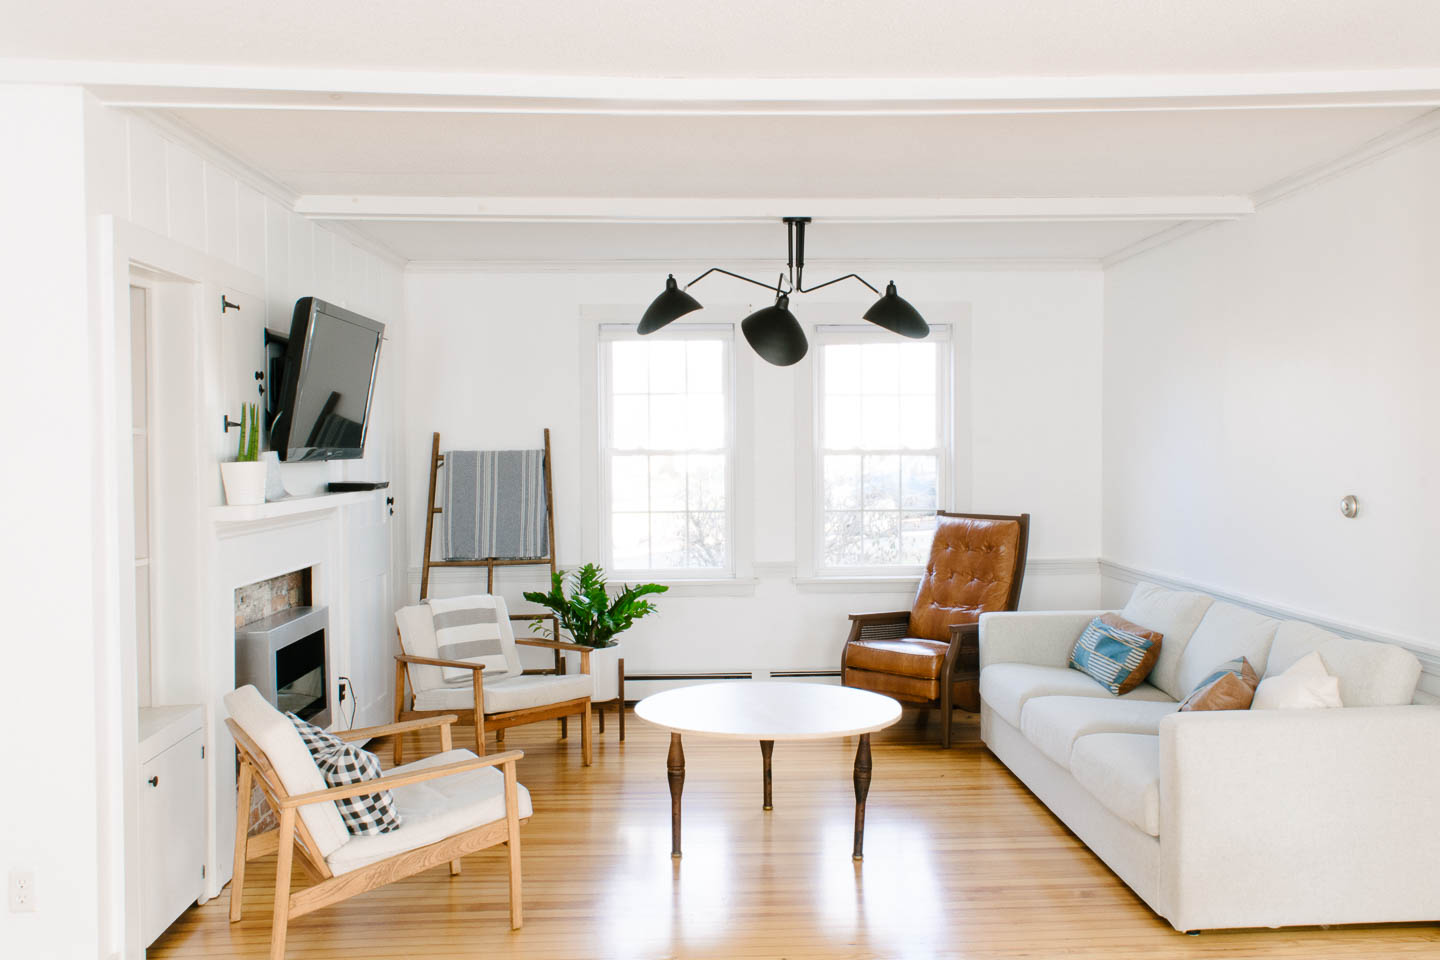
Read MoreI thought today we could get you some reveal photos of our cali casual living room, since we probably won't be getting to much else in the room for quiet a bit with our baby boy on the way.
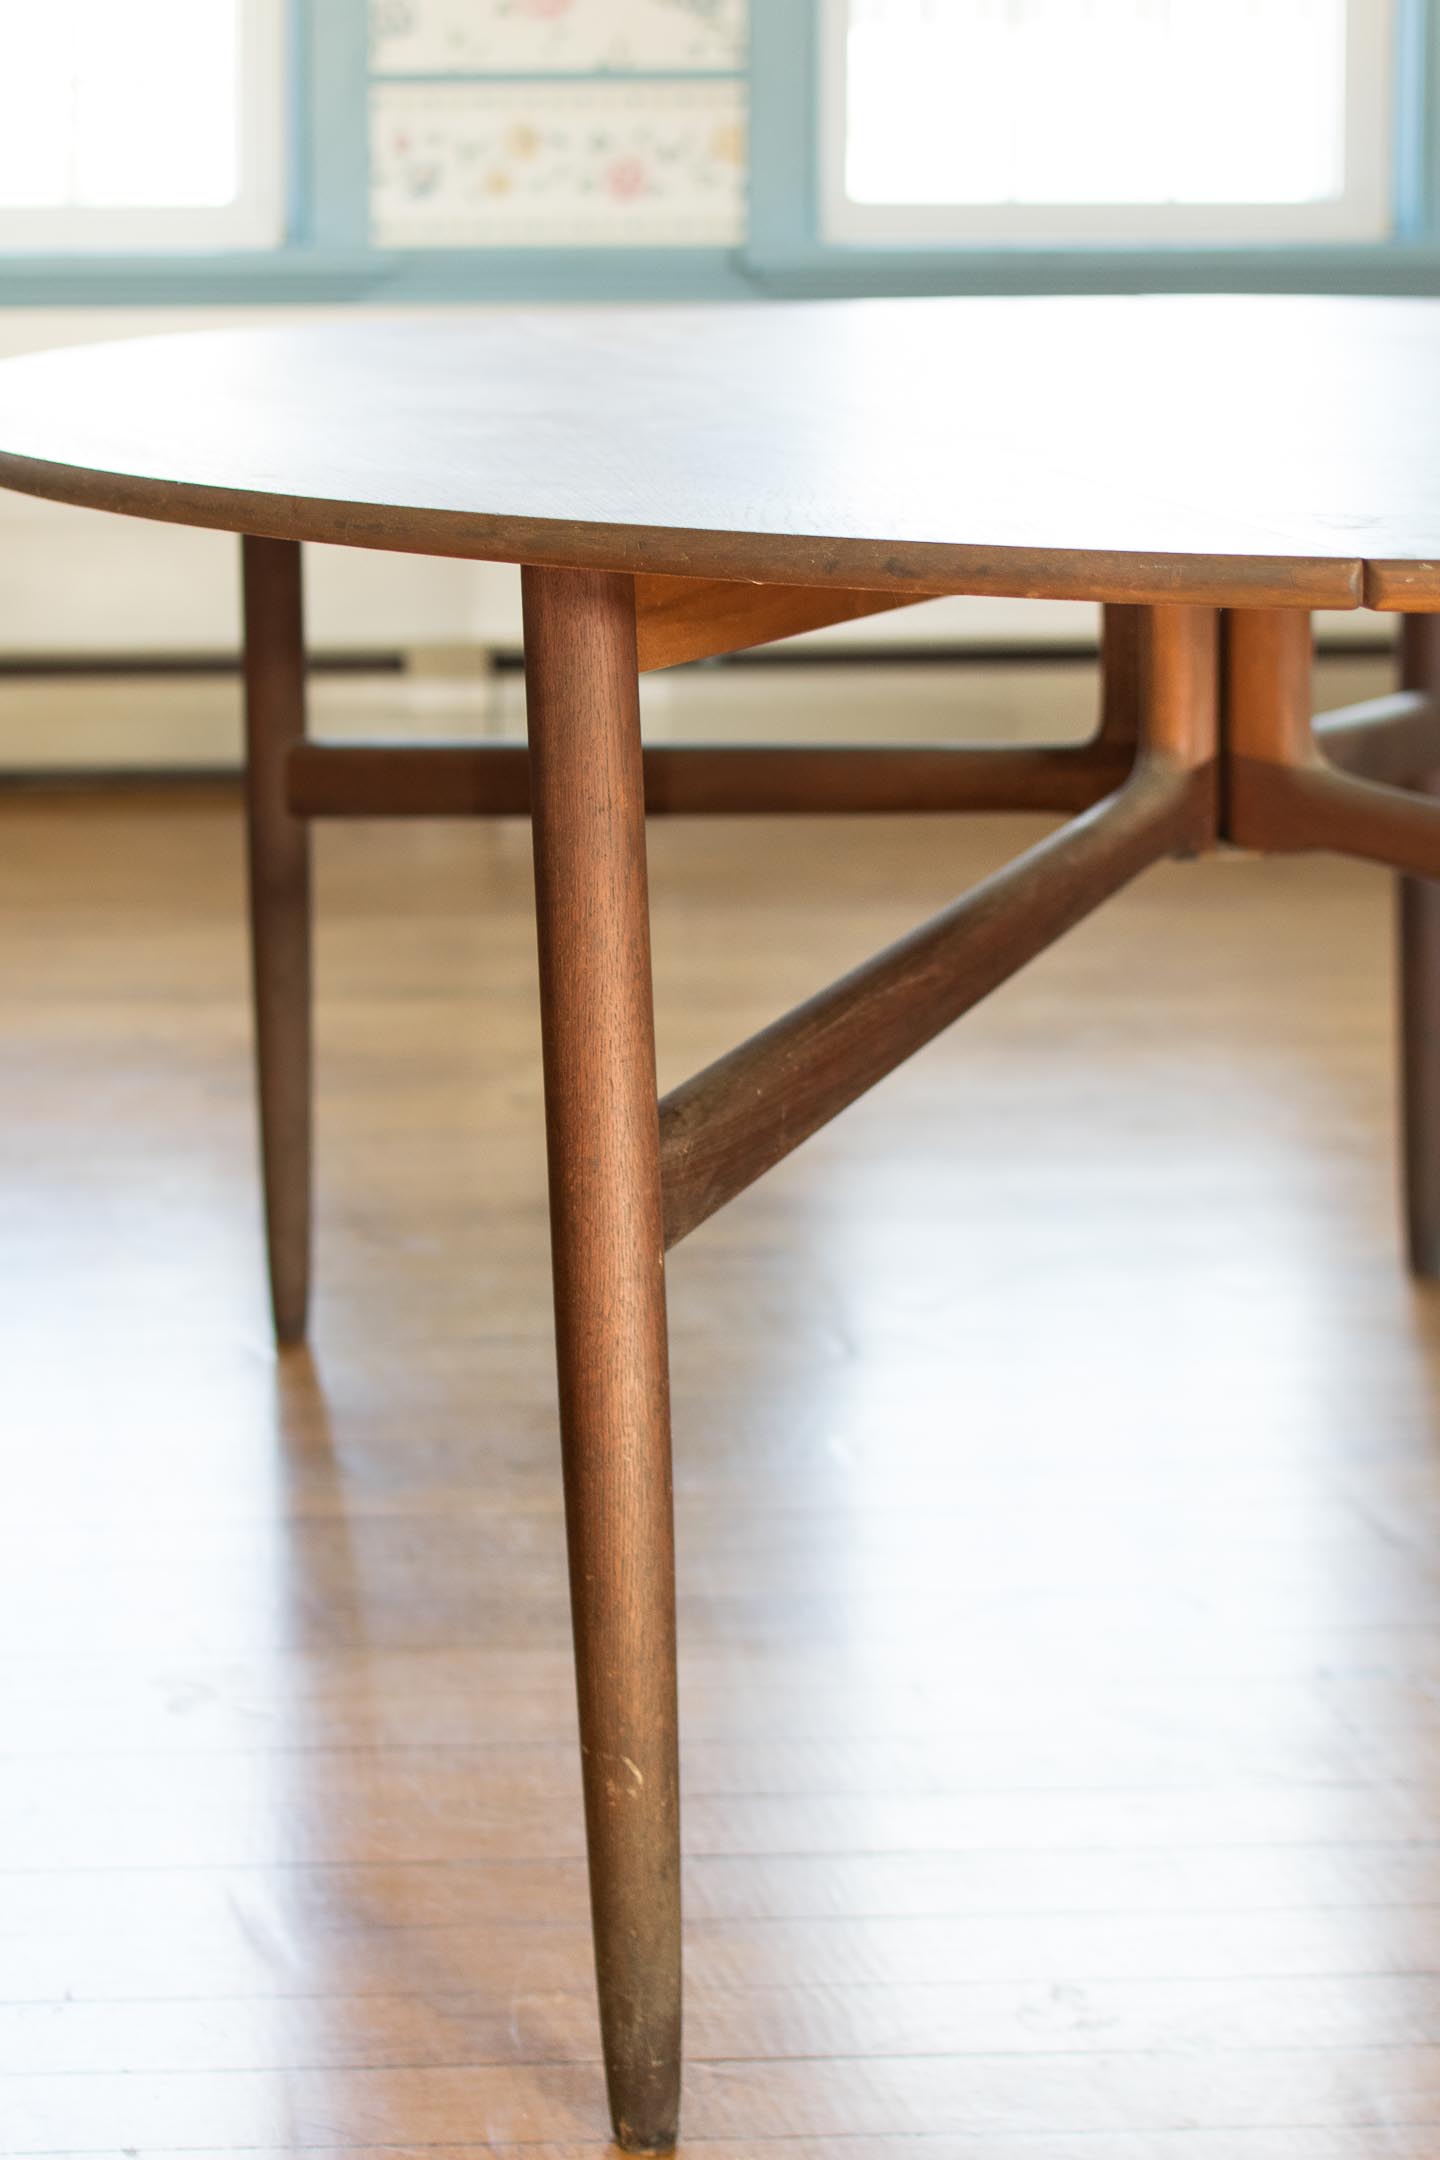
Read MoreIt’s been a long while since we’ve had the chance to create another interior design coloring page for all of you, but I was inspired to do another dining room when we found this amazing new dining table on Craigslist a few weeks ago. See all our past Color It Sunday pages by clicking on the projects tab or here.
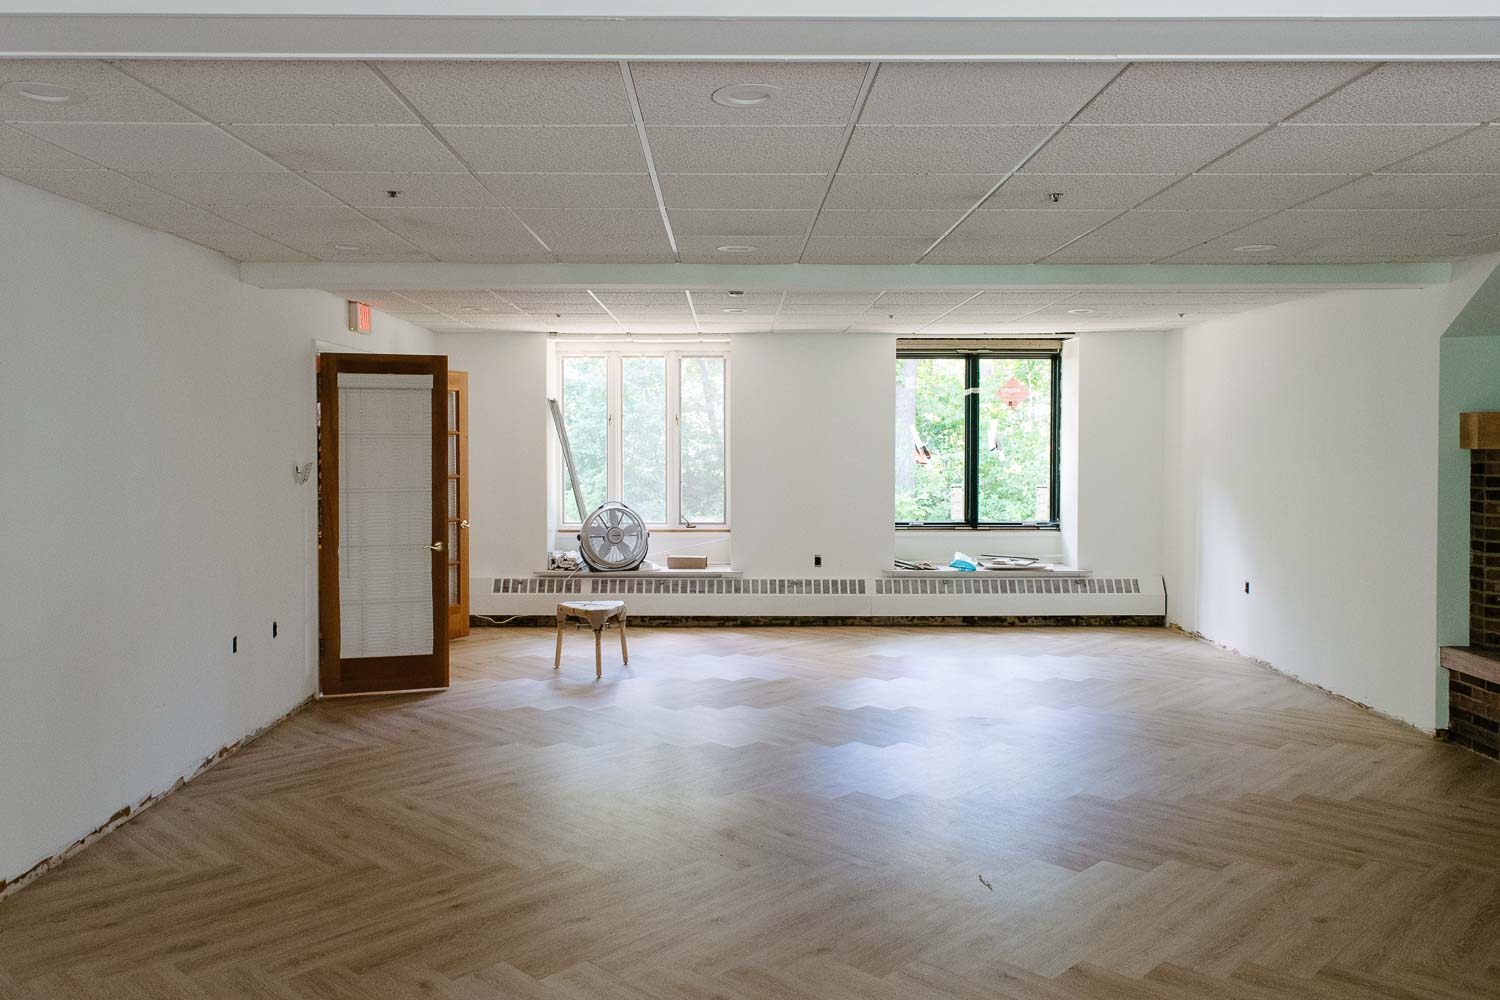
To say we’ve had a lot going on lately would be a huge understatement. With the move into a much larger historic home in September, the One Room Challenge Nursery just getting wrapped up, the holidays, and our little Man scheduled to arrive shortly after the new year, we have been busy for sure.
You know what they say about the busy times? Be prepared to be even more busy... we must put out some special smell (sweat?!) that tells everyone that now is the time for other opportunities to come along. We’ve had multiple potential projects and clients give us a call over the last few weeks with intriguing possibilities, you have to wonder why it all happens at the same time! But we sure are grateful for these fun prospects.
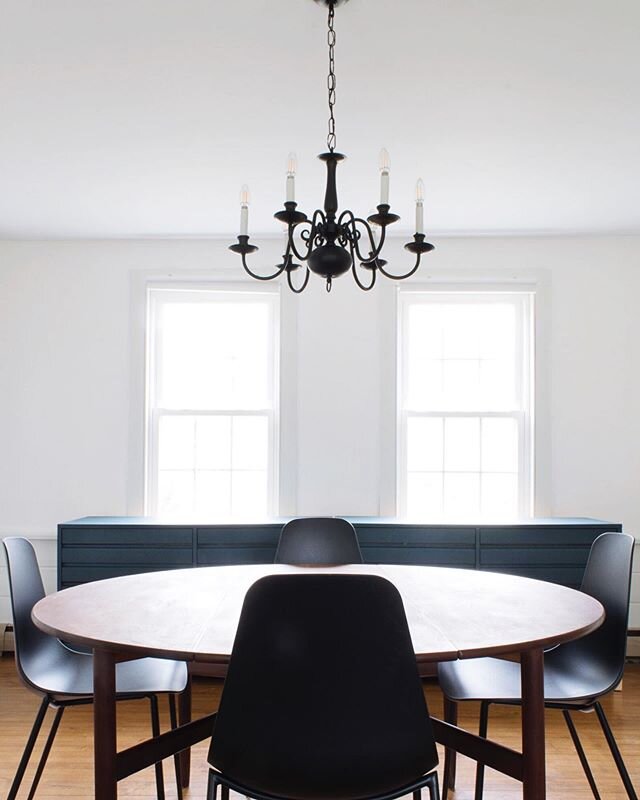
That’s why if you noticed, we took last week off and just enjoyed Thanksgiving at my sisters place without posting. But today we are back at it with an industrial dining room inspired by a wonderful friends kitchen/ dining remodel.
The dining room is a mix of industrial, mid-century, and rustic. You know how much I love a good eclectic mix and our friends do too.
Download the free pages or click the link below.

Would you create a feature wall? Some really modern art in the frames, find a few classic oil paintings, or some vintage posters?
Color it up and let us see your results on social media #thglcoloringpages, and thank Libby for the inspiration 😍.

I know your thinking what is she going to do with yet another mid-century piece but look at those legs!!? It’s a big house I think it can handle some more mid-mod eclectic love.
I practically threw the money at the seller when my mother, daughter and I went to go “check it out”. Which is obviously code for I already know I’m getting this thing unless it’s falling apart. I guess I beat out the man driving from upstate NY to come take a look!
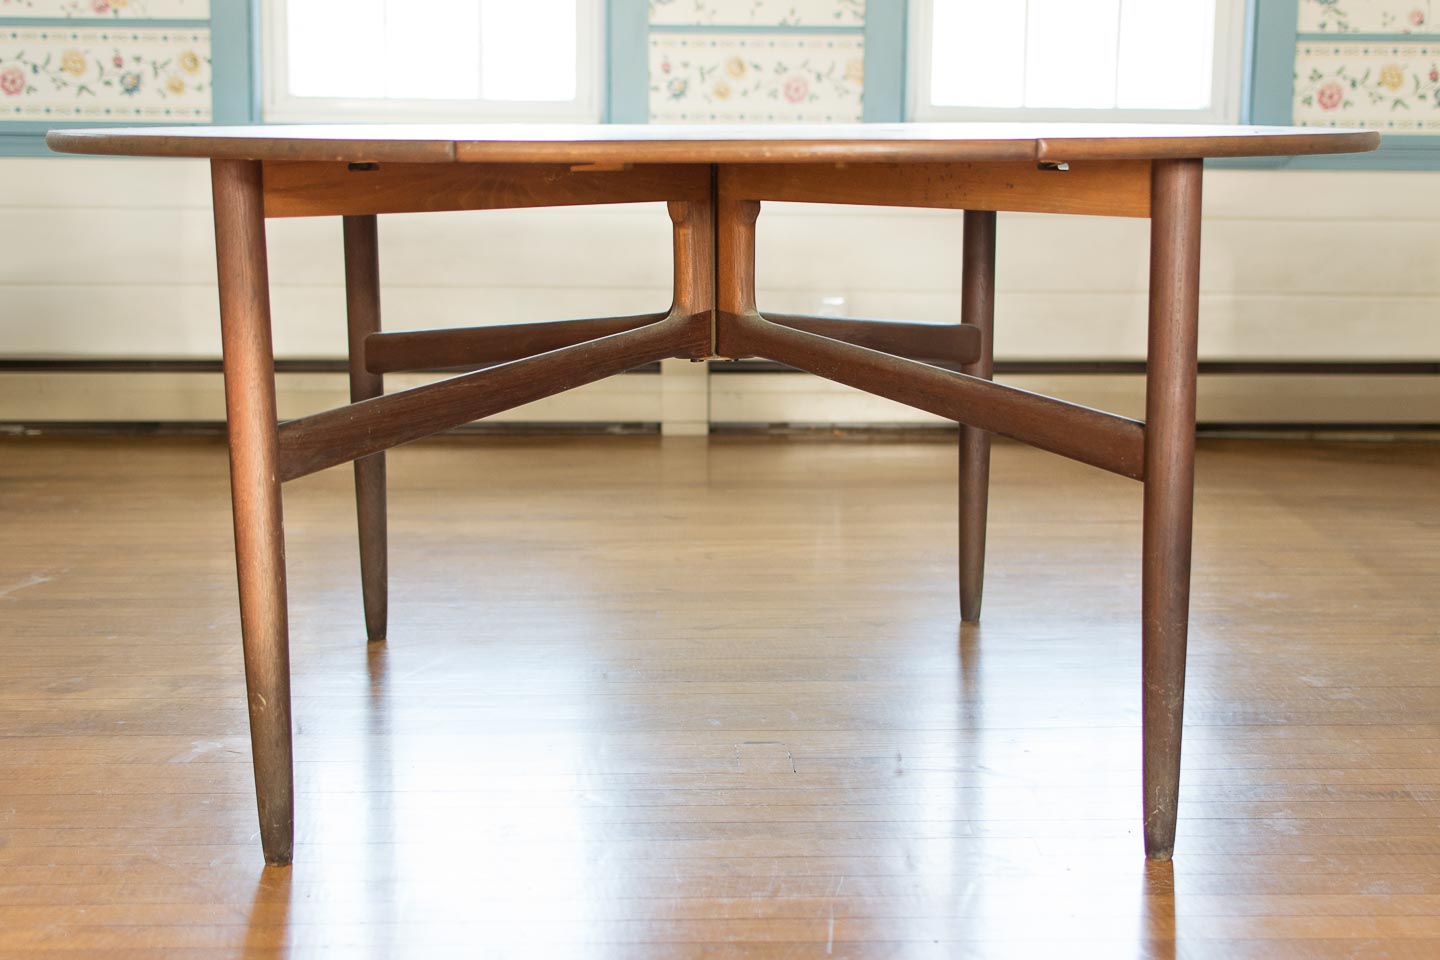
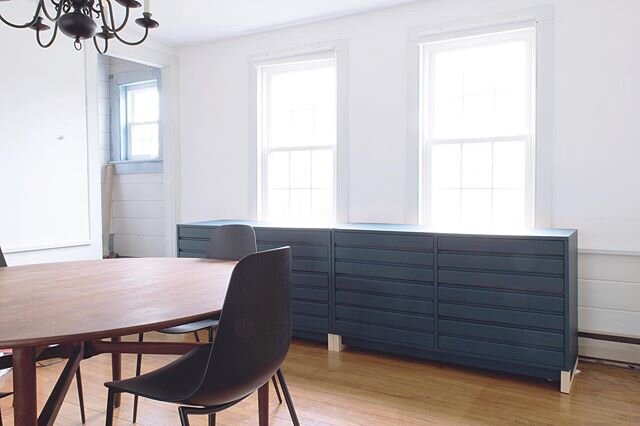
It’s just going to hang out here in the dining room with all this wonderful, amazing wallpaper (sense the sarcasm) for a while.
It needs a complete refinishing job, chairs, and something glamorous as a light fixture (Sputnik again anyone?), but eventually we will get around to this as well.
We are really debating a traditional chair with the table or going for it and grabbing something modern and matchy. what would you do?
Over the last 7 weeks we have dealt with a lot of late nights and nap time projects while designing and constructing this natural & soothing boy's nursery. Honestly though, we are so grateful it’s done and that the One Room Challenge helped us complete the nursery before the baby arrives. It very well will be the only room in this Colonial we will complete for a long while, so we made it count!
This post may contain affiliate links.When you click on a link and purchase I will get a small compensation at no extra cost to you, win win. Read the full disclosure here.
We knew this would be the nursery right away, with its little nook area and original closet/ doors, it already had the character and room we wanted.
Shelving wasn’t hard to think up for this spot since we still have wood that was milled from a beech tree at our old house. With some very inexpensive hardware and hunter-green paint, we wrapped up the nook shelving on no time.
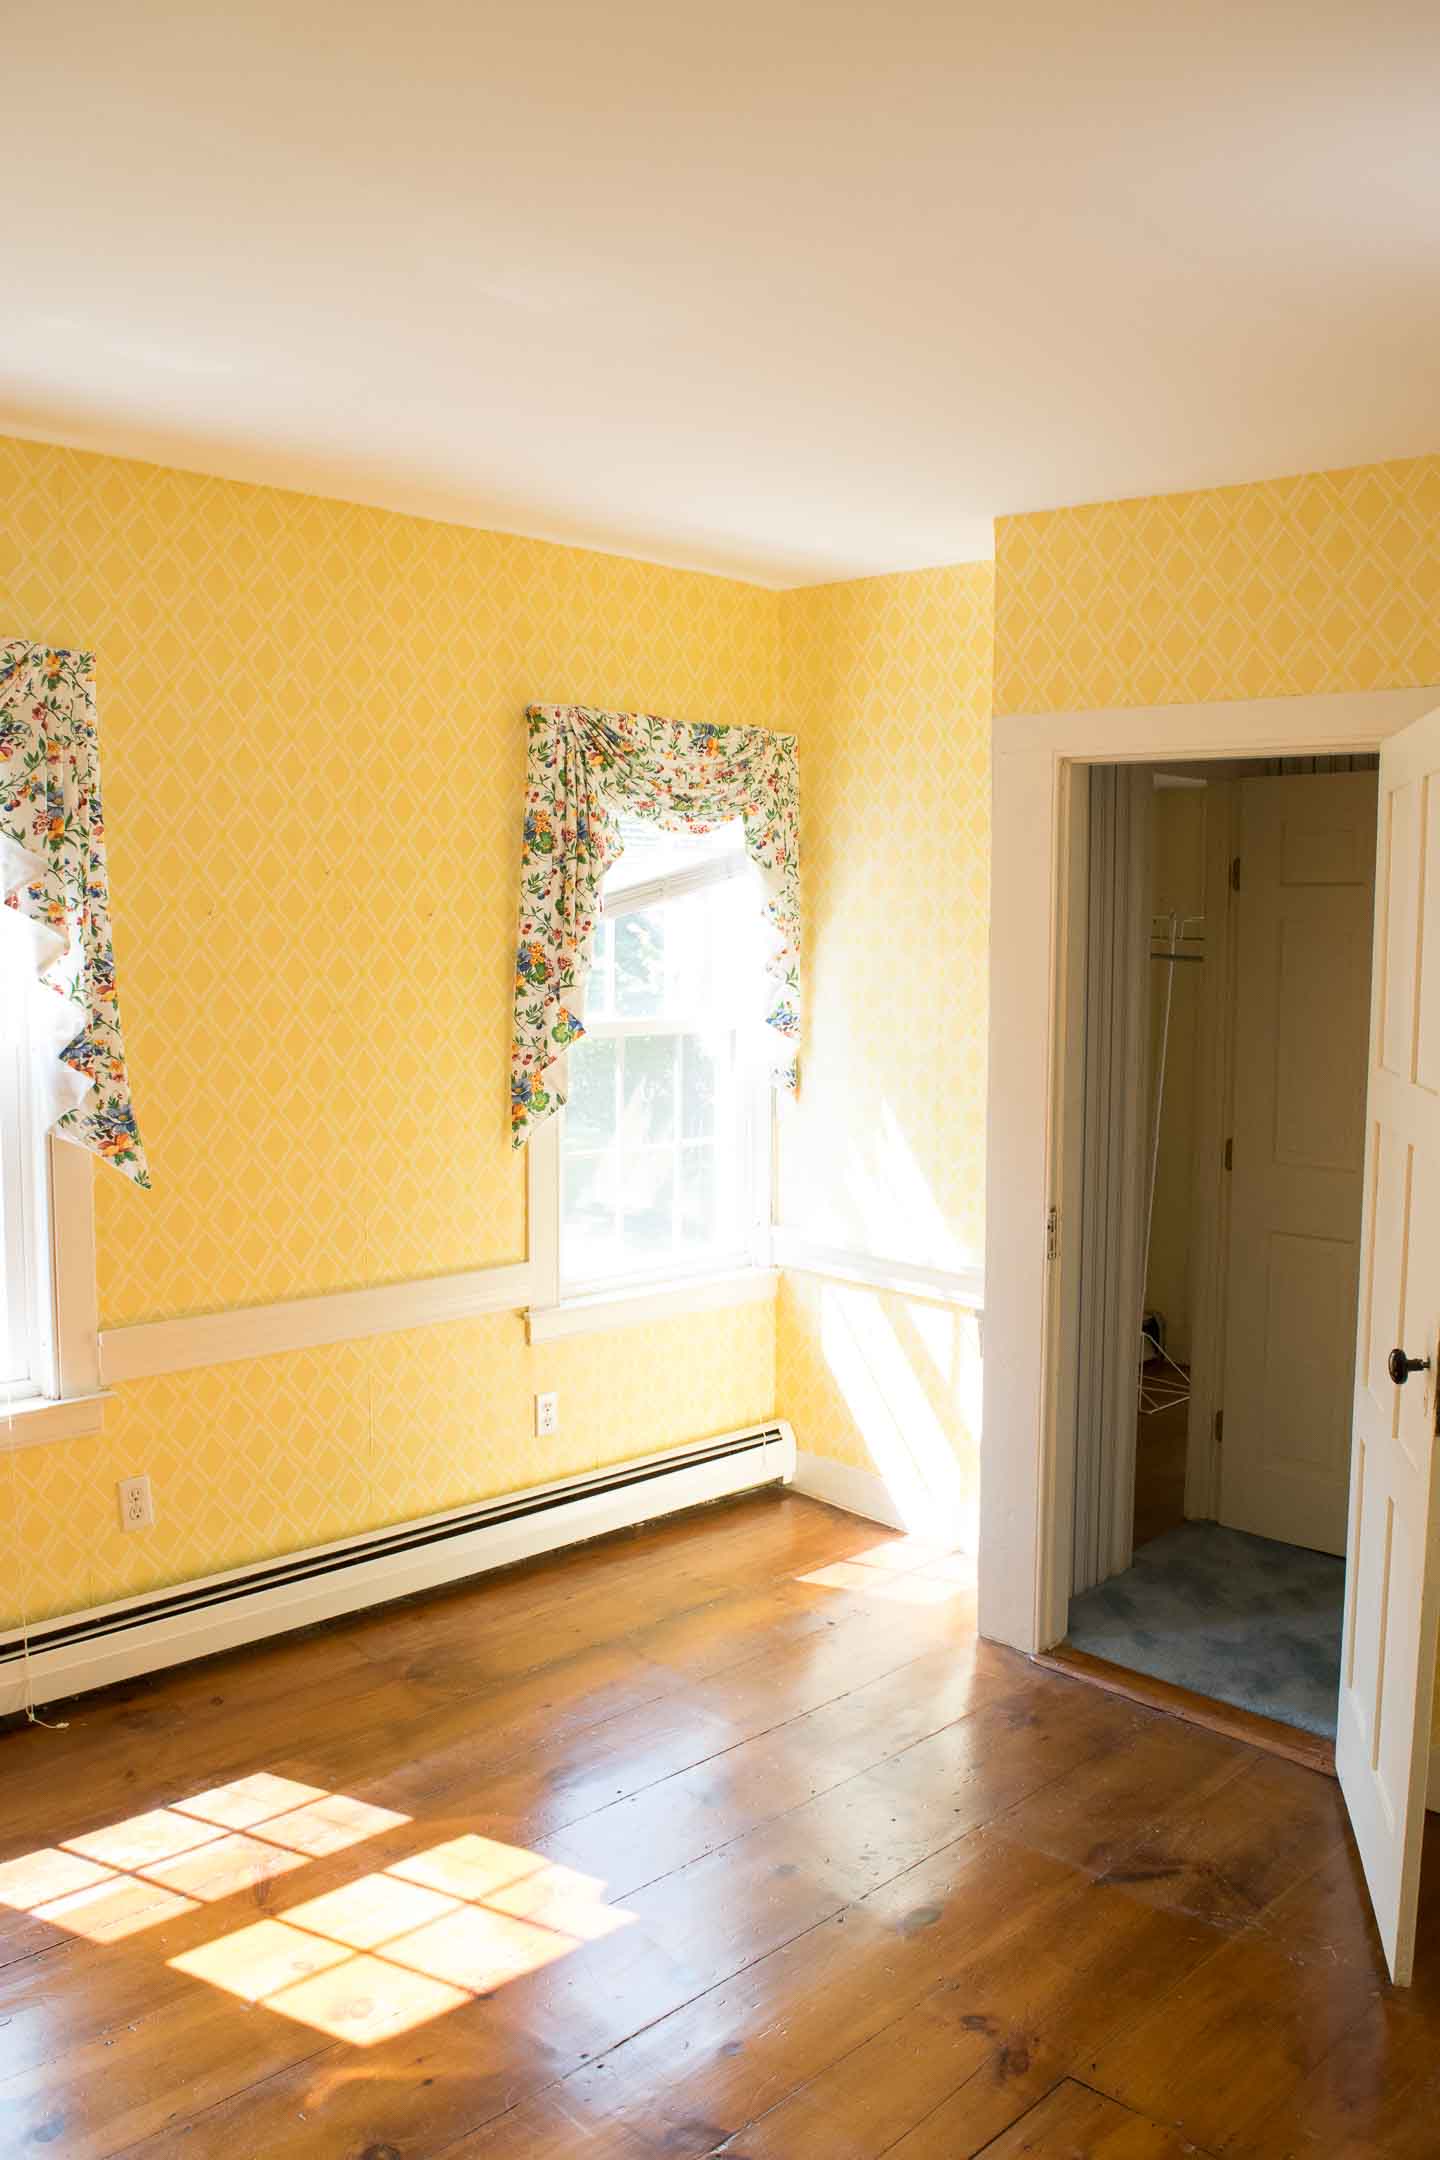

It only took half a second for me to realize the wallpaper was not going to work, with the windows facing south this room gets a fair amount of light that only further excentuated the extreme yellow. So we took it down in favor of a painted design and opted out of more wallpaper which would have been costly; and I couldn’t bare to put any up after painstakingly taking so much down.

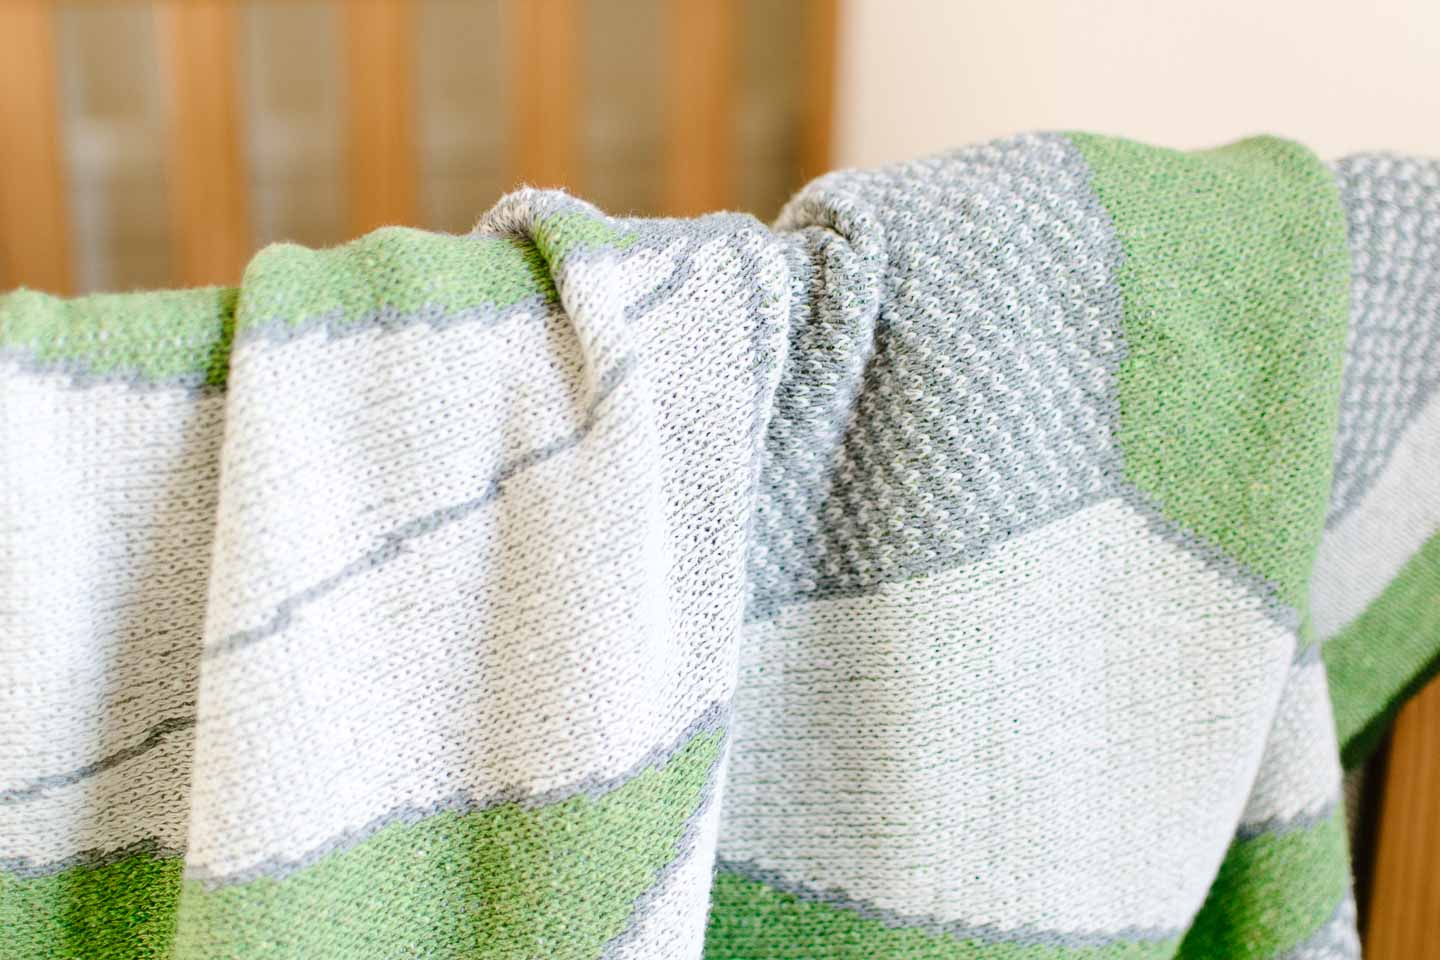
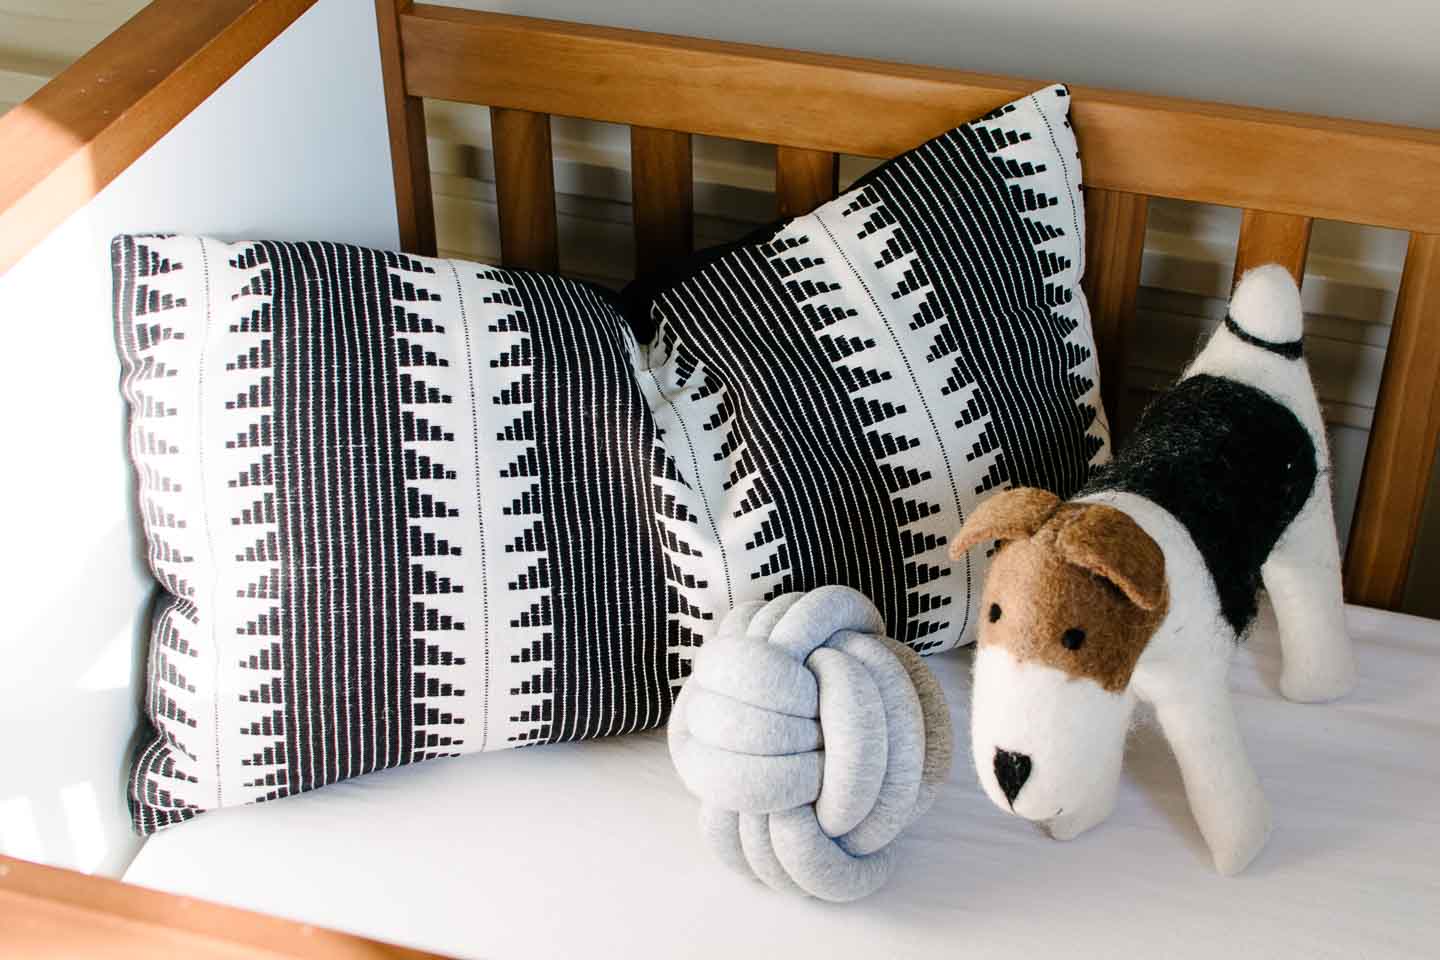
Using green as our accent was an easy decision after we found this geometric baby blanket at a local store. The blanket really kicked off the entire rooms design but it was just one amazing piece we found from local or small makers for this room.
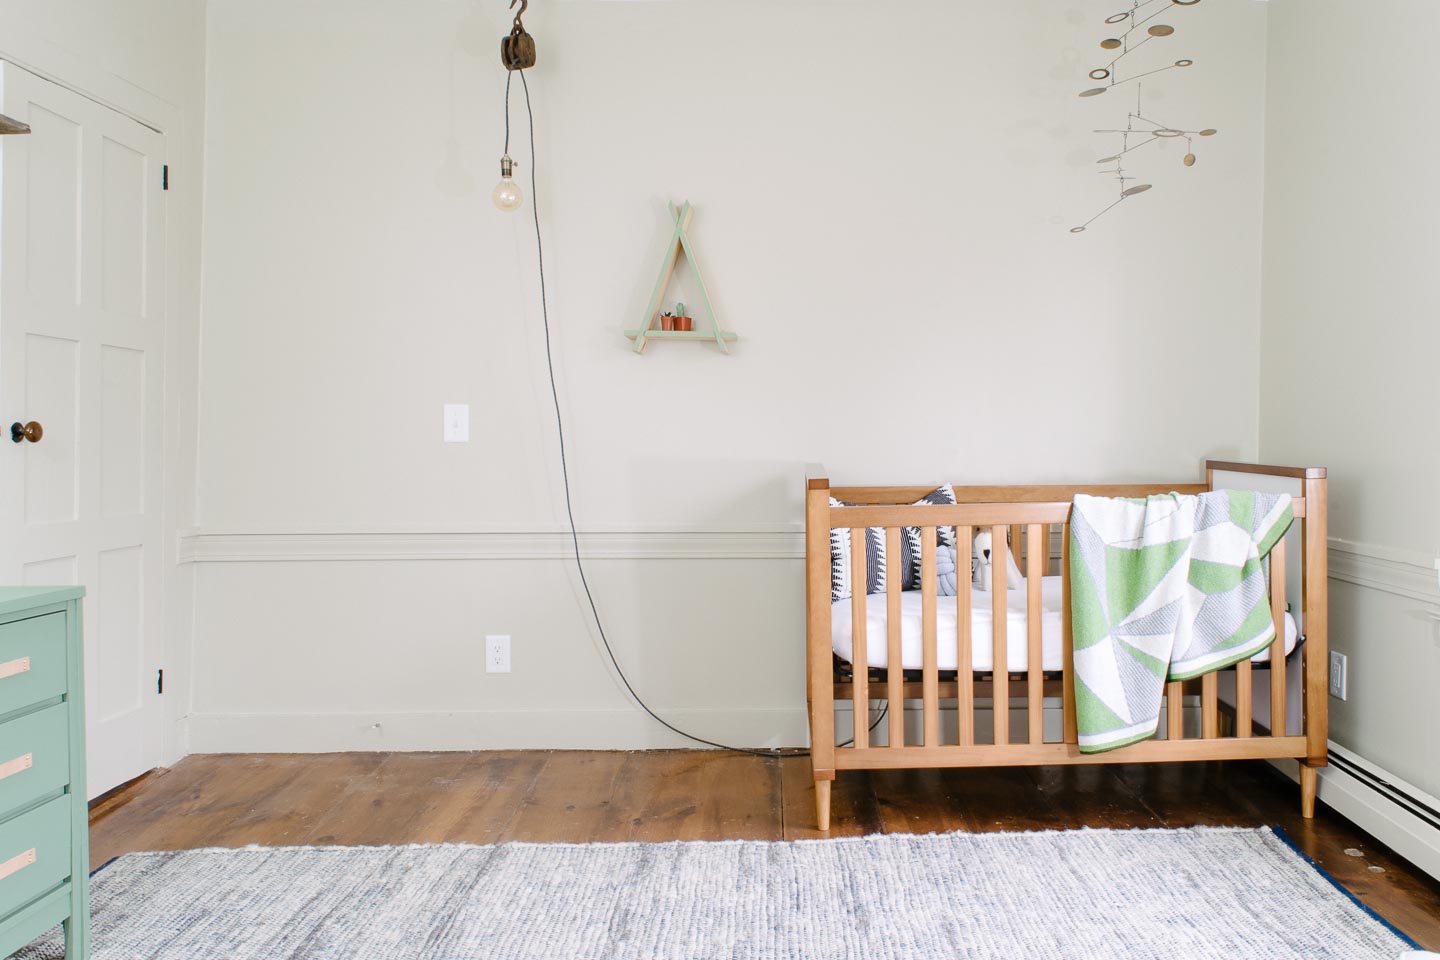
The crib was reused from our daughters nursery to save funds for other splurges, and because I’m not sure I could find another crib we love as much as this one. When we got it in 2015 (it’s discontinued) we wanted something gender neutral so that it could be reused.

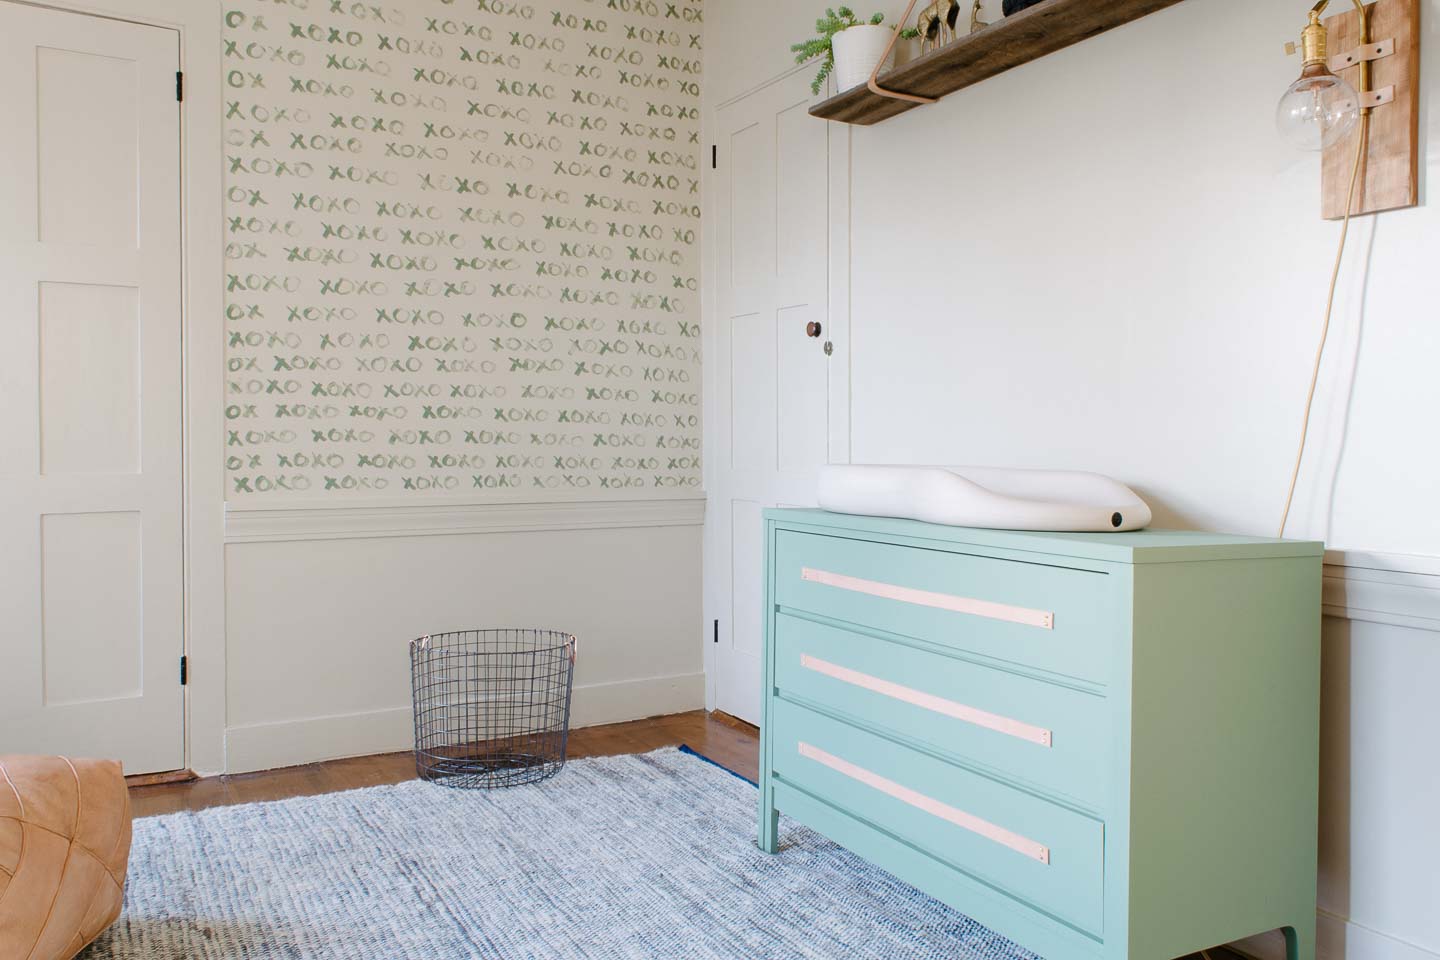
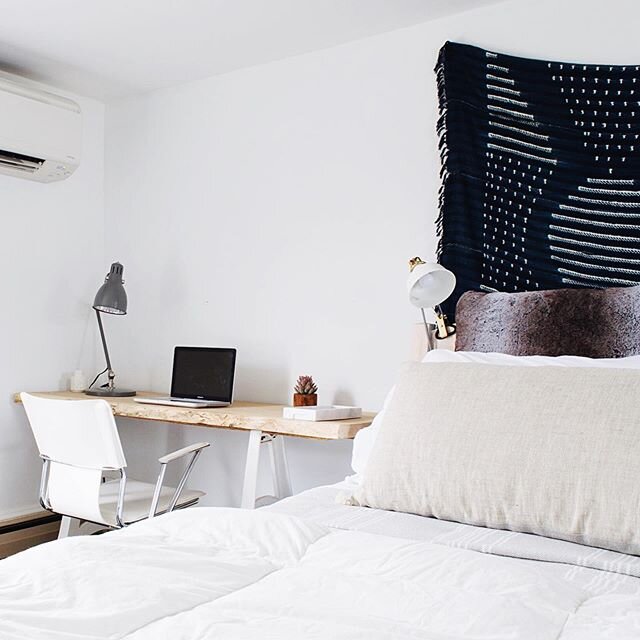
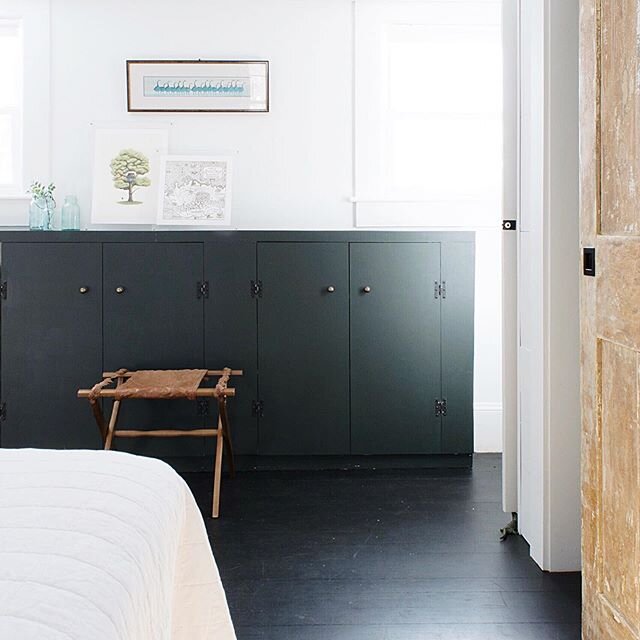
We painted this vintage mid-century dresser to use as our changing table and added long leather pulls for a natural element.
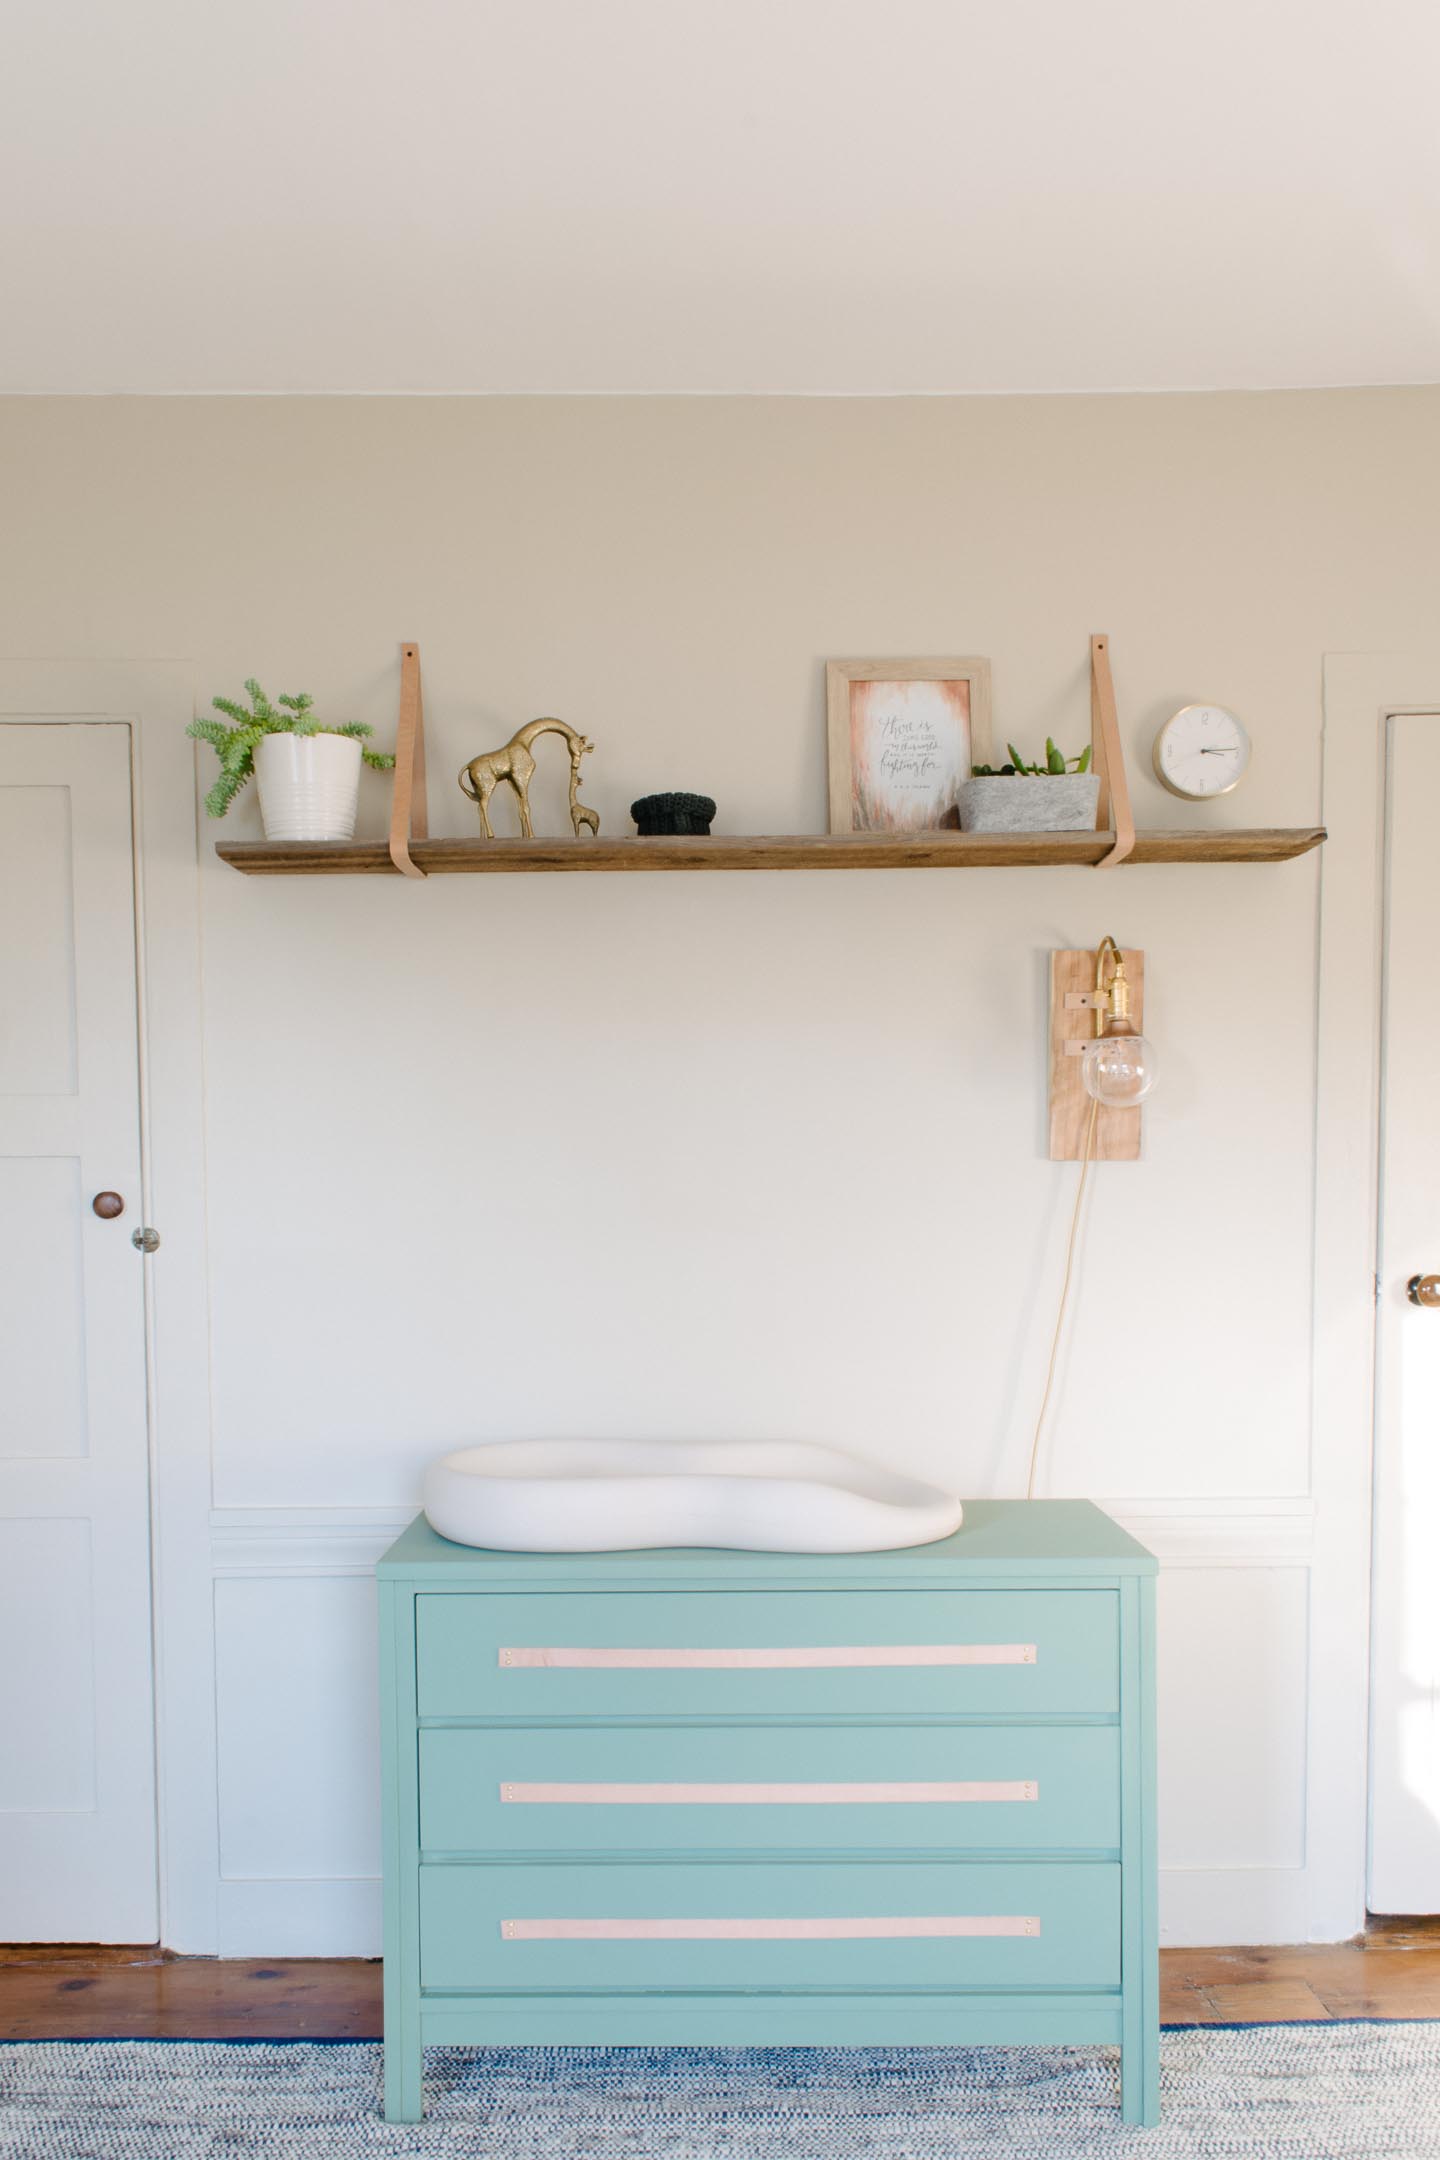
The leather strapped shelf above the changing table was hung extra high (hey were super tall folks) so no head bashing would occur in the middle of the night. And that left ample room for the night light sconce we made to hang on the wall.


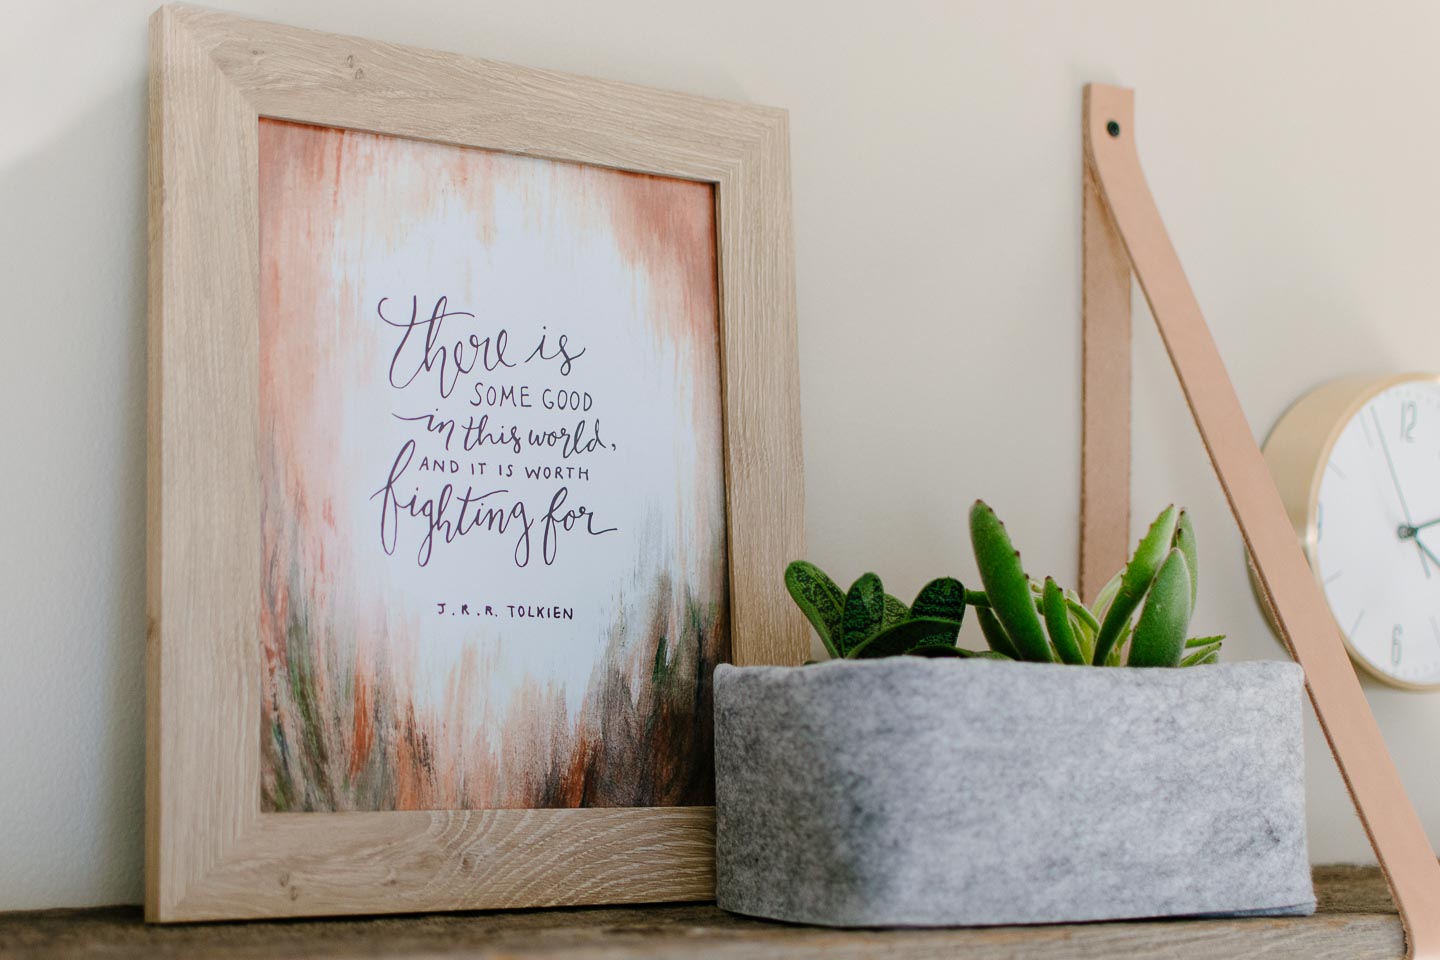
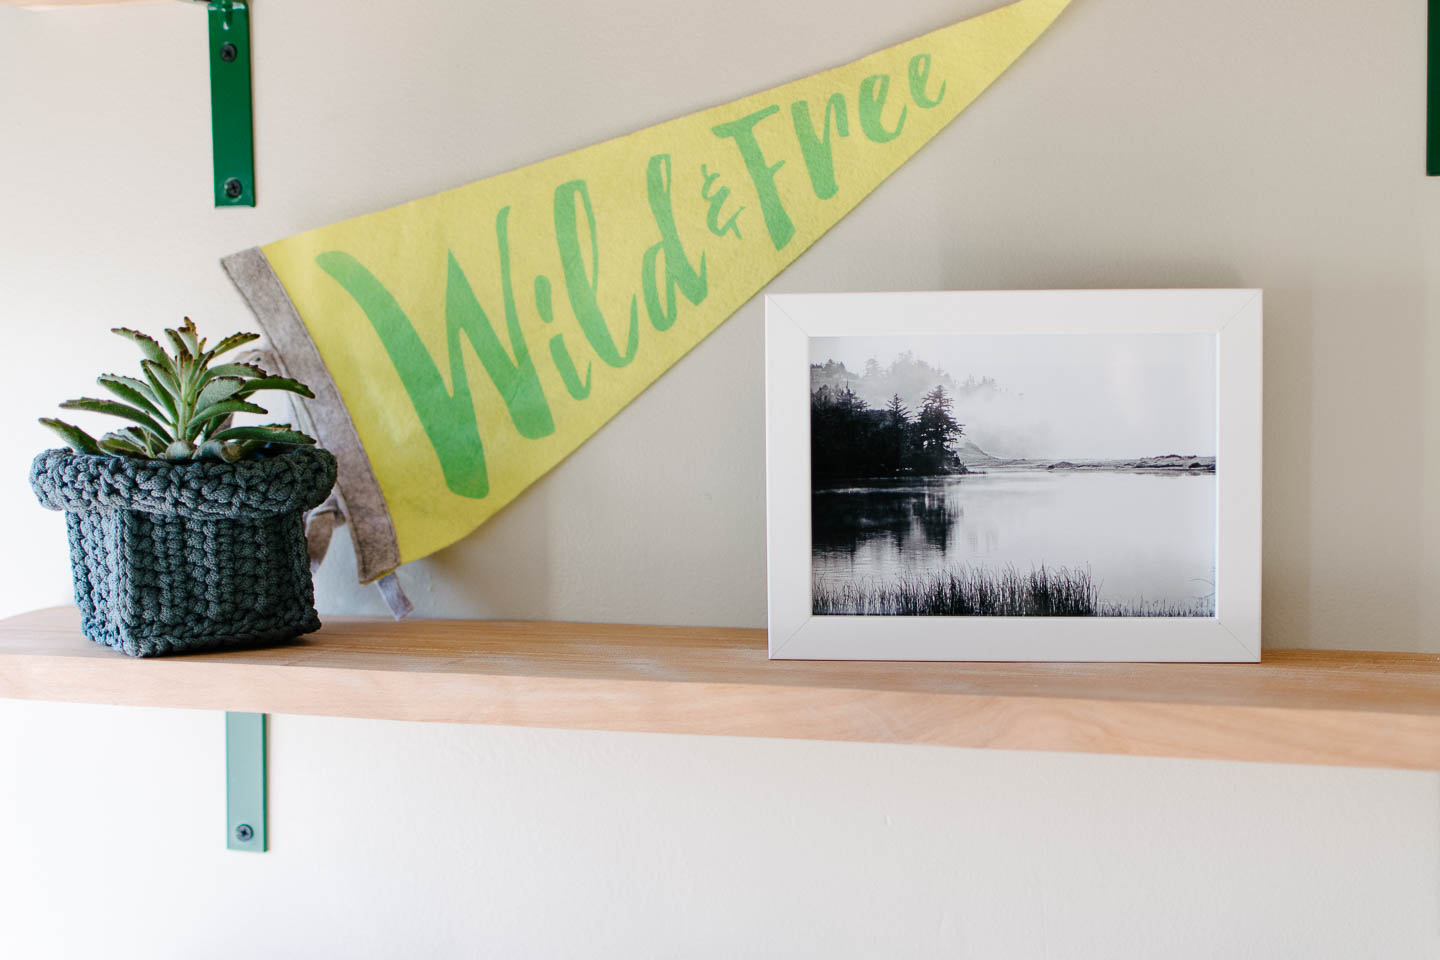
One thing we worried about was that the room would get too busy with all the things needed for a baby. So we kept the art minimal but meaningful.
I commissioned an Etsy artist (shop here) to create a print of our 67’ Chevy Bel Air Wagon as a mini-surprise for Mitch, but our daughter is the one that fell in love stating that was her vroom vroom!

We made the art impactful without breaking the bank by only picking items that had a link to us in some way.
I started by narrowing down some fantasy novel quotes I really like and saw before we even knew we were pregnant, some beautiful horse prints to go with the wild and free sign, and a couple of forest prints that sparked joy.
Once I had 6-8 good options I sent them to Mitch for final selection so that they would mean something to him as well. Like the Lord of the Rings quote, (he could care less about anything fantasy related) but picked this quote because he felt it was truly something he wanted his little boy to know and had meaning in the real world.

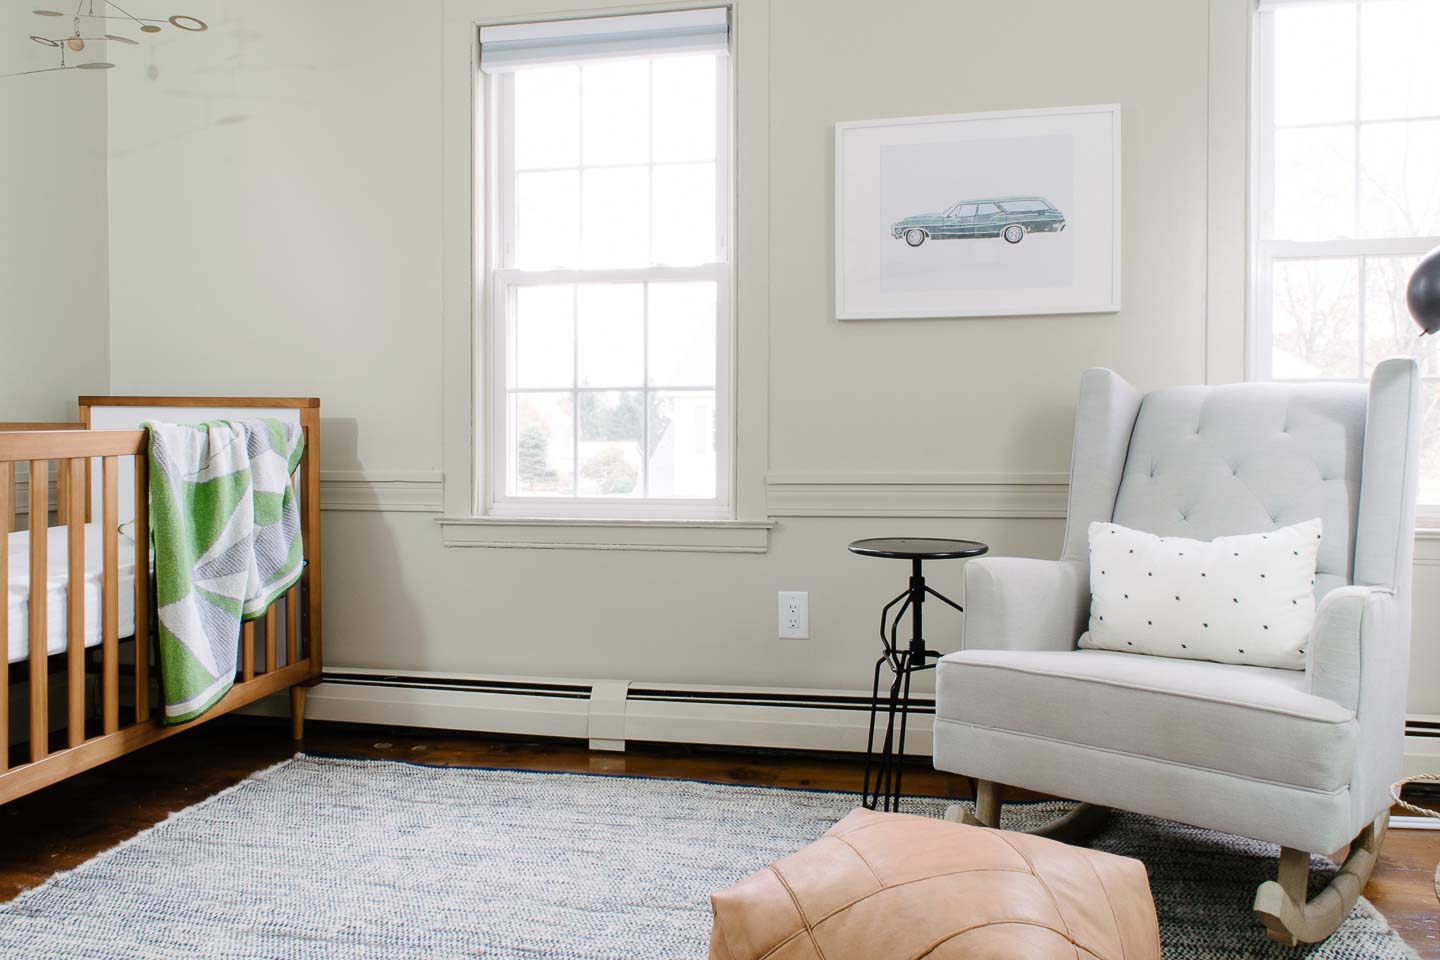
The rocking chair was another item we reused from our daughters nursery. Having searched to find something both unobtrusive and comfortable for our tall frames, we weren’t ready to give this up. The side table is actually a stool we painted black so it would work with the reading wall sconce.


Lighting was something we really needed to debate for the space, because it didn’t have any overhead lights and we didn’t want to spend more for our electrician just after fixing a bunch of code issues just last month.
So we created a lighting plan that addressed all the areas we would be using. The changing table, a general overhead light and the rocking chair/ reading area.


Overall we couldn’t be happier to start spending some major time in this space with our little boy!
Catch up on all the posts here:
The Design | Custom Artwork | Mid-Mod Dresser with Leather Pulls |
Updates | Nursery Closet | XOXO Feature Wall
Crib (Similar) | Crib Pillow | Knot Pillow | Mobile (2) | Geometric Blanket | Rocking Chair | Side Table (similar) | Leather Pouf | Chair Pillow | Seagrass Basket | Lake Print | Horse Print | Brass Frame | Wild & Free Sign | Shelf Baskets | Brass Giraffes | Wood Picture Frame | Quote Art | Brass Clock | Reading Wall Sconce | DIY Pulley Light | Felt Baskets | Wire Hamper | Changing Pad | Triangle Shelf
Hopefully everyone who needed the extra time because of these crazy natural disasters has been able to finish up, it was so nice of Linda our host to extend the One Room Challenge for everyone.
Let's go check out all of the other
One Room Challenge reveal's shall we?

Well we did it, not in the first week like we originally had planned but all the way in the fifth week; we finally wrapped up all the nursery painting. It sure turned out to be nice that the One Room Challenge was extended another week.
Here's what lead us to this week:The Design | Custom Artwork | Mid-Mod Dresser with Leather Pulls | Updates | Nursery Closet
If your just joining us now we revealed the yellow wallpaper in week 1 that would need to be removed before painting the trim and walls (the same color) could commence. I figured it wouldn’t be fun to remove but I never imagined just how difficult it would be.
Here is where we started to refresh your memory:
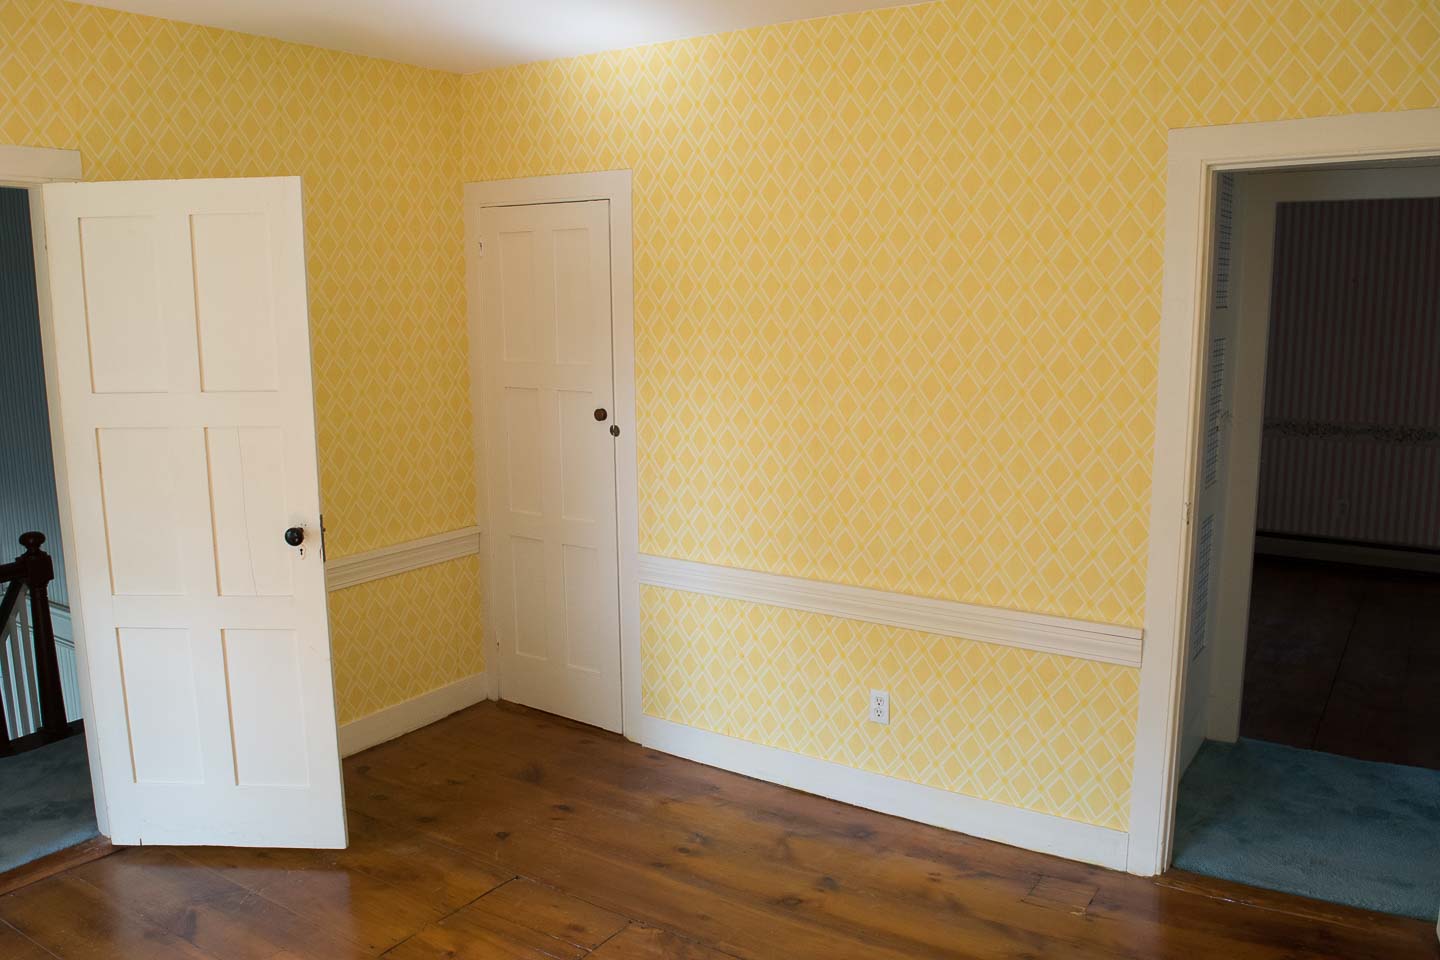
This took a huge chunk of time because we actually have never had to remove wallpaper before. Therefore I was unaware that different types of wallpaper can need different removal techniques.
This wallpaper turned out to be some type of water resistant stuff from the early 70s. Apparently wetting down the paper doesn’t do much, who would have thunk it?!?
So I had to:
It was a process, but thankfully once I had done that part, Mitch had a day or two off from work and helped by plastering the walls in any spots that needed it and sanding. Then we had to clean the walls, again!
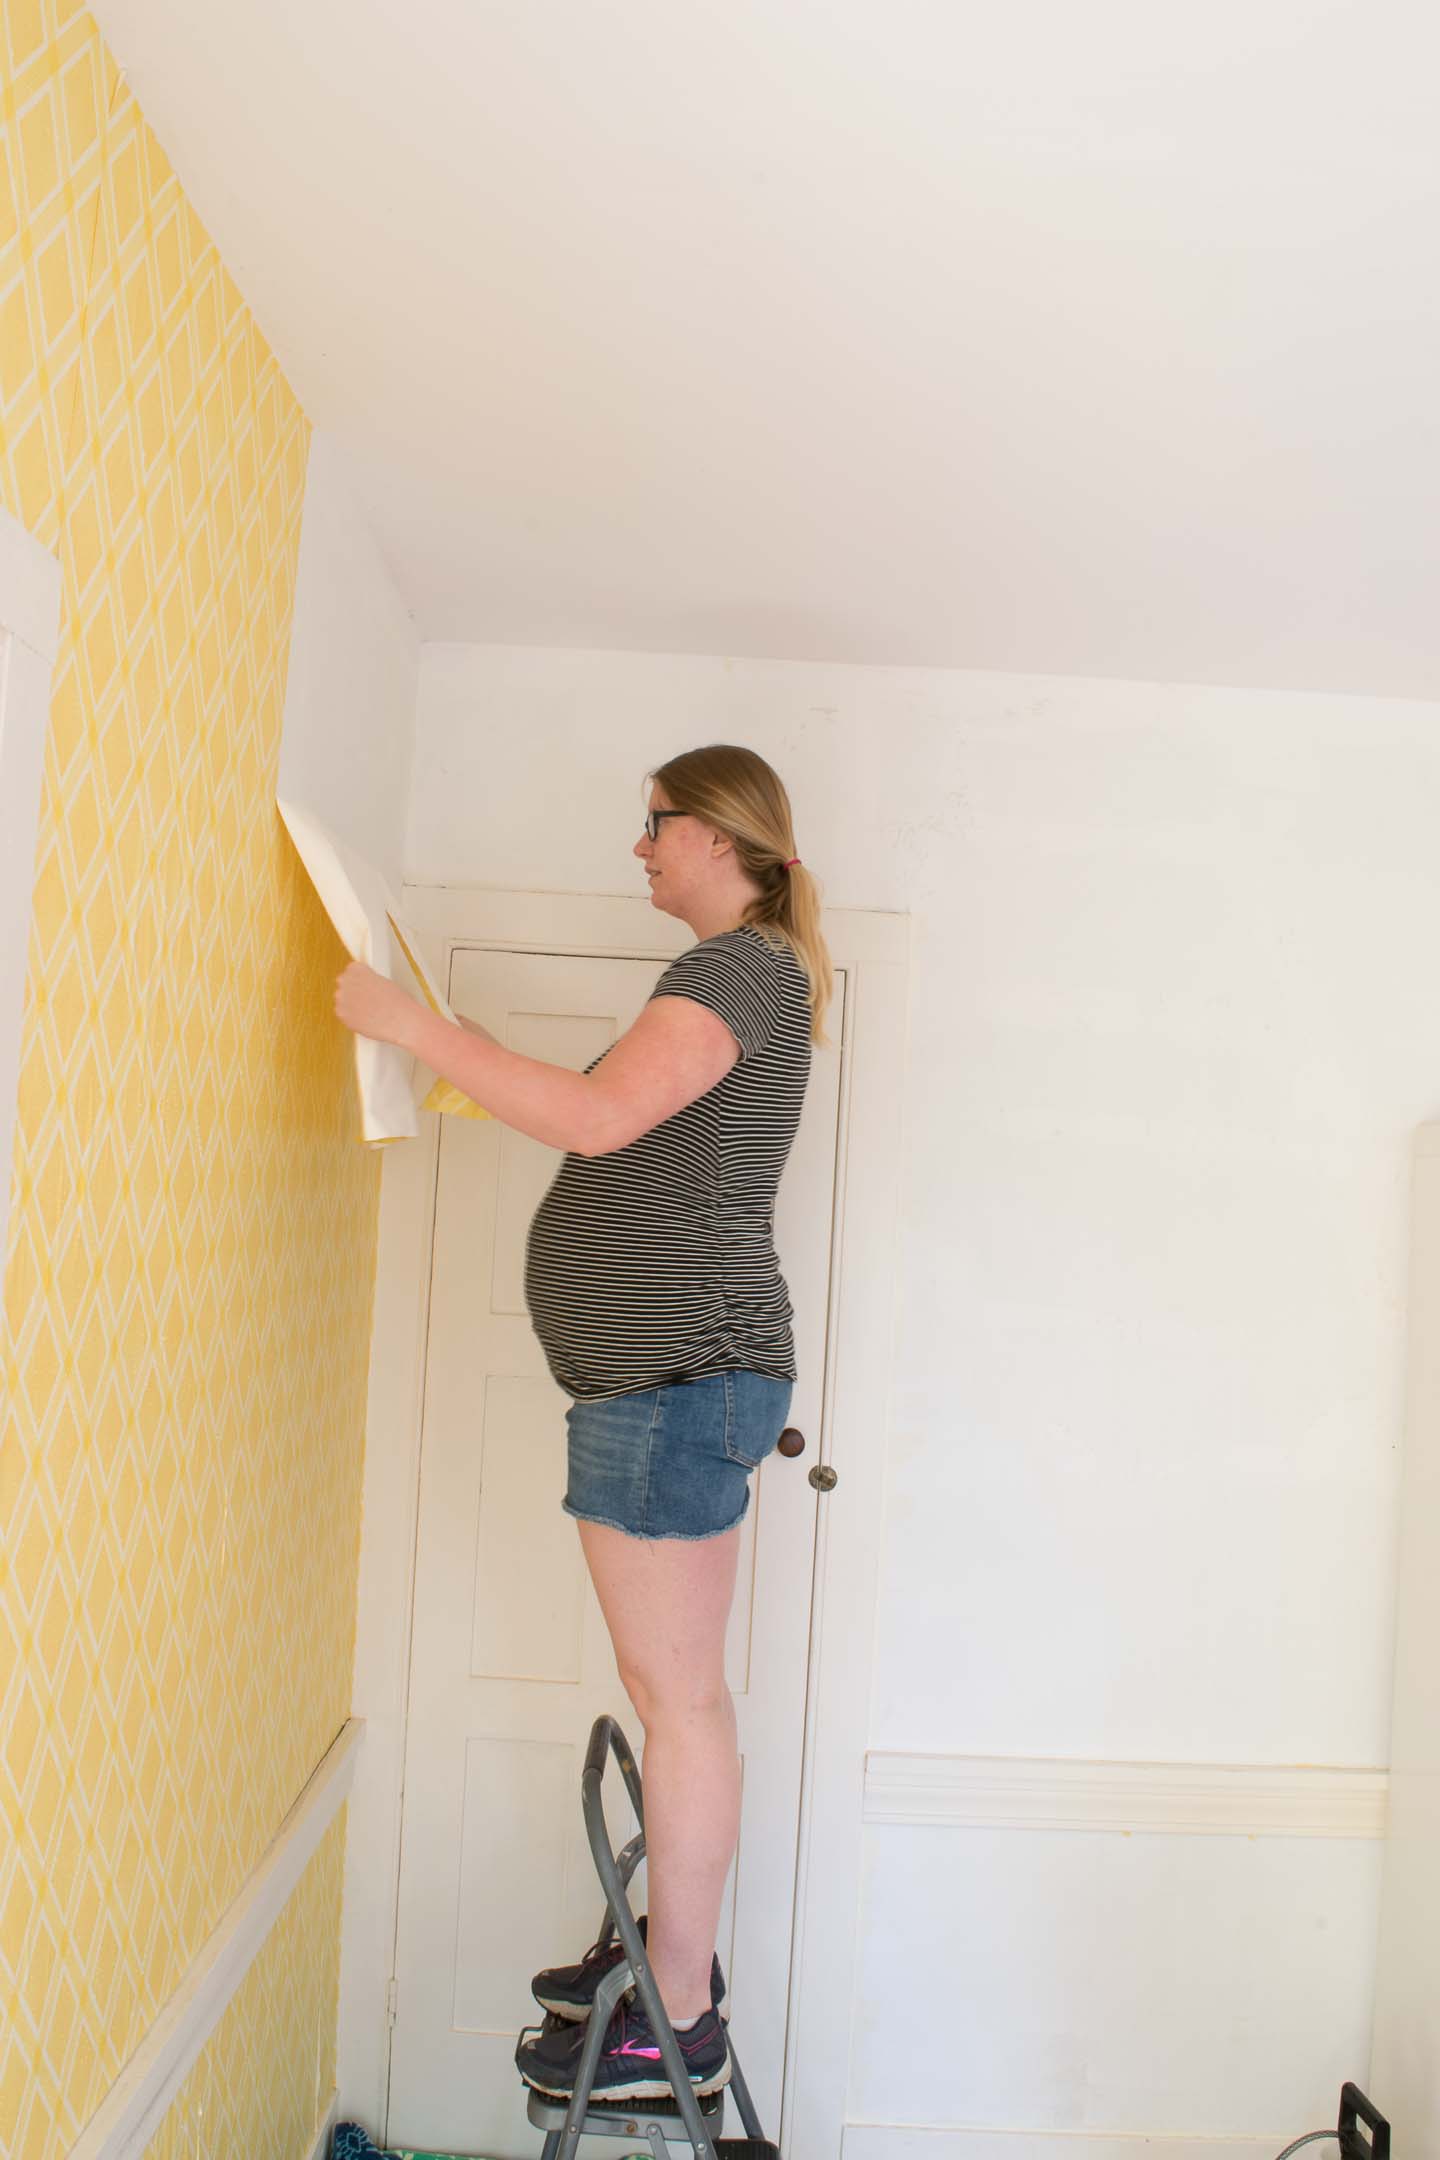
To say I will think twice before putting wallpaper back up anywhere in the house is an understatement!
Then we started with priming everything since only some of it was primed before the wallpaper.
I did all my caulking after primer as per usual; I’m able to see issues better after getting that primer up. A painter also taught me the trick of dipping your finger in water before running it along the bead of caulking, turns out beautiful every time.
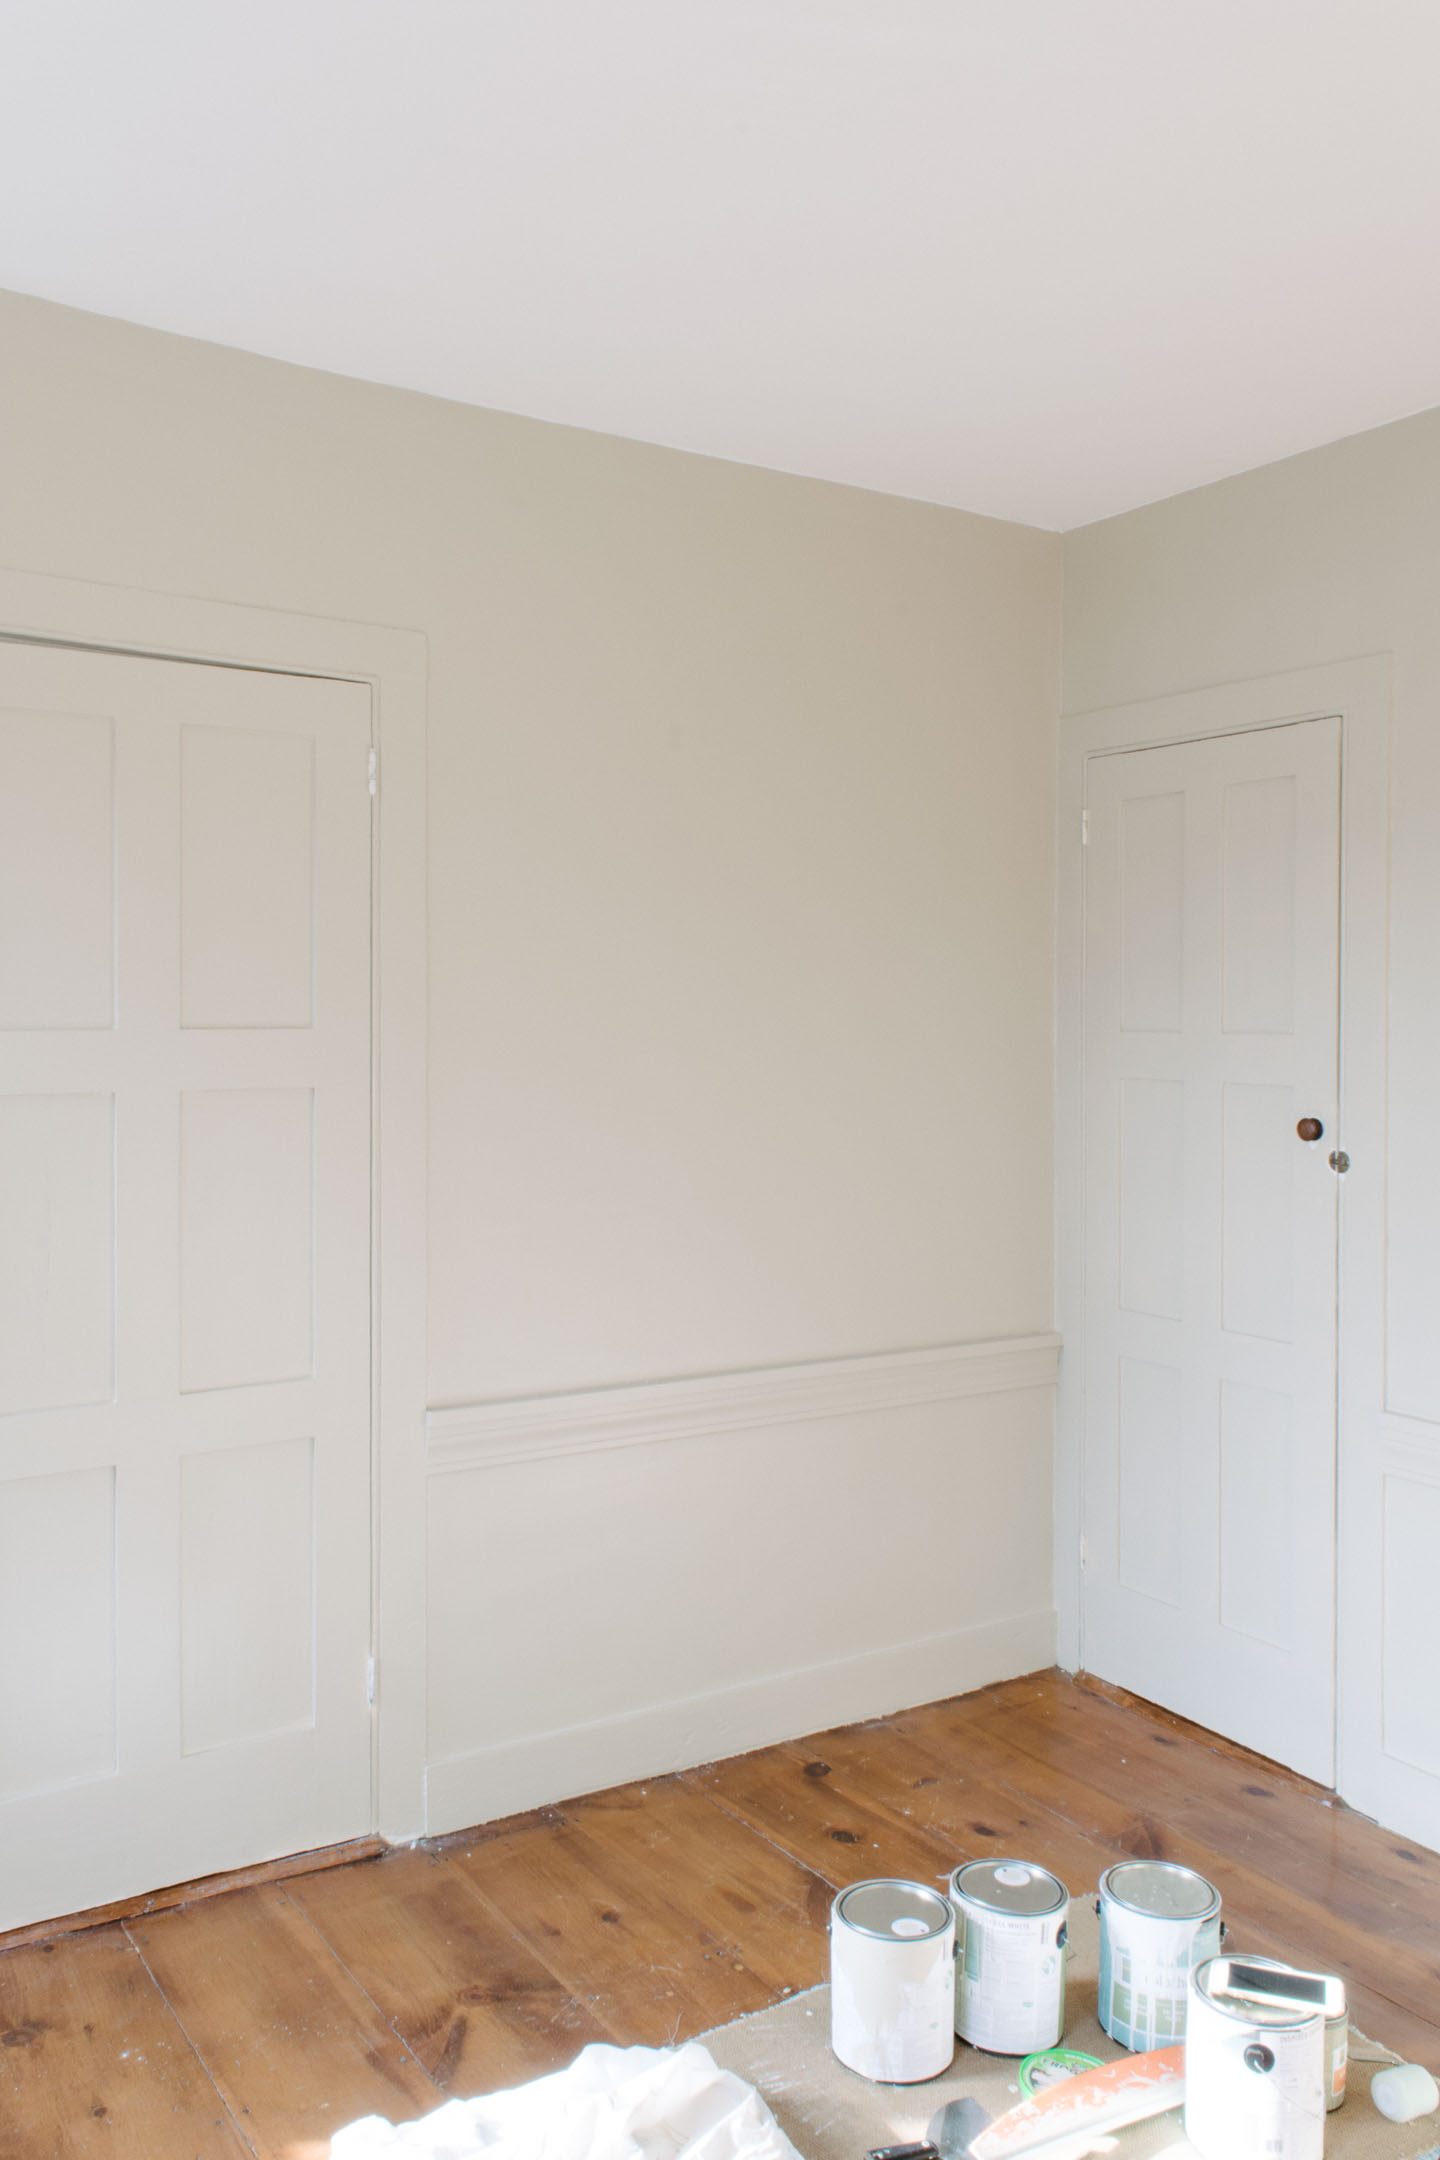
Then we put on two coats of eggshell paint on everything, trim, walls, and baseboard heaters.
Initially I got worried about the darkness but it’s really pretty wonderful. I will say my “neutral” room has turned out to be not so neutral anymore. But you will see that in the reveal shots!
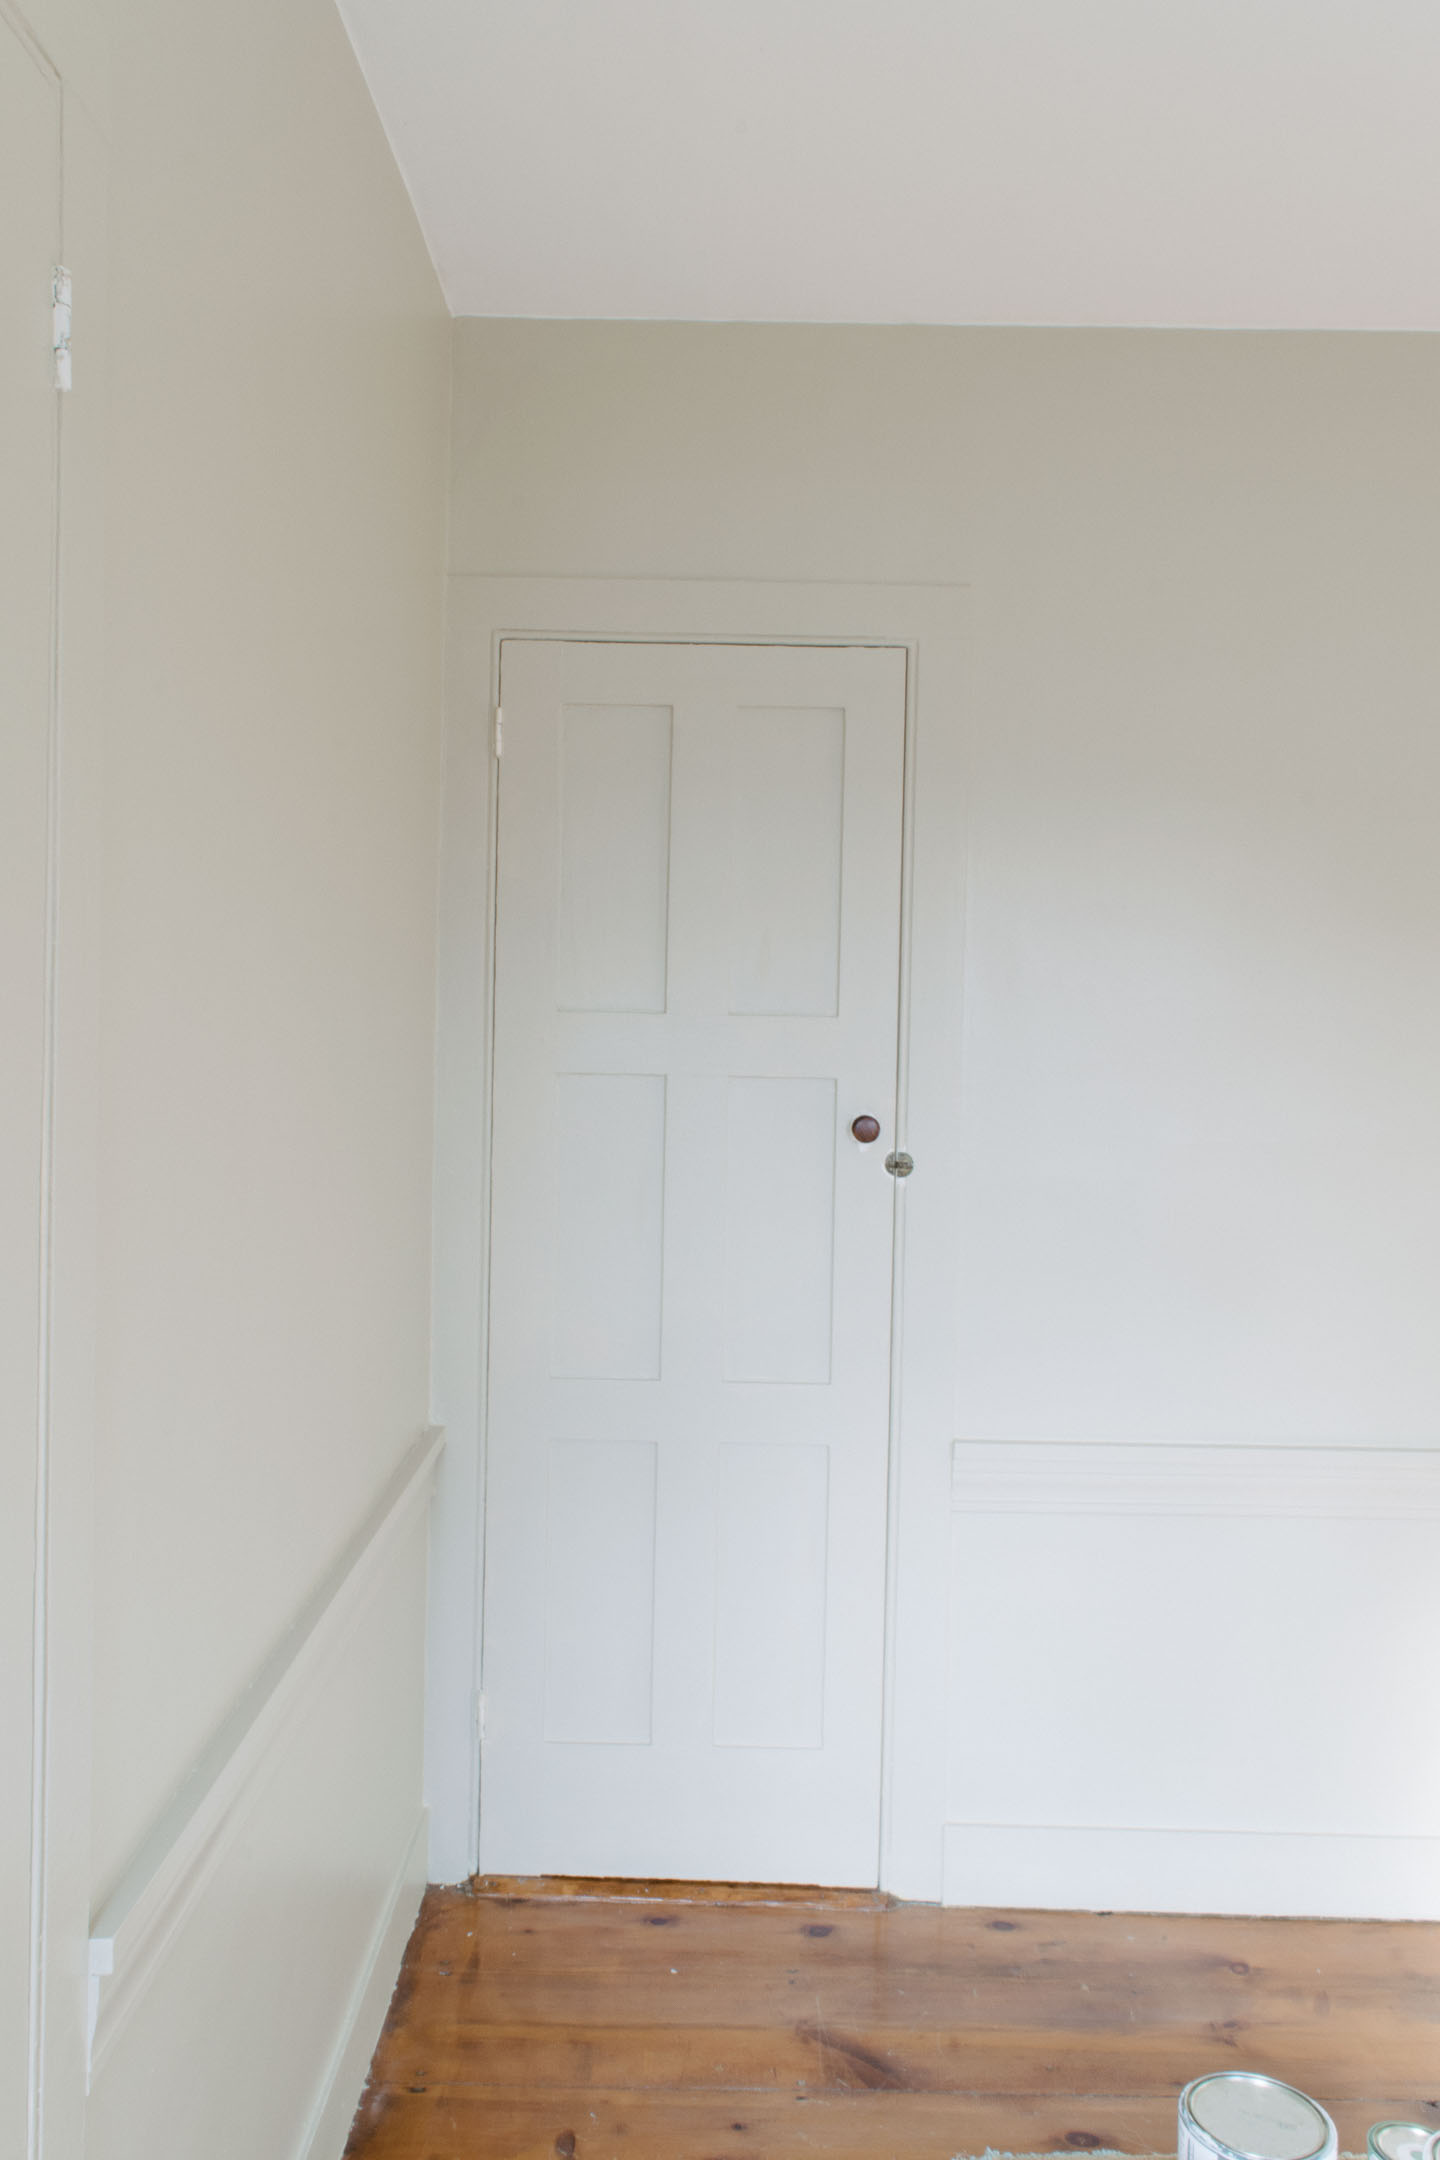
We've since removed the doors and original (?) hinges so that the old paint could be removed and the hinges could be sprayed black.
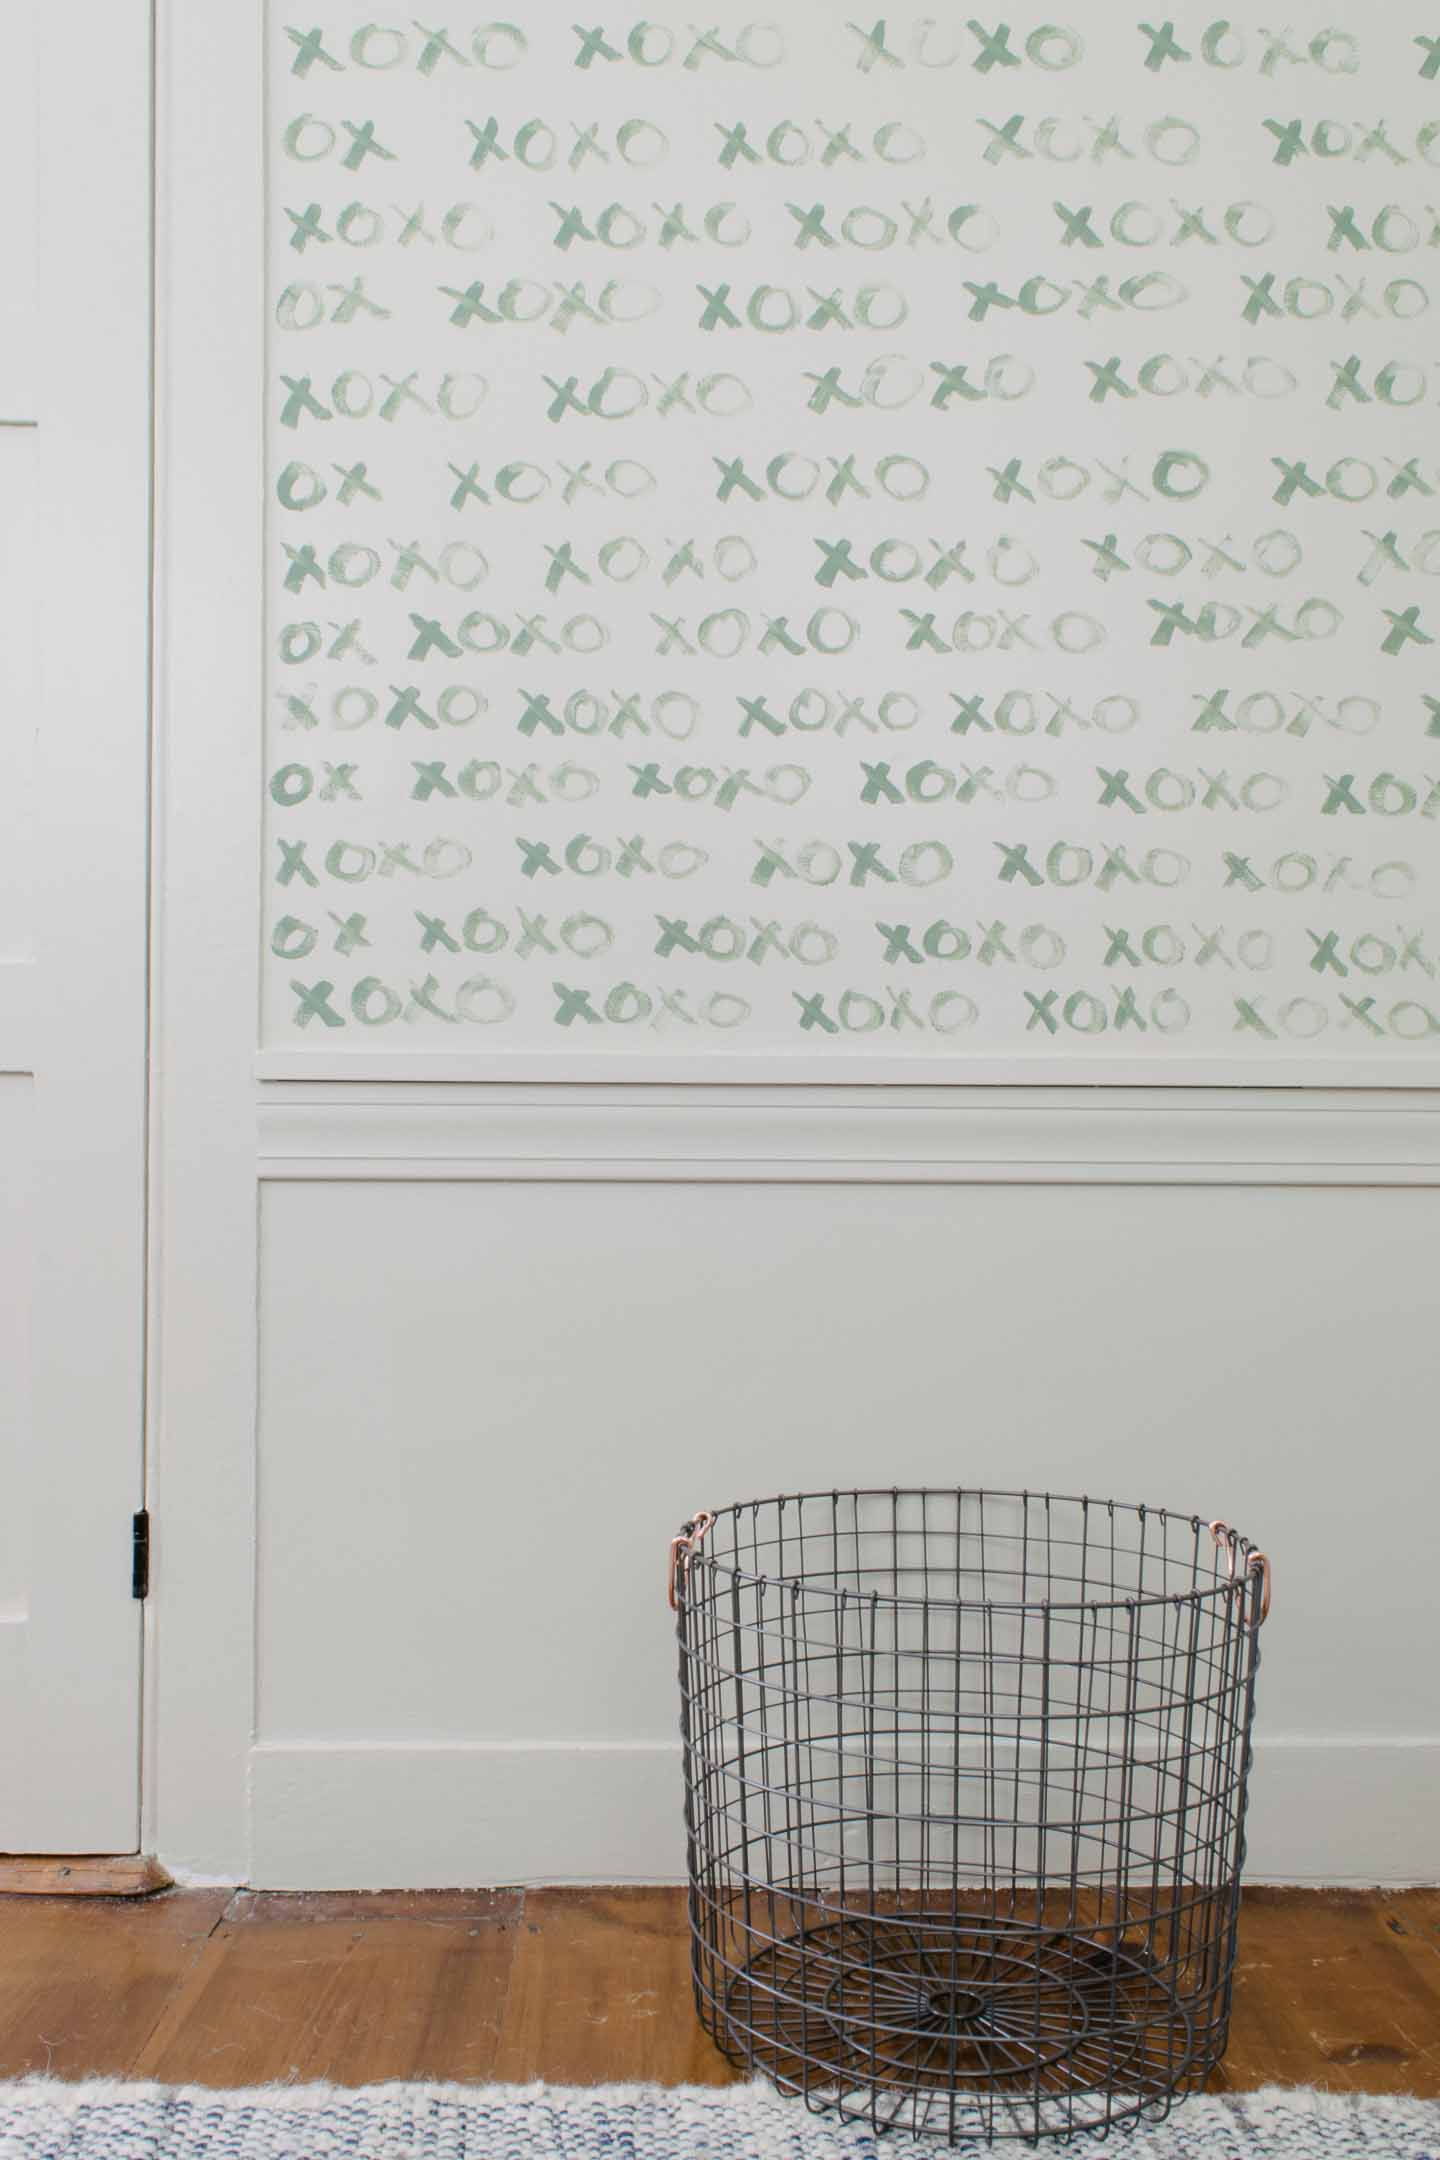
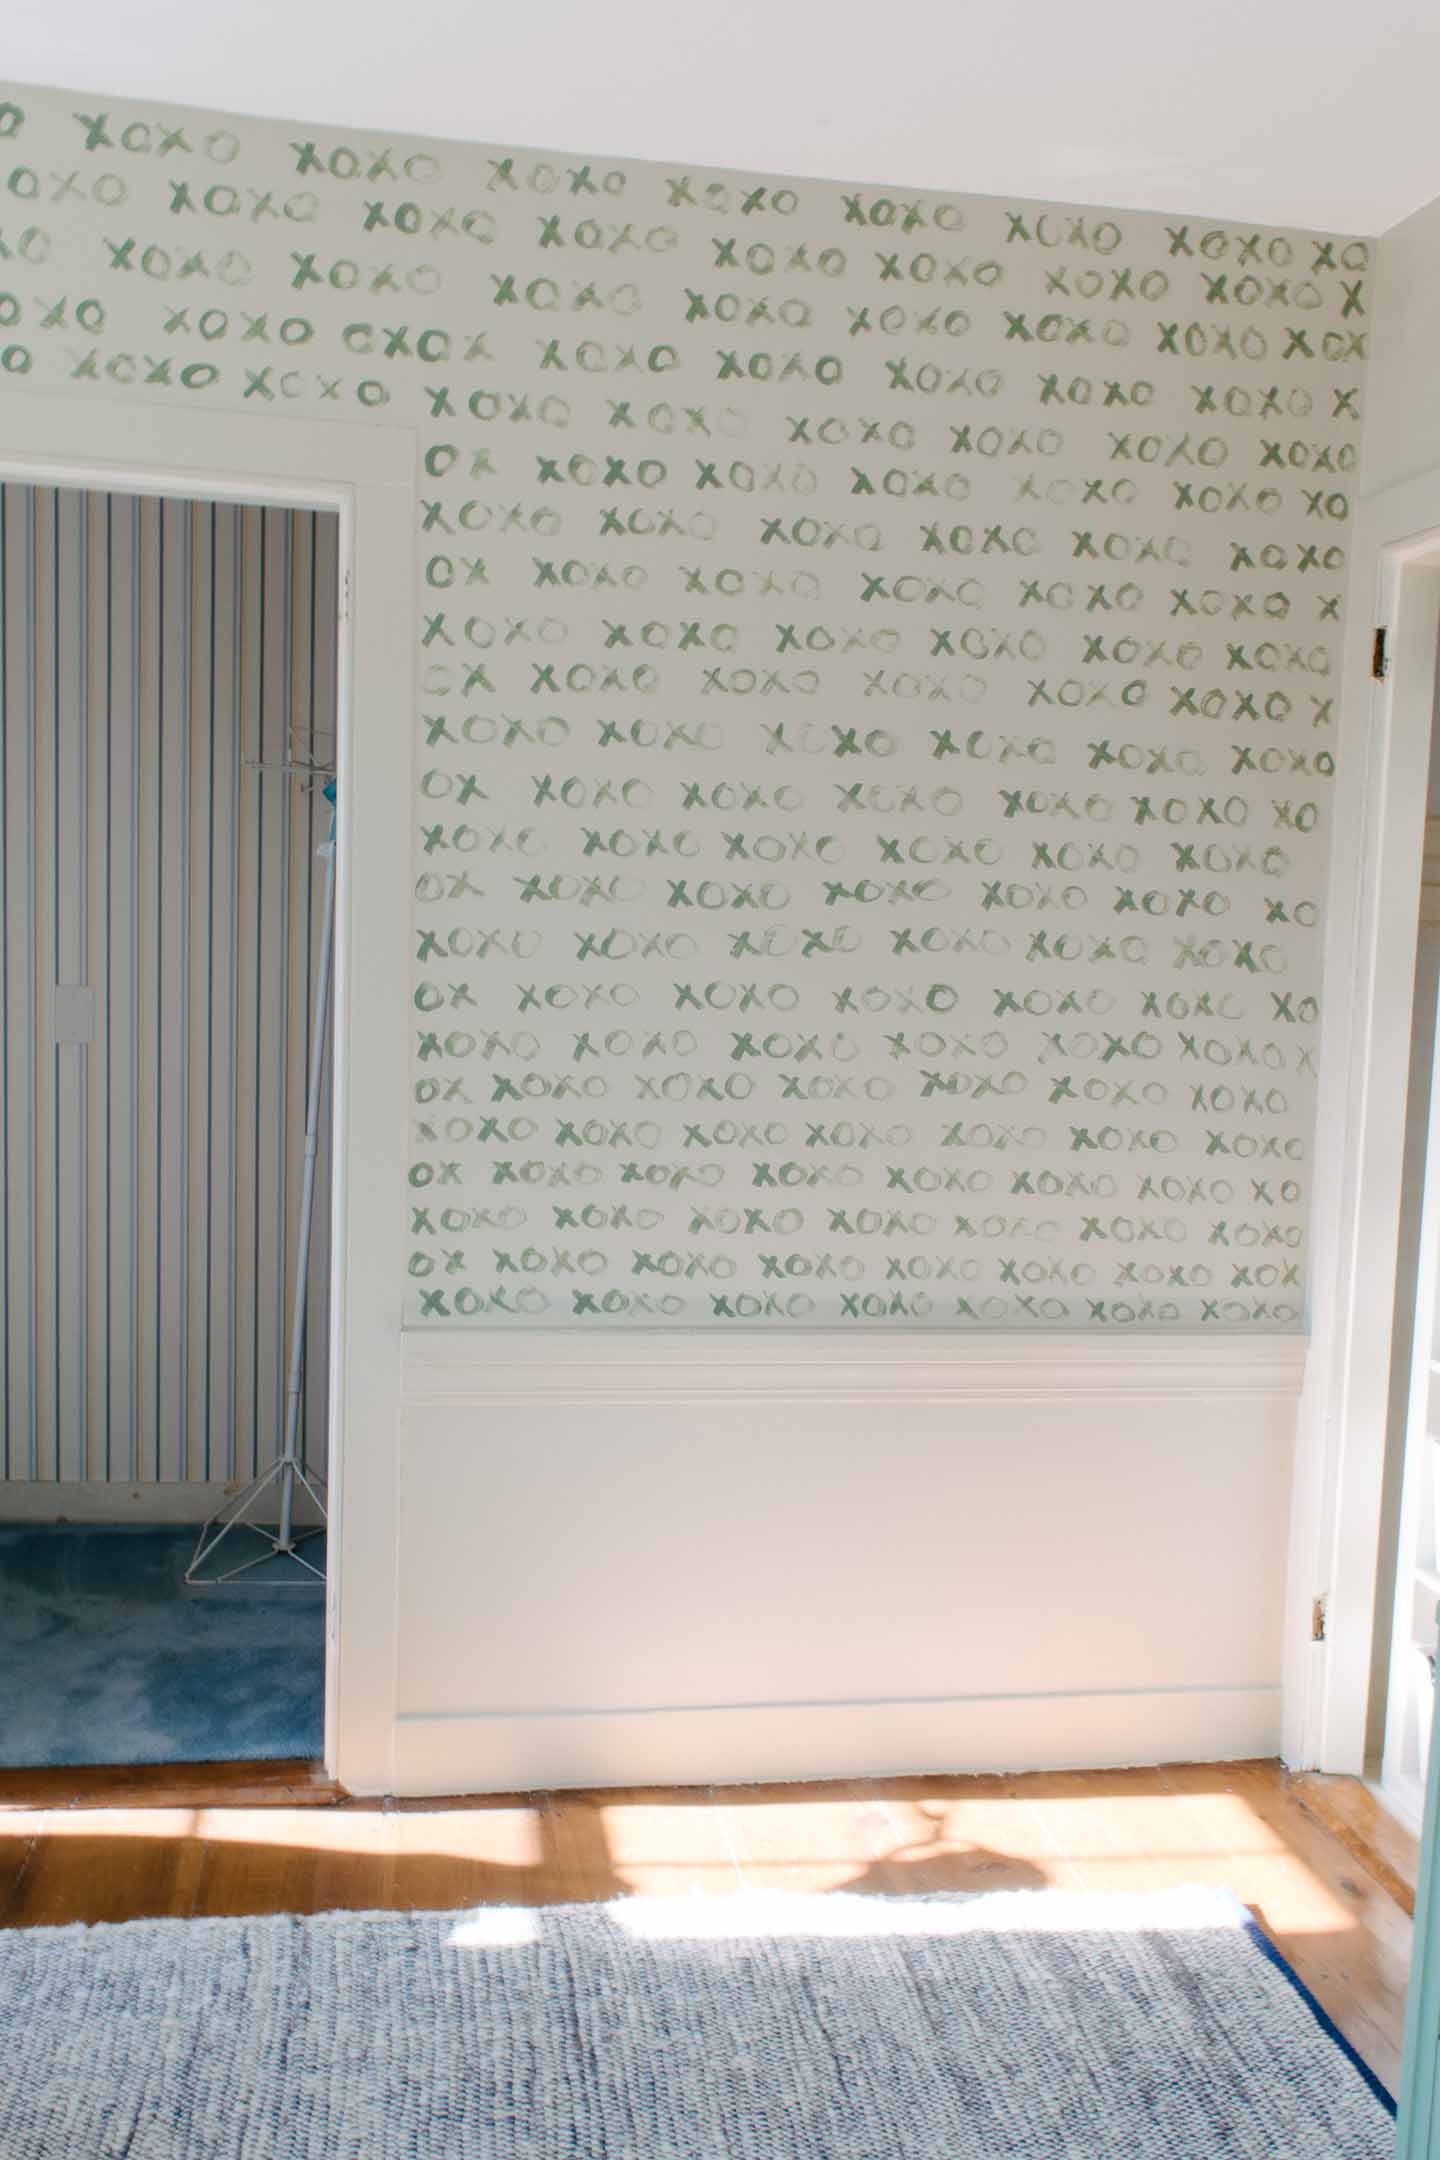
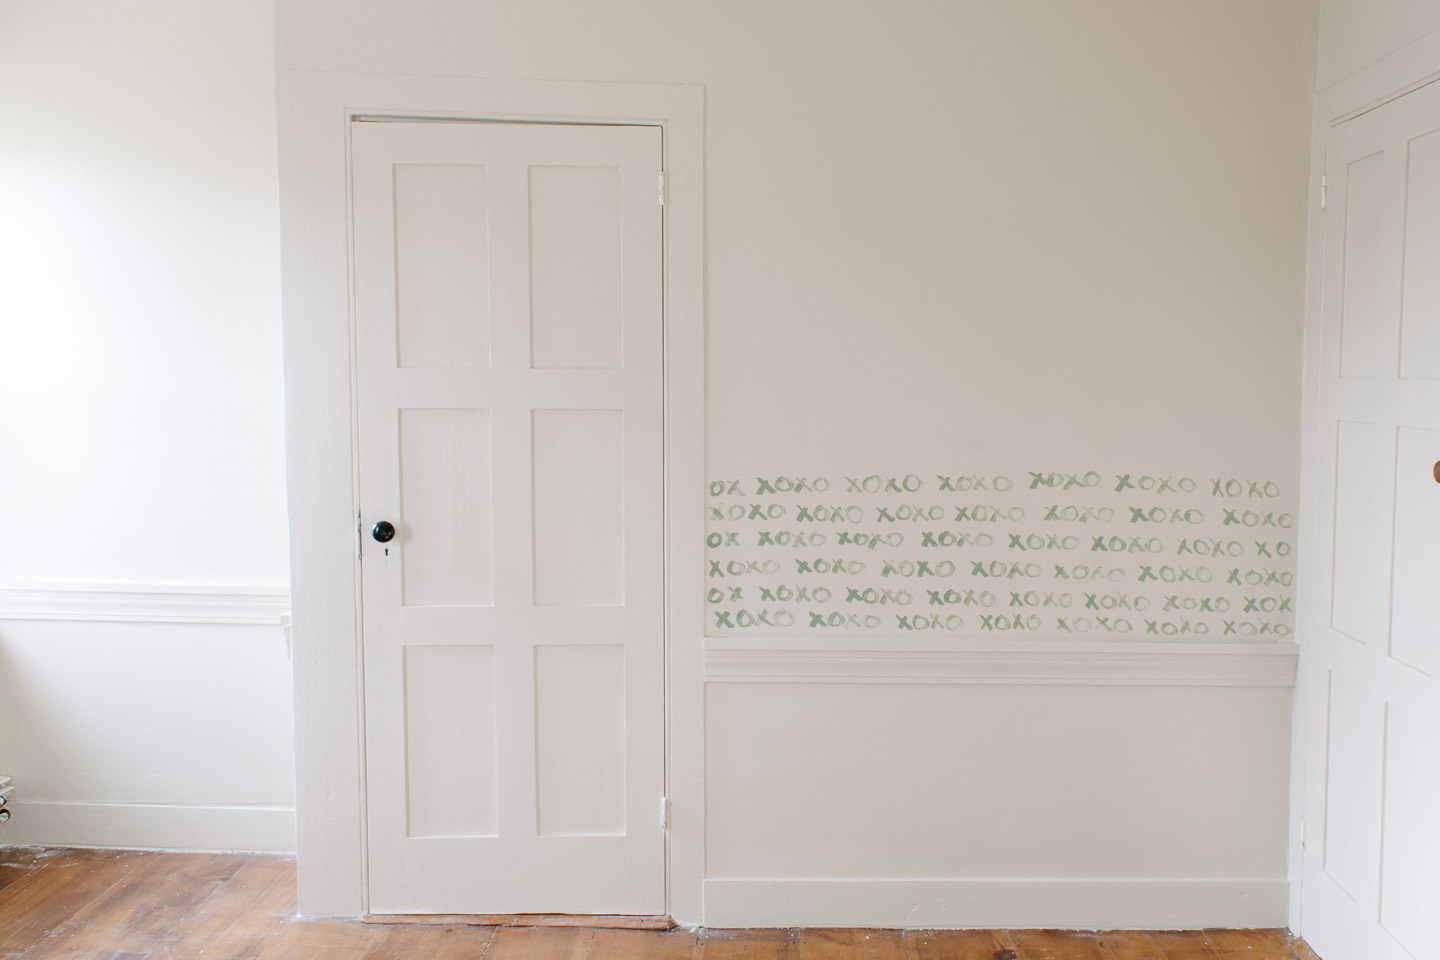
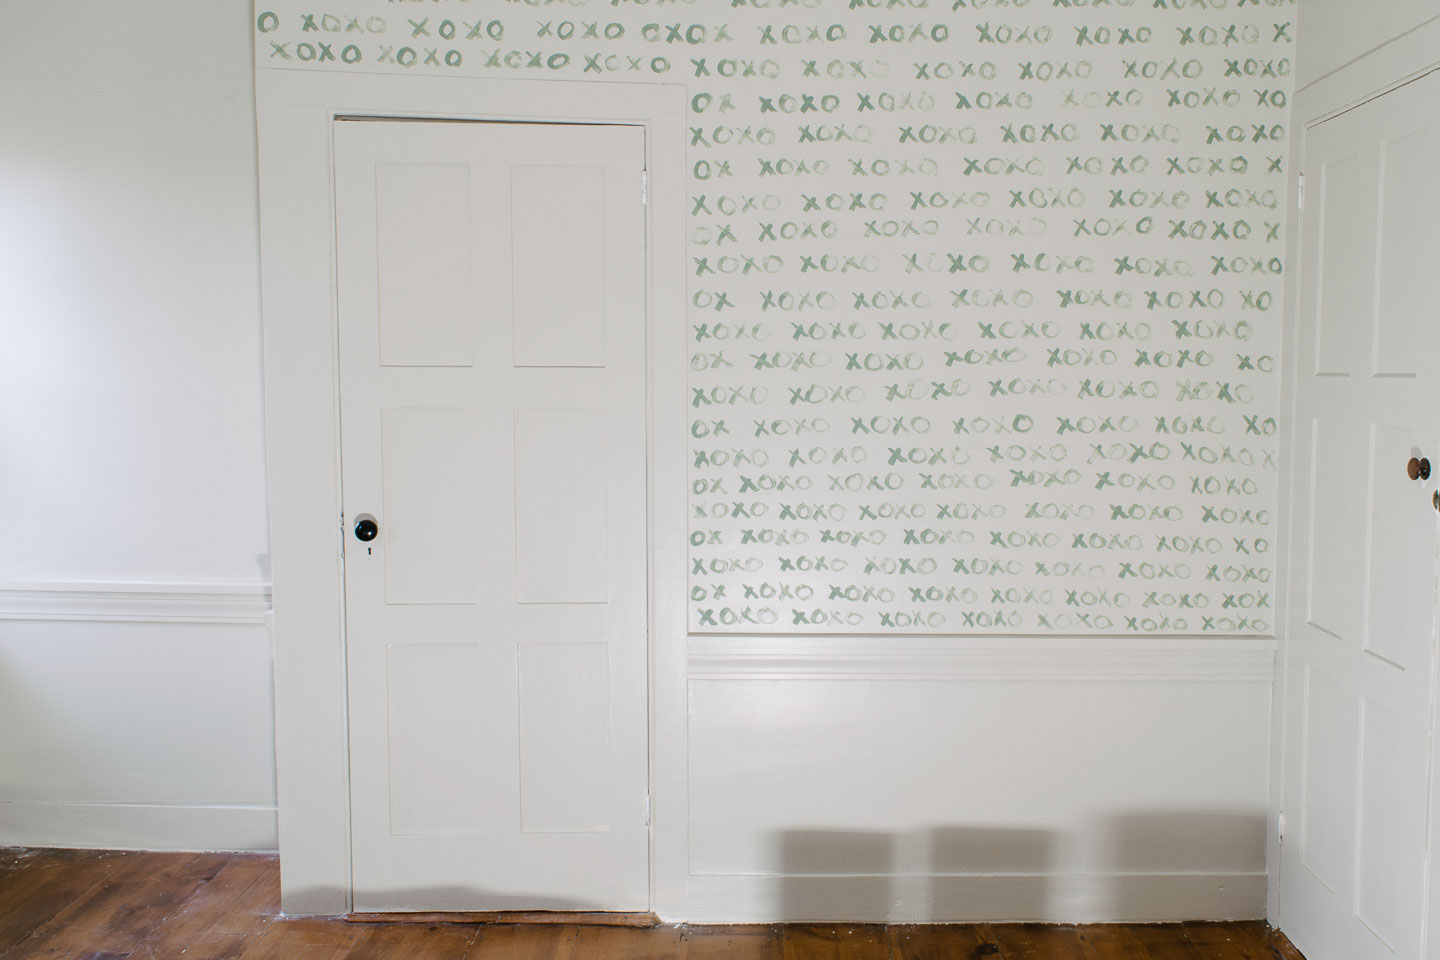
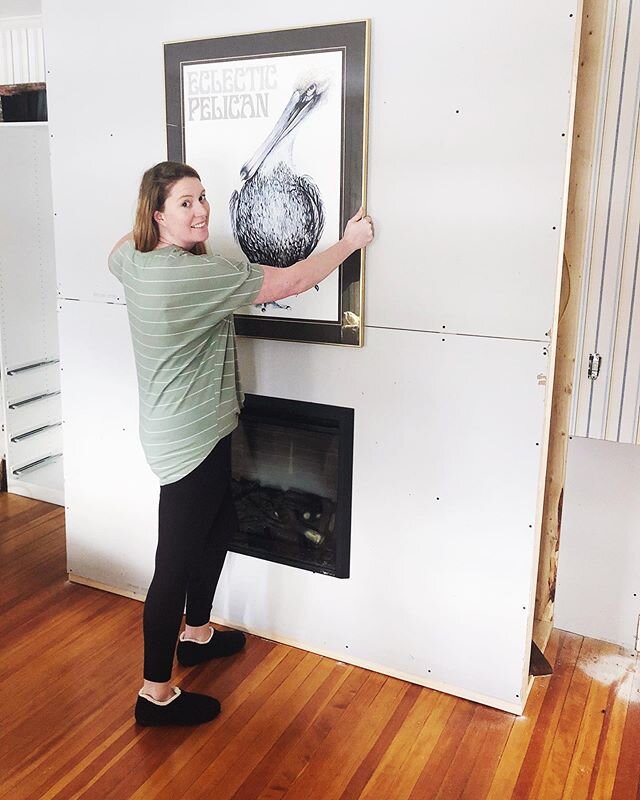
I wanted to do another Feature Wall since we have been missing the uniqueness of our last one from last spring ORC (we sold the tiny bungalow in September) .
Before we even knew whether we were having a boy or a girl an idea popped into my head about painting xoxo on the wall in either green or possibly green with a pink here or there.
Mitch couldn’t visualize it but went along with the idea anyways and so here we are!
I polled everyone on my Instagram Stories about finishing under the chair rail and the majority leaned in the same direction as I did, leave it blank. I think if I had filled in the bottom section it would have excentuated the chair rail, something I was avoiding by painting everything the same color.
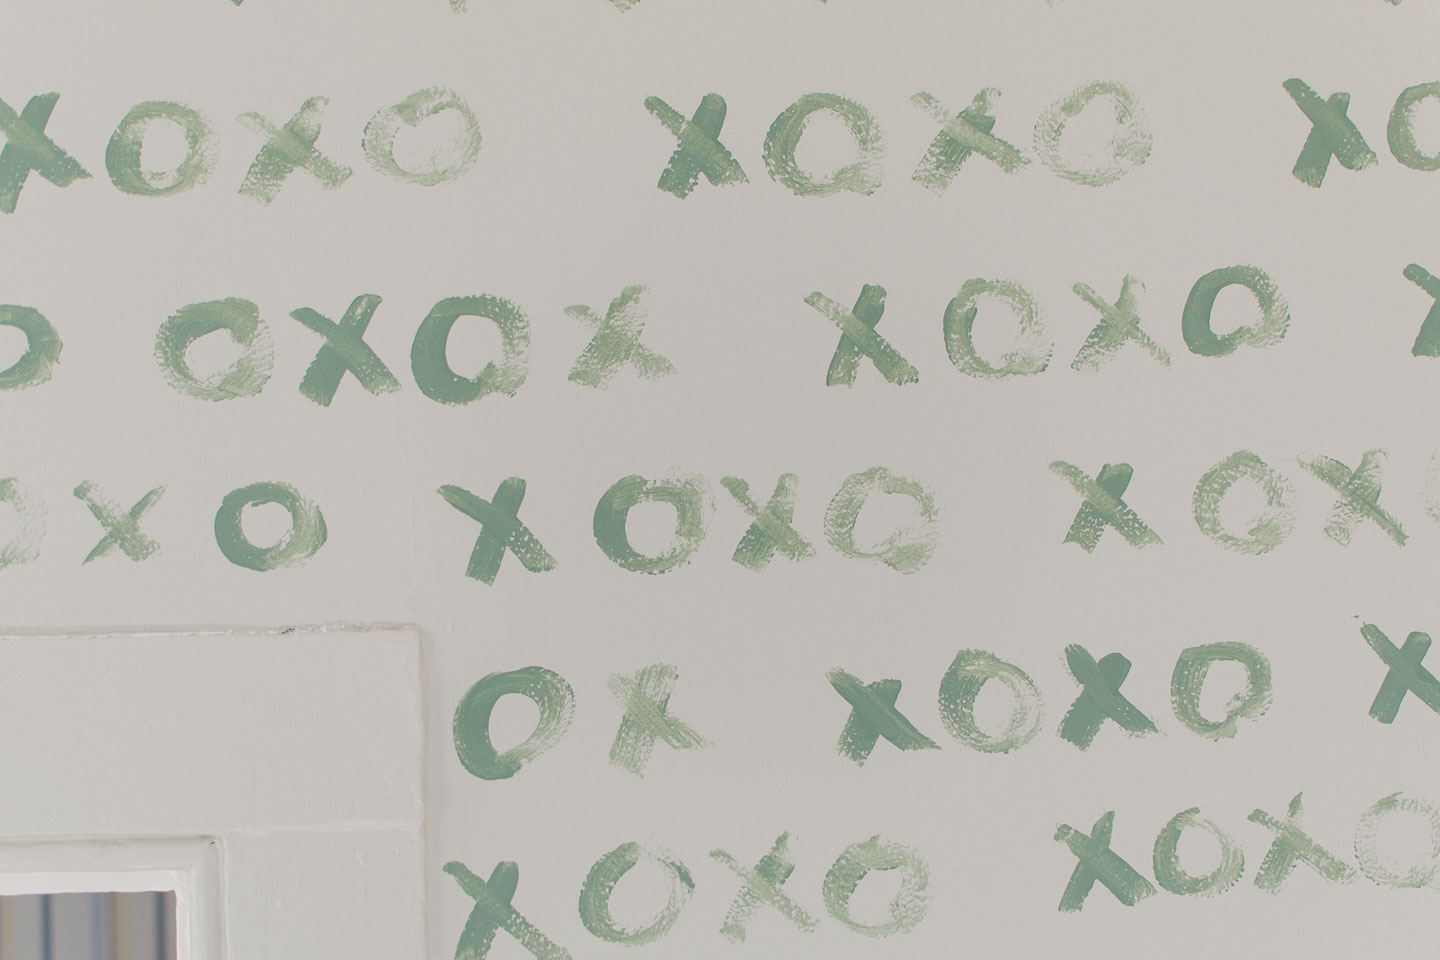
This was pretty simple but it still didn’t come out “perfect”, although I wanted a free hand look since it’s a message from mommy and daddy to our little guy... should probably be our handwriting (and you can’t read Mitch’s).
I recently saw an Instagram-er who did a painted feature wall and recommended painting a pattern in 12 x 12 blocks to keep things relatively straight. I really wish I knew who it was because without that piece of advice I’m sure things would have gone way askew.
Here's the succession (I was working in the evening/night so not the greatest pictures guys)

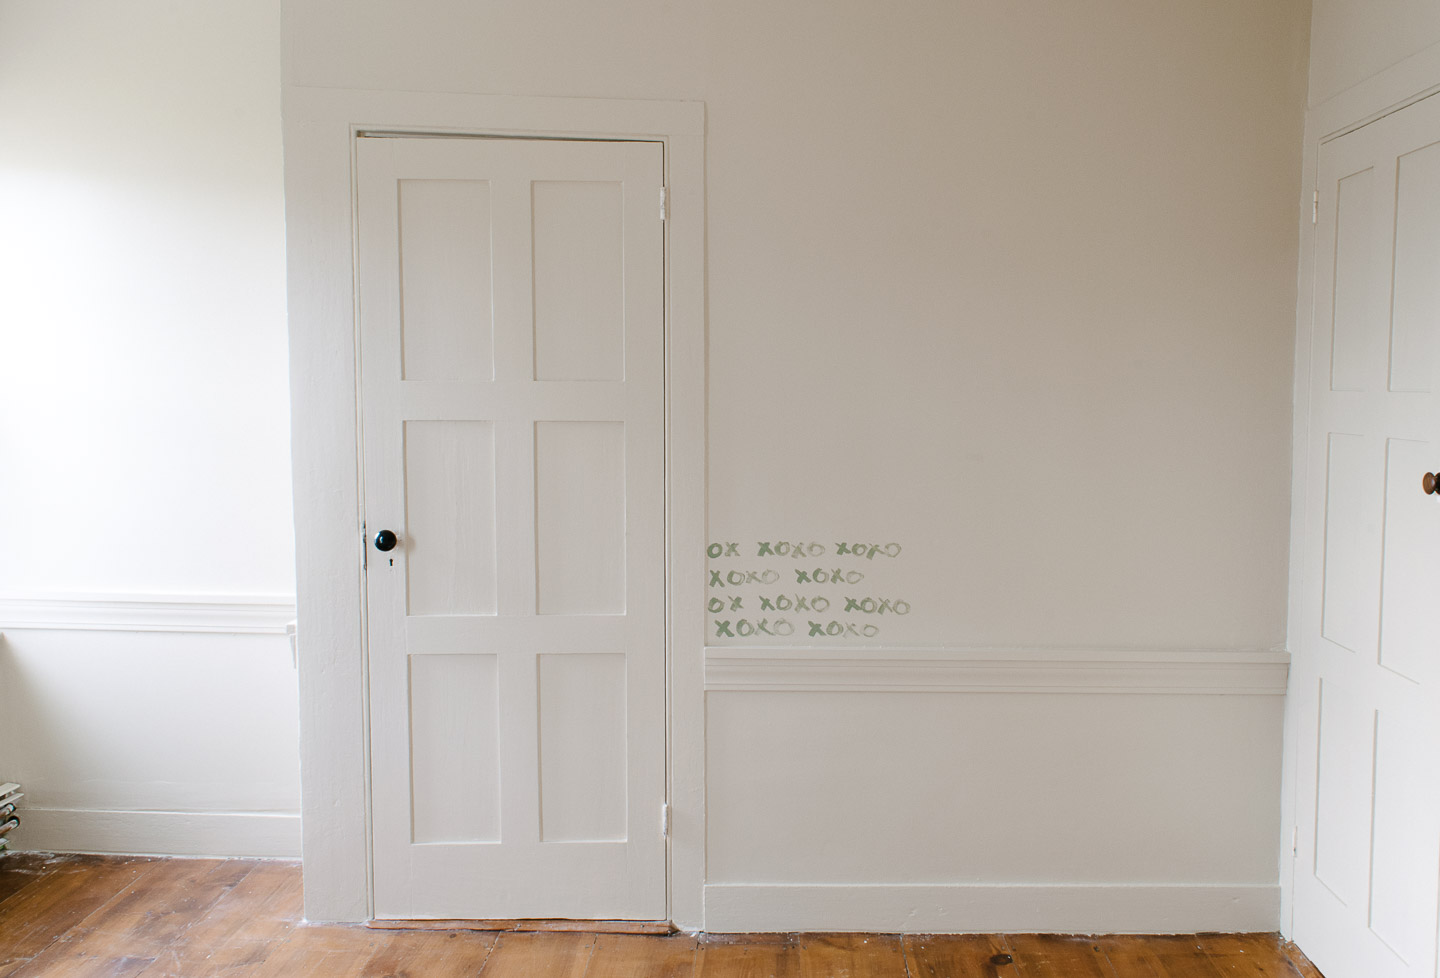
Honestly, that was it, I worked in blocks up and then over (left to right) until I got to the top of the door frame and had to work right to left (which was a bit difficult) , and offsetting the “words”.
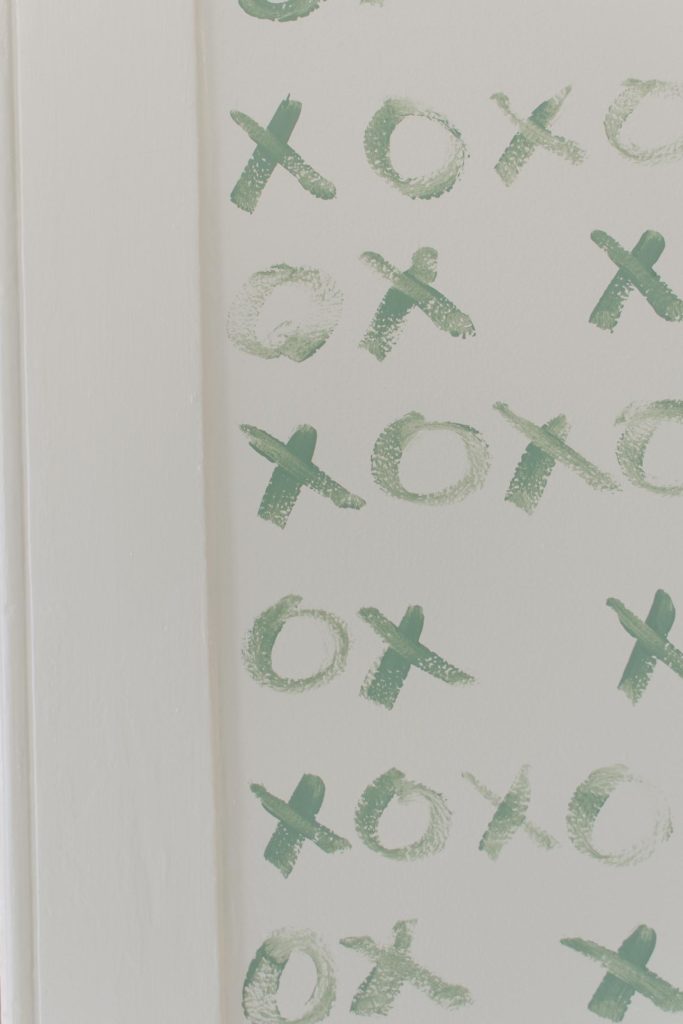
Inadvertently, I switched the xoxo pattern at my offset from xoxo to oxox and at the very top of the door you can see where the mishap had to be corrected.
The pattern being :
OX XOXO
XOXO XOXO
OX XOXO
XOXO XOXO
I can’t really tell and I think it was a useful mistake. If I hadn’t done that the pattern going up the door frame would have all started with an x.
Like this:
XOXO XOXO
XO XOXO
XOXO XOXO
XO XOXO
So keep that in mind if you want to do something similar, my font also got a tad bigger and a tad spread out as I reached the top. Still not a deal breaker for me but if you are a total perfectionist you might want wallpaper (I’m crying while writing that!)
Next week is the Big Reveal, and we still have so many little projects to complete! Shelving, side table, hanging artwork and the mobile, and then final touches! Wish all of us participants luck and check out what everyone else did this week on the One Room Challenge!

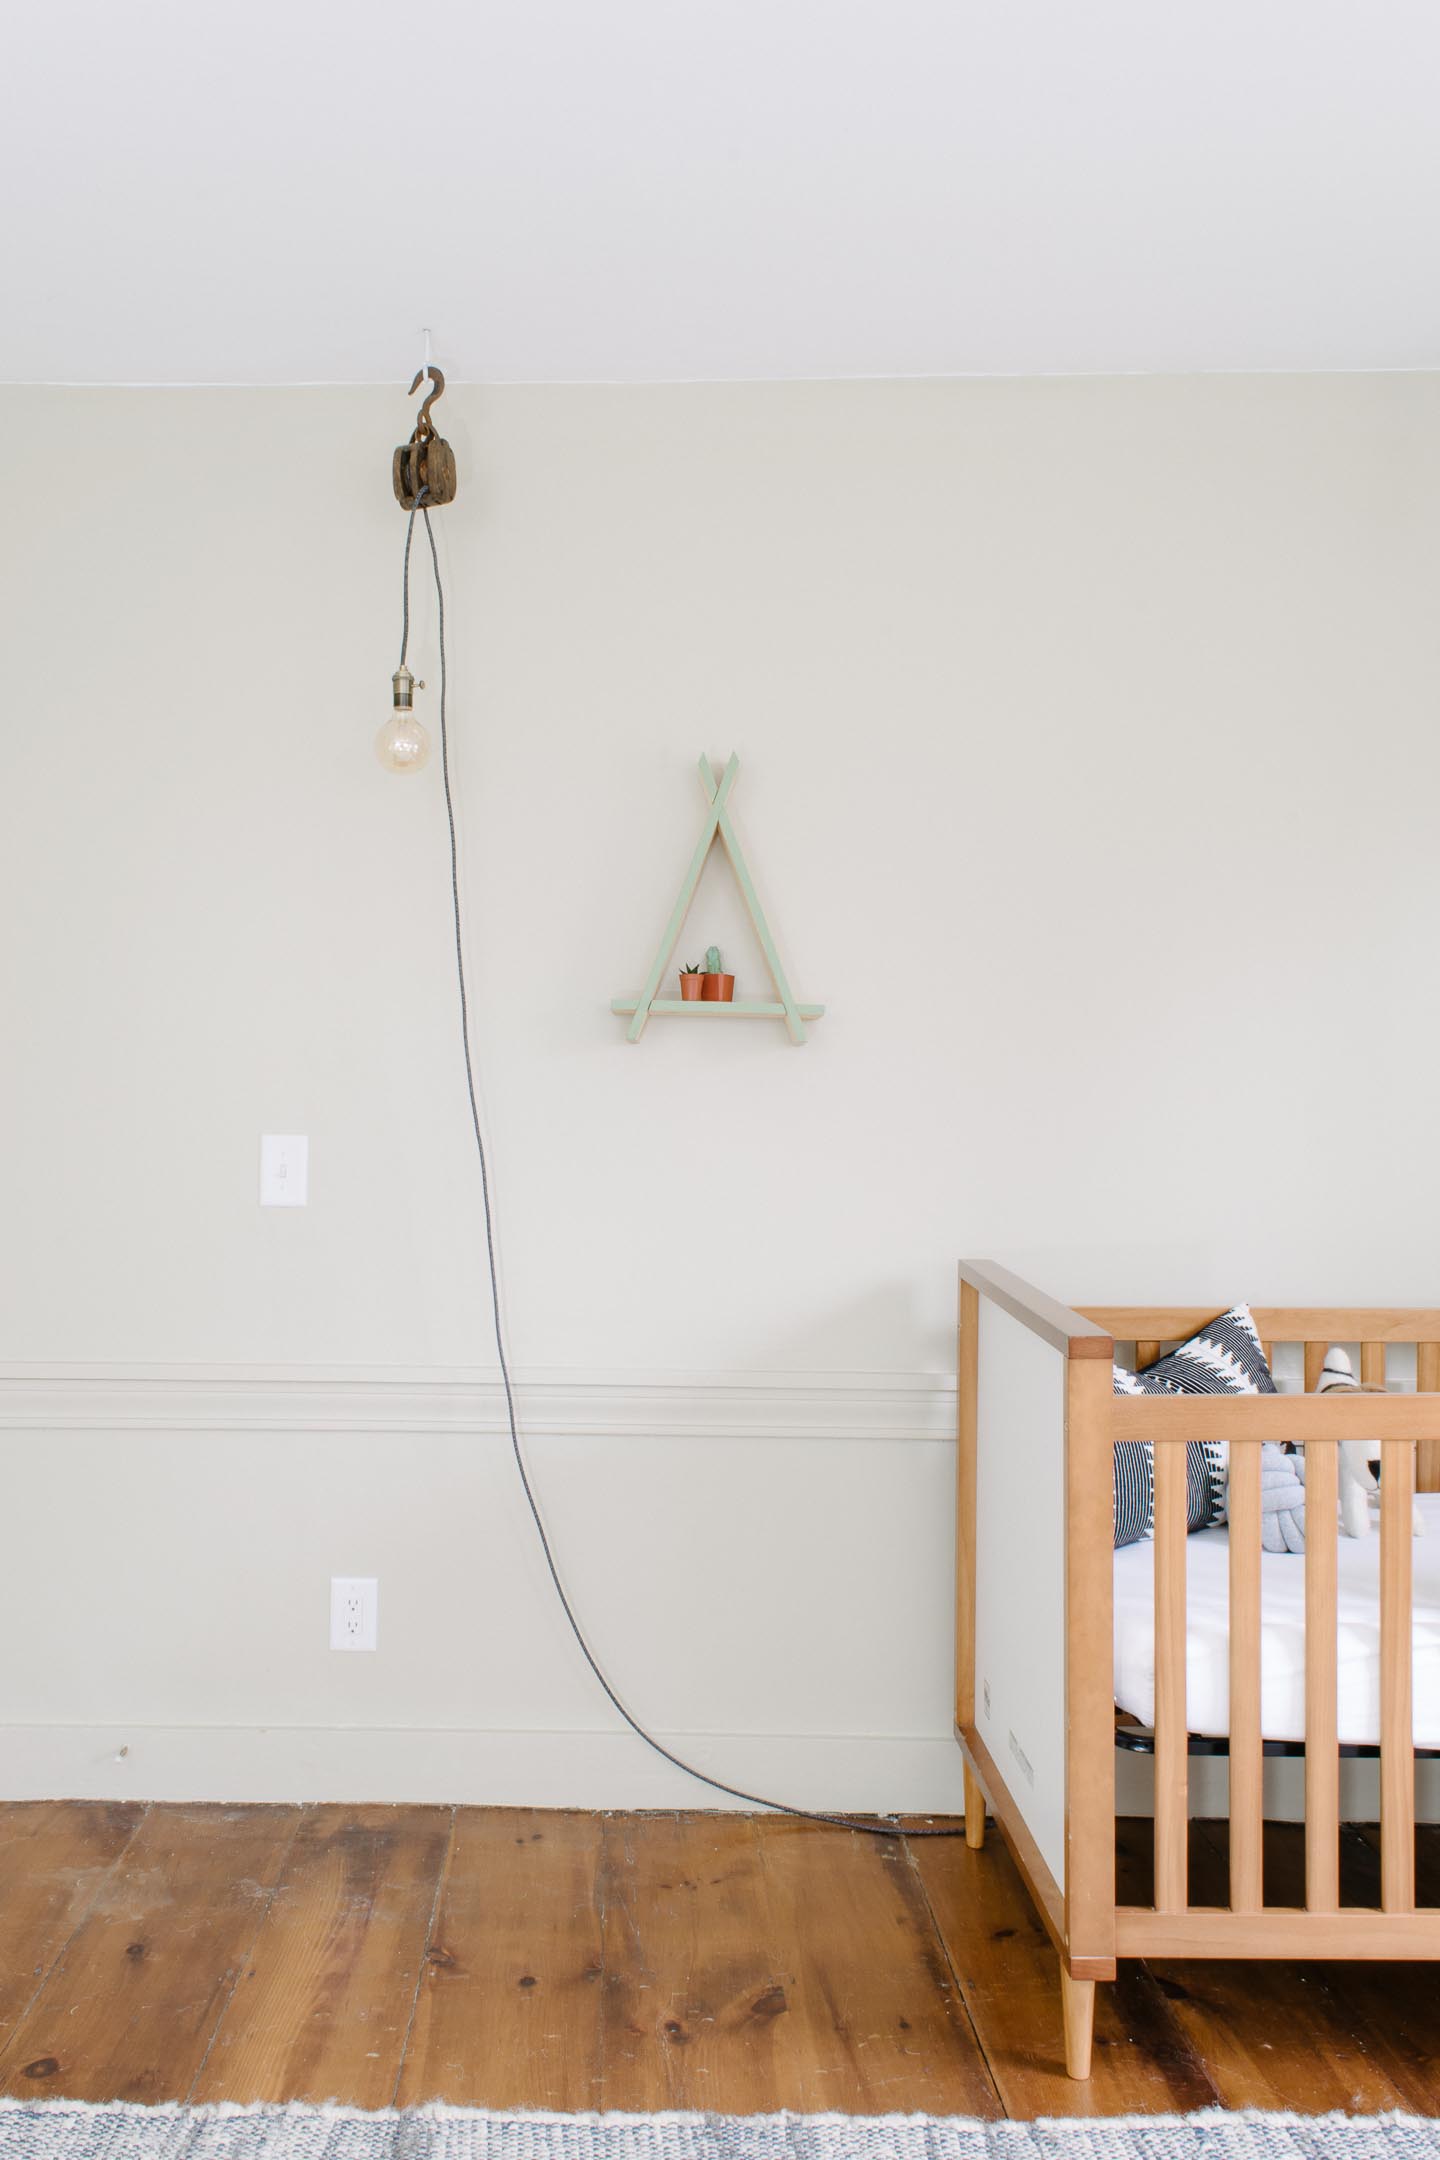
We were so excited about the new house that it took until we moved in for us to notice neither of the kids rooms had any overhead lighting in them, so an industrial pulley light is our solution. After a hearty, yet very fair bill for the electrician to come in and bring things up to code (and make sure the house didn’t go up in flames) we really didn’t want to continue adding to the price tag, so we’ve opted to leave ceiling light fixtures out of those two rooms.
Instead, we’ve put together a lighting plan to cover zones in the nursery, which of course makes me happy because it = more lights fixtures. I really love light fixtures like our DIY Sputnik Chandelier and Entryway Lights.

This post may contain affiliate links.When you click on a link and purchase I will get a small compensation at no extra cost to you, win win. Read the full disclosure here.
We decided on making/ buying three different fixtures.
1. A general “overhead” light in the form of this industrial pulley light hung from the ceiling 2. A reading sconce for at the rocking chair 3. A shelf light for at the changing table
That way we get the best of both worlds and can have general lighting and task lighting all without paying for the electrician and putting holes in the ceiling.
To create general lighting we knew something would still need to be hung high, even if it wouldn’t be ceiling mounted.
I’ve certainly seen plug in bare bulbs that hang up from a hook in the ceiling, but we wanted something with a bit more character.
A couple of years ago my mother and I grabbed these pulley’s while at an antique show (how to go prepared to a flea market), and so I thought why not use the pulley to create a light? Seemed like a perfect industrial piece for a baby boy's nursery. Also something that would work well in his room for years to come which is always a win in my book.

We used Color Cord Company for the lighting supplies needed, they have some fantastic options for DIY lighting kits that you can make yourself and get a unique fixture for your space. This post was not sponsored, we just really liked working with all of the amazing options they had to offer!
Wire Strippers
Lighter
- Check to make sure you have all the supplies needed - Prepare the wire by pulling back the fabric and exposing the wire casing, then cut back the casing to expose the electrical wires.
 -Wrap wire into pulley as you will want it... making sure the plug or back section is far enough away from the light bulb so that they do not touch.
 -Expose the copper wire and wire to socket

 - Stretch fabric back over wiring
- Take lighter and burn ends of fabric to stop fraying
- Pull back fabric on plug end and strip back insulation to wires
- Strip back wires to copper
- Wire end to plug
- Stretch fabric back over wiring
- Take lighter and burn ends of fabric to stop fraying
- Pull back fabric on plug end and strip back insulation to wires
- Strip back wires to copper
- Wire end to plug
 - Voila! Now hang from a ceiling hook , screw in bulb, and plug it in!

We didn’t actually have this hung from the ceiling yet so here is the husband model showing the finished results off so well !

** You will probably have already noticed how very basic this tutorial is, with no crazy details on how to wire a light fixture. If you are not familiar with electrical, our advice is for you to hire an electrician and possibly learn from him before attempting to DIY a light fixture on your own. We are NOT electricians and therefore .....please do not try this at home without consulting with a licensed electrician.

Follow along with our Giant adventures as we fix up this 1847 Historic Colonial in Western Massachusetts.
P.S. Expect lots of wallpaper removal and don’t say we didn’t warn you!


Powered by Squarespace.