How to Make a Industrial Pulley Light & Nursery Lighting
/
We were so excited about the new house that it took until we moved in for us to notice neither of the kids rooms had any overhead lighting in them, so an industrial pulley light is our solution. After a hearty, yet very fair bill for the electrician to come in and bring things up to code (and make sure the house didn’t go up in flames) we really didn’t want to continue adding to the price tag, so we’ve opted to leave ceiling light fixtures out of those two rooms.
Instead, we’ve put together a lighting plan to cover zones in the nursery, which of course makes me happy because it = more lights fixtures. I really love light fixtures like our DIY Sputnik Chandelier and Entryway Lights.

This post may contain affiliate links.When you click on a link and purchase I will get a small compensation at no extra cost to you, win win. Read the full disclosure here.
We decided on making/ buying three different fixtures.
1. A general “overhead” light in the form of this industrial pulley light hung from the ceiling 2. A reading sconce for at the rocking chair 3. A shelf light for at the changing table
That way we get the best of both worlds and can have general lighting and task lighting all without paying for the electrician and putting holes in the ceiling.
The General Lighting
To create general lighting we knew something would still need to be hung high, even if it wouldn’t be ceiling mounted.
I’ve certainly seen plug in bare bulbs that hang up from a hook in the ceiling, but we wanted something with a bit more character.
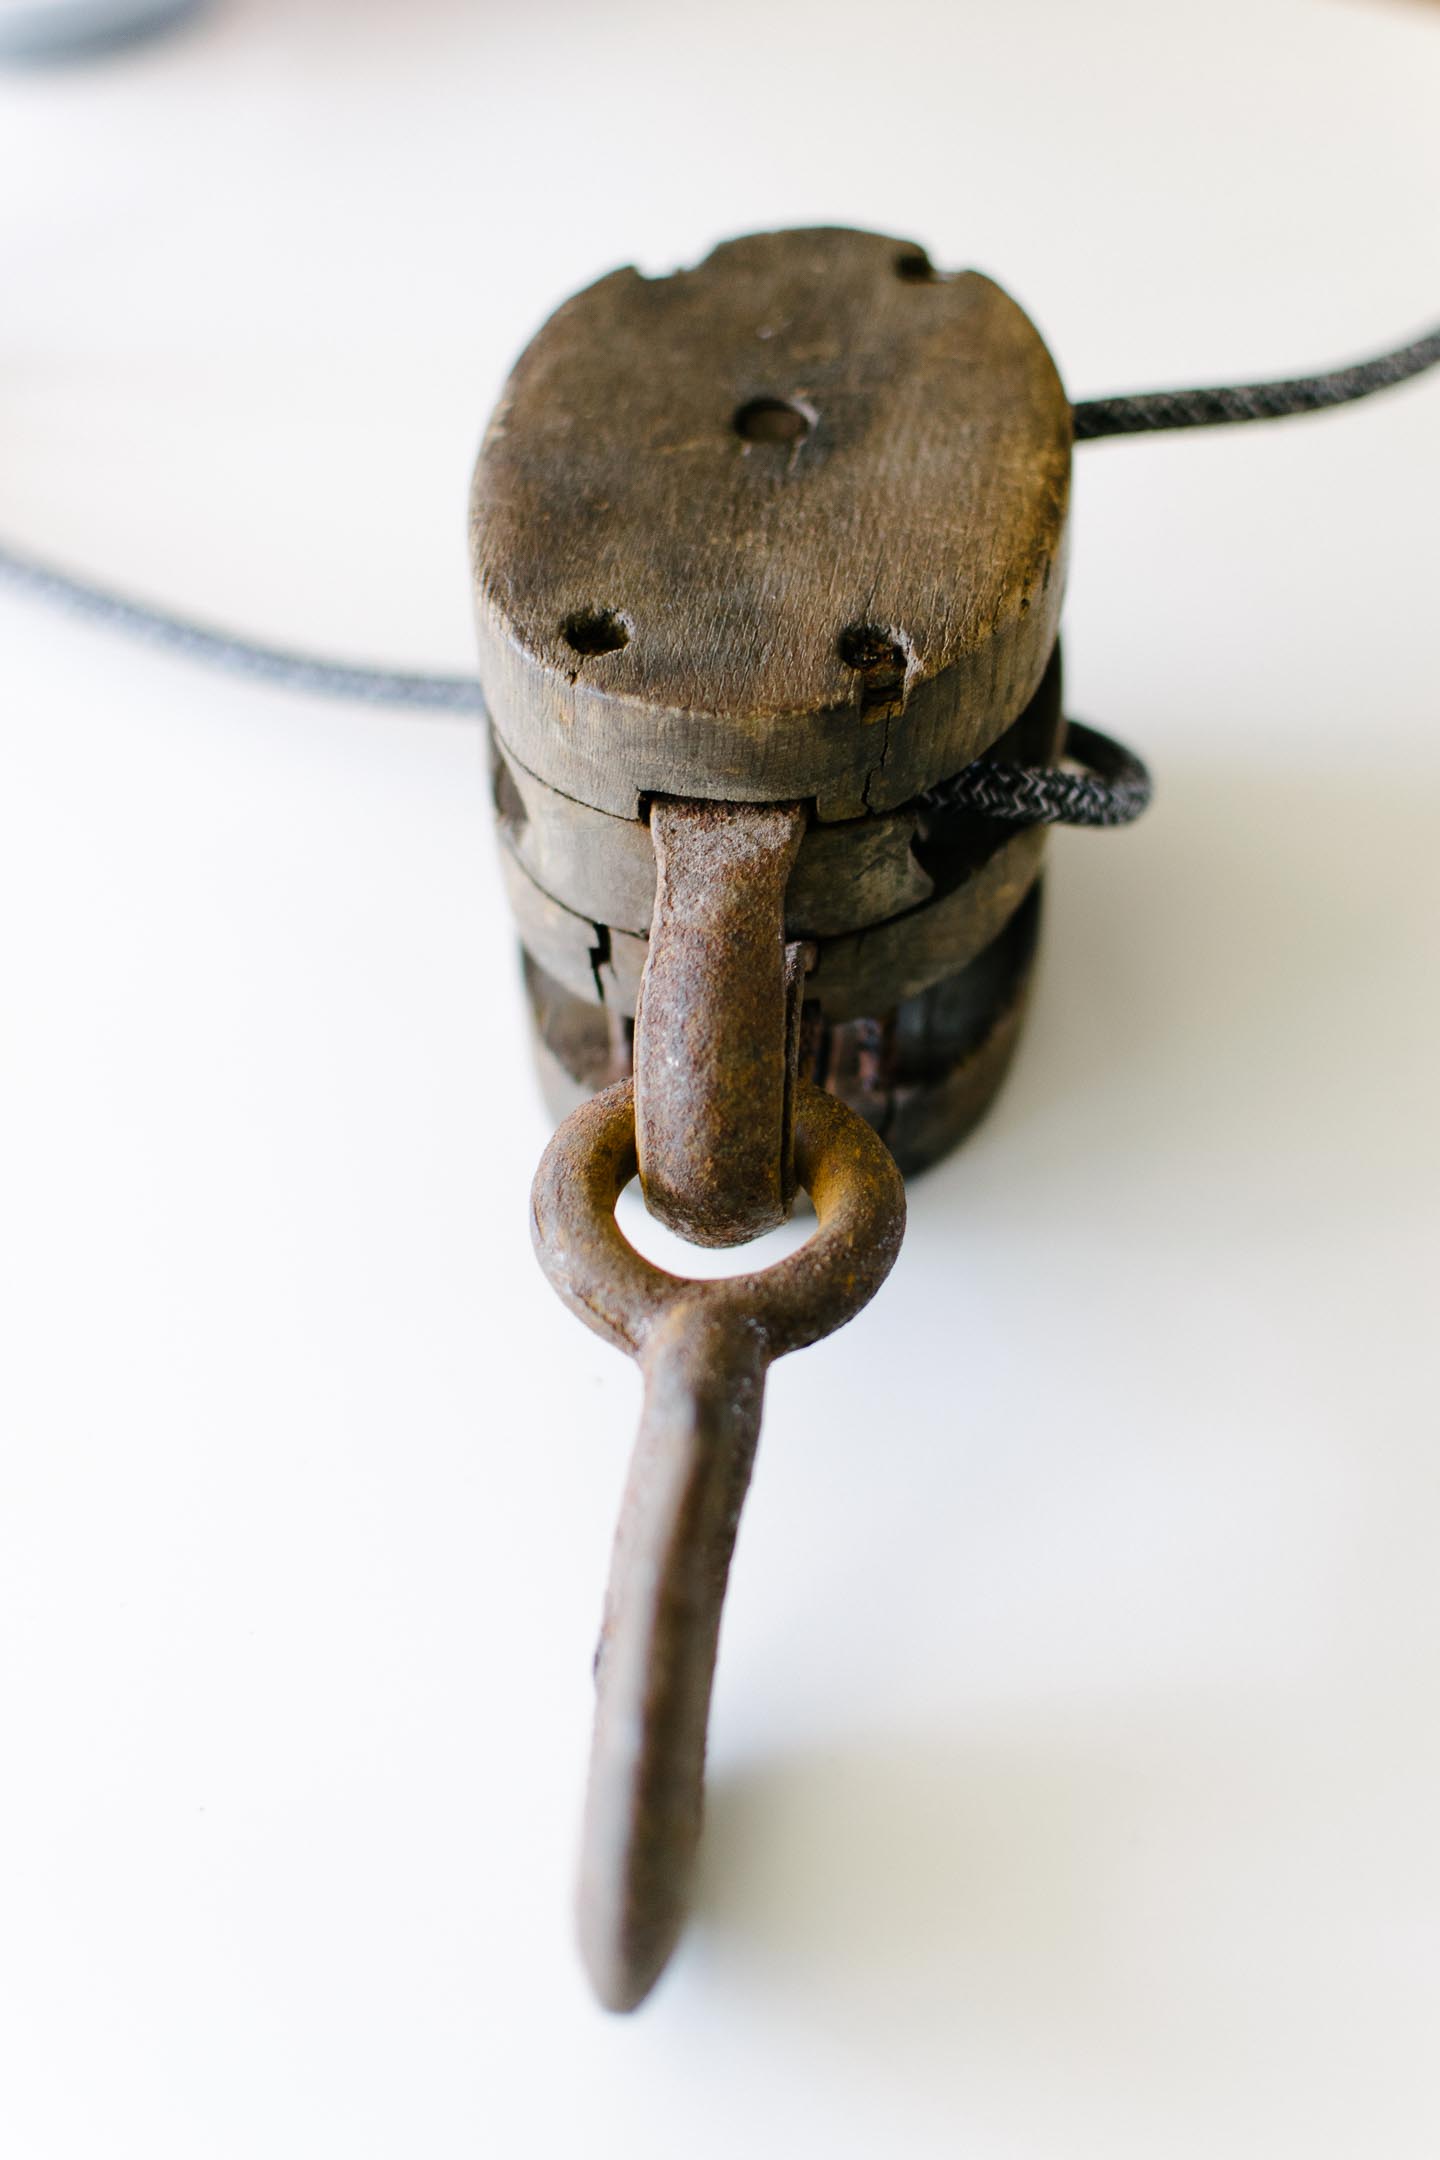
A couple of years ago my mother and I grabbed these pulley’s while at an antique show (how to go prepared to a flea market), and so I thought why not use the pulley to create a light? Seemed like a perfect industrial piece for a baby boy's nursery. Also something that would work well in his room for years to come which is always a win in my book.
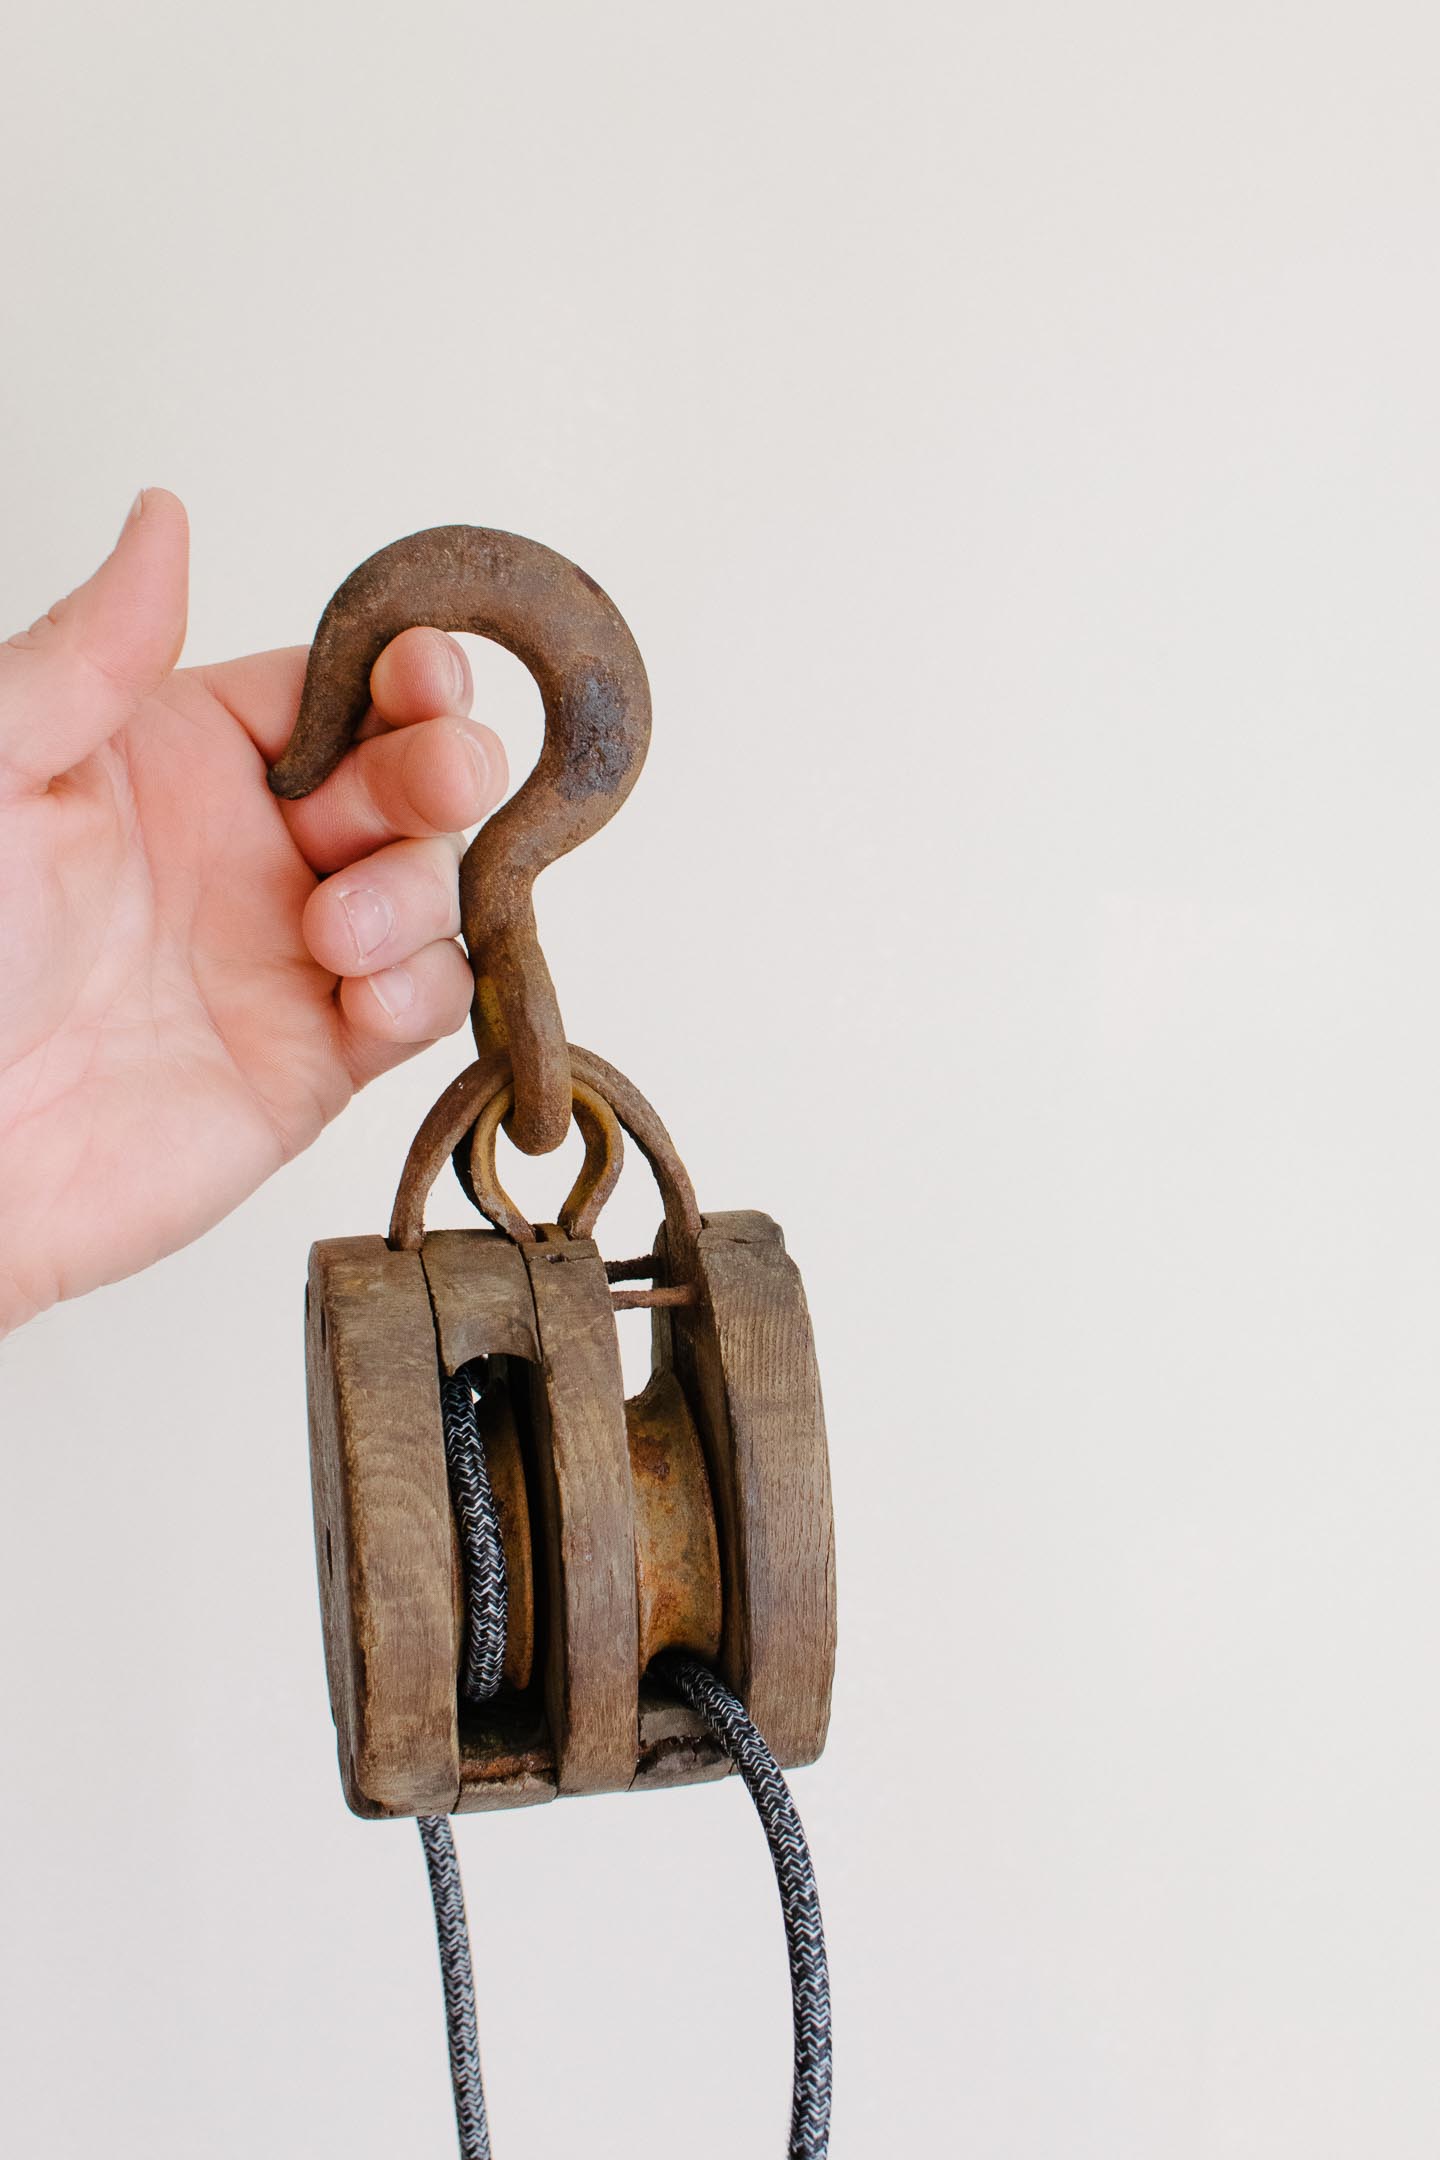
How to Make a Industrial Pulley Light
We used Color Cord Company for the lighting supplies needed, they have some fantastic options for DIY lighting kits that you can make yourself and get a unique fixture for your space. This post was not sponsored, we just really liked working with all of the amazing options they had to offer!
Supplies Needed
Wire Strippers
Lighter
Steps
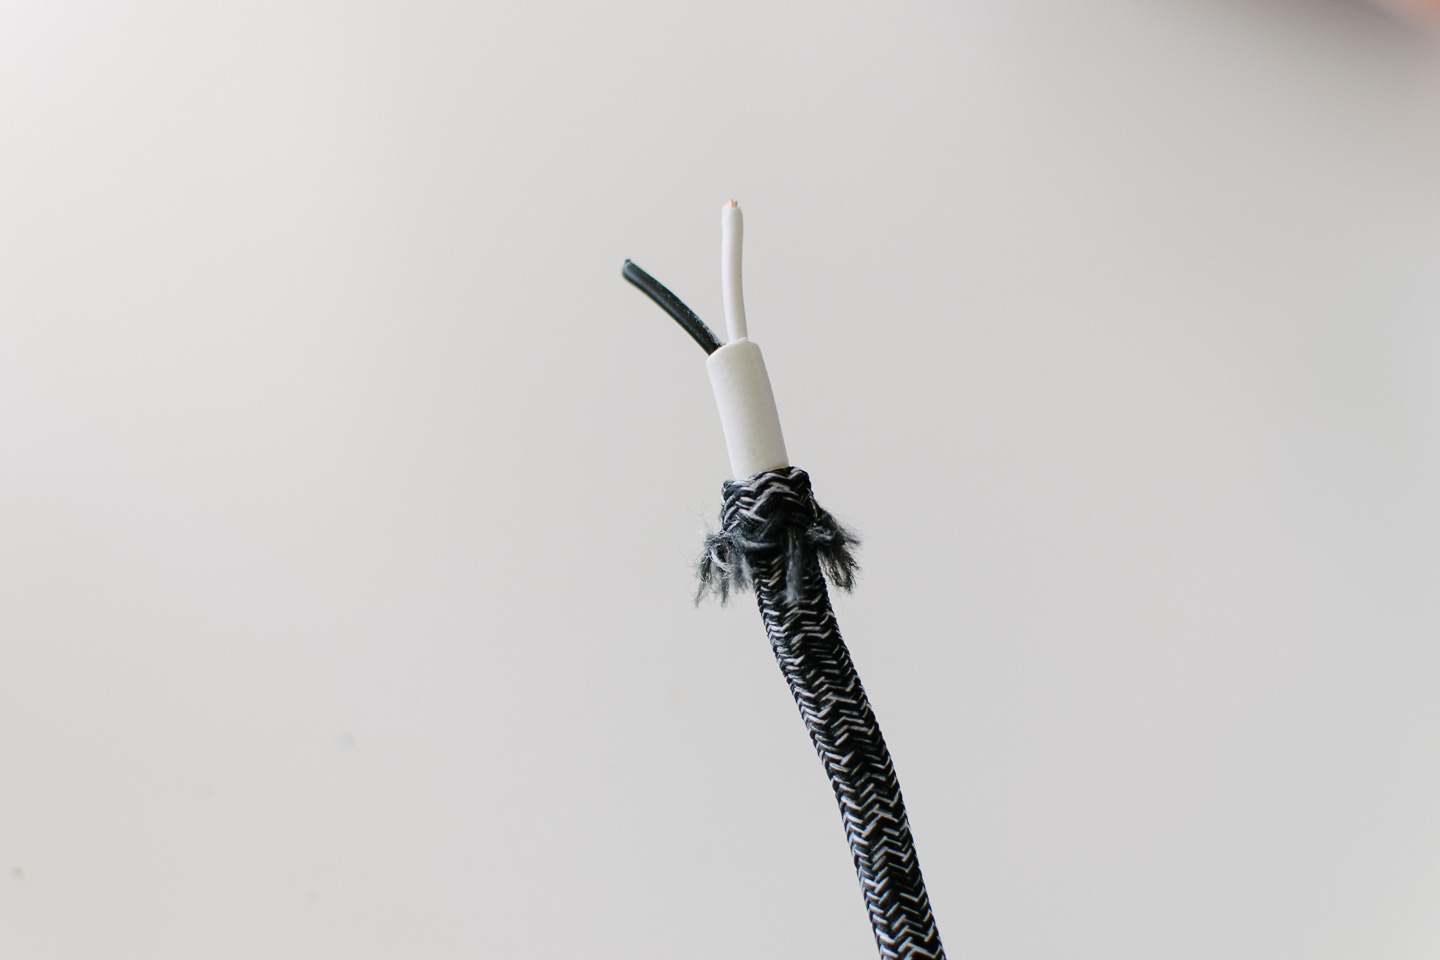
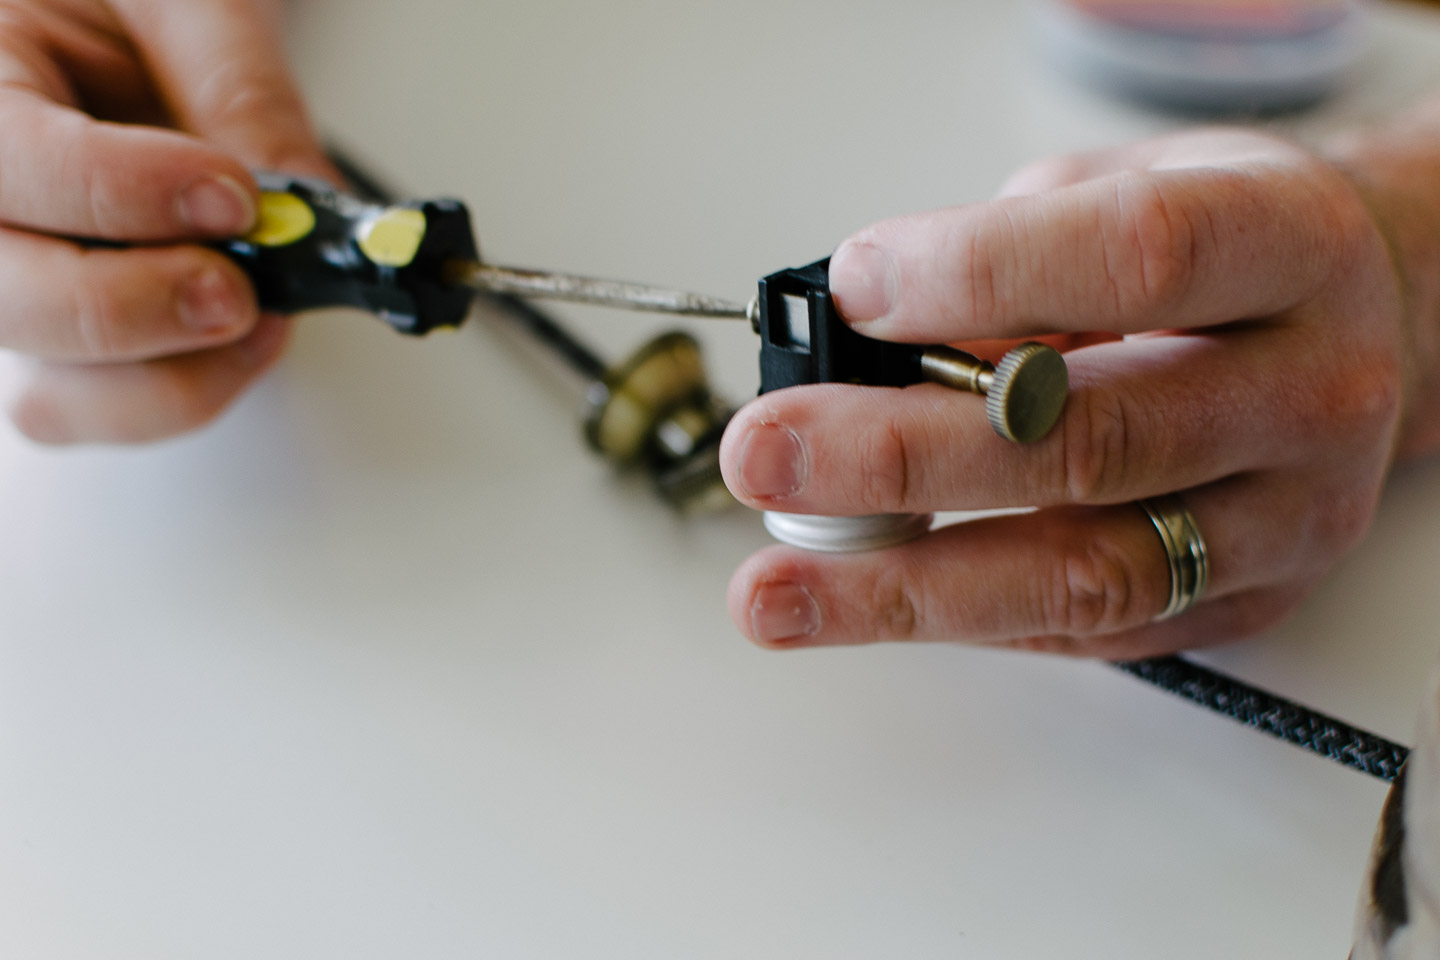
- Check to make sure you have all the supplies needed - Prepare the wire by pulling back the fabric and exposing the wire casing, then cut back the casing to expose the electrical wires.
 -Wrap wire into pulley as you will want it... making sure the plug or back section is far enough away from the light bulb so that they do not touch.
 -Expose the copper wire and wire to socket
 - Stretch fabric back over wiring
- Take lighter and burn ends of fabric to stop fraying
- Pull back fabric on plug end and strip back insulation to wires
- Strip back wires to copper
- Wire end to plug
- Stretch fabric back over wiring
- Take lighter and burn ends of fabric to stop fraying
- Pull back fabric on plug end and strip back insulation to wires
- Strip back wires to copper
- Wire end to plug
 - Voila! Now hang from a ceiling hook , screw in bulb, and plug it in!
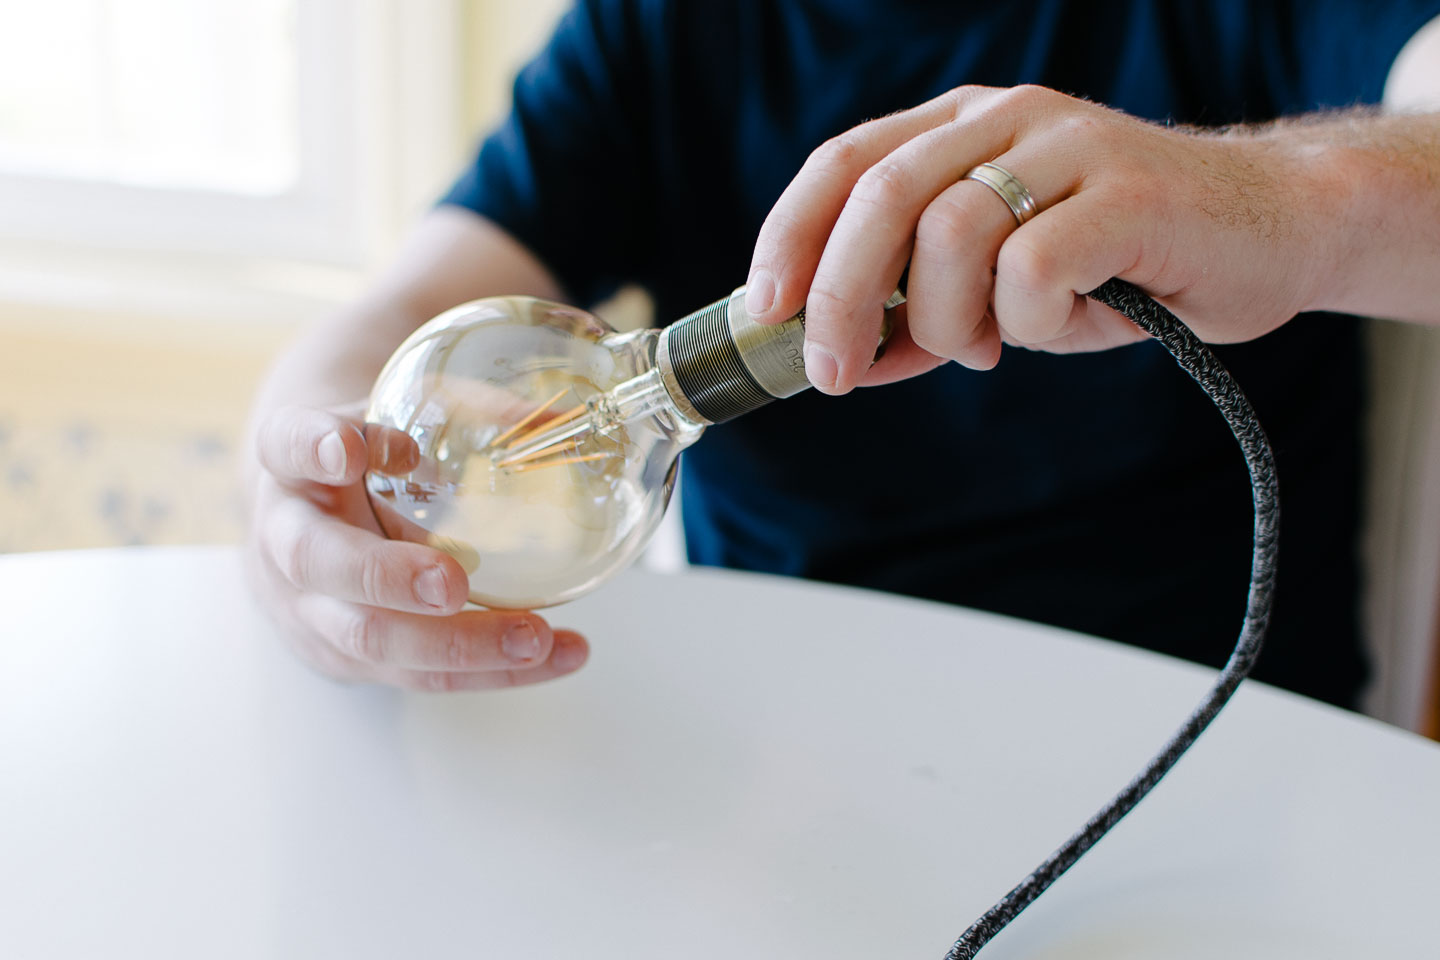
We didn’t actually have this hung from the ceiling yet so here is the husband model showing the finished results off so well !

** You will probably have already noticed how very basic this tutorial is, with no crazy details on how to wire a light fixture. If you are not familiar with electrical, our advice is for you to hire an electrician and possibly learn from him before attempting to DIY a light fixture on your own. We are NOT electricians and therefore .....please do not try this at home without consulting with a licensed electrician.