Create a sputnik light that will rock your space
/This post may contain affiliate links. Read the full disclosure here. Follow my blog with Bloglovin
When we found all our inspiration for the dining room it became clear a Sputnik light was a must have for the space.
A Sput-What??? Wasn't that a Russian Satellite?
Our biggest problem was the budget, although we did find a few great looking lights on Etsy for a pretty decent price, we still couldn't swing it and afford some of the other items to be checked off the list for this room. We've been working so hard to #finishthatspace this year and really didn't want to pour all of the funds into one piece, however wonderful it may be.
So, DIY seemed to be our best avenue, and Mitch has some experience with electrical so we soldiered on.
**Disclaimer** We are not electricians and have no prior experience with lighting design. This post gives you a general outline and parts list for this light fixture; you purchase, assemble, and install at your own risk. If you are running a dimmer switch, ensure that your total wattage does not exceed what the dimmer switch can handle. Nine bulbs x 60 watts per, put us well over the dimmer's rating and we ended up changing it out.
Sputnik Light: Making a Plan
Once I had my inspiration pictures in-hand, I went on a virtual search for parts; where does one actually find brass fixture parts you ask? Having never built or thought of building a fixture like this took a bit to figure out. Alas, I found Grand Brass Lamp Parts and they fit my criteria, USA company located close to us in West Haven, CT.
I even found a couple of designer DIY kits you can purchase through them with all the supplies you need to build your own!
When we started adding up all the pieces needed for the project, it became apparent the cost was going to put us up and over $200 for the lot. Thats when the real designing started, my favorite part.
We couldn't afford everything to be brass, so how do we get a high quality piece with some compromise to reduce the overall cost? We started thinking about what it would look like to do both brass and steel like in our mood board inspiration.
Although we really liked the look, it didn't seem like we could find the right male steel rods for the brass center body. We really liked the mix of metals, and how it added some depth to the fixture without becoming too flashy.
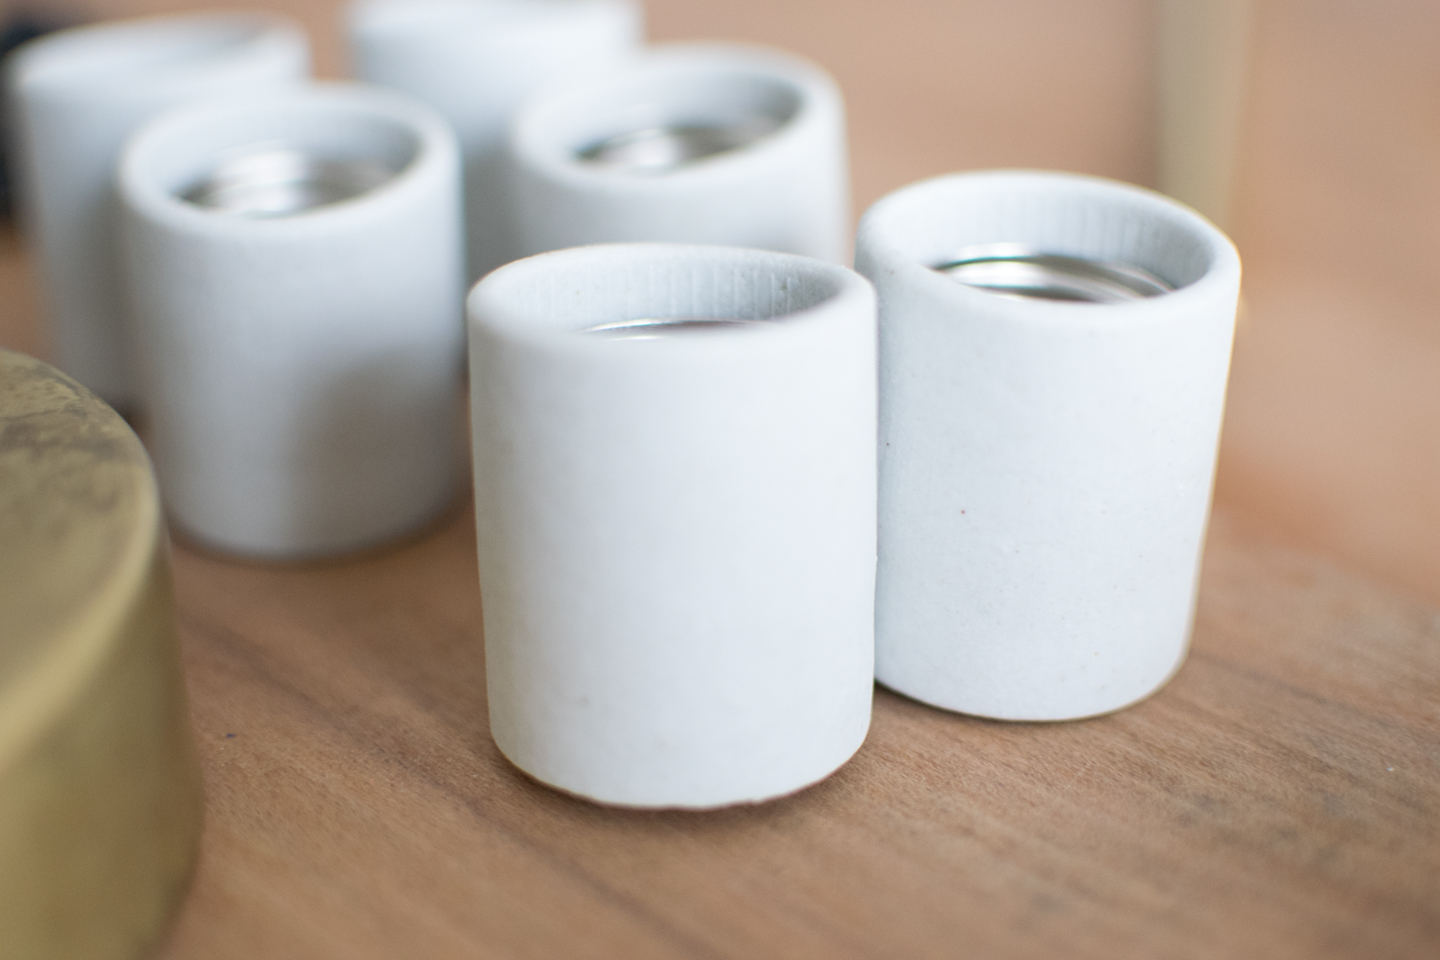
In the end, we figured out a huge part of the cost was going to be the brass socket covers (with 9 of them) and the bare porcelain sockets lent the same depth to the fixture. So it was decided the white porcelain would work well with our cafe stools.
We got the overall aesthetic we were looking for because of the budget constraints we had, now we had our very own light.
Sputnik Light: Ordering your parts
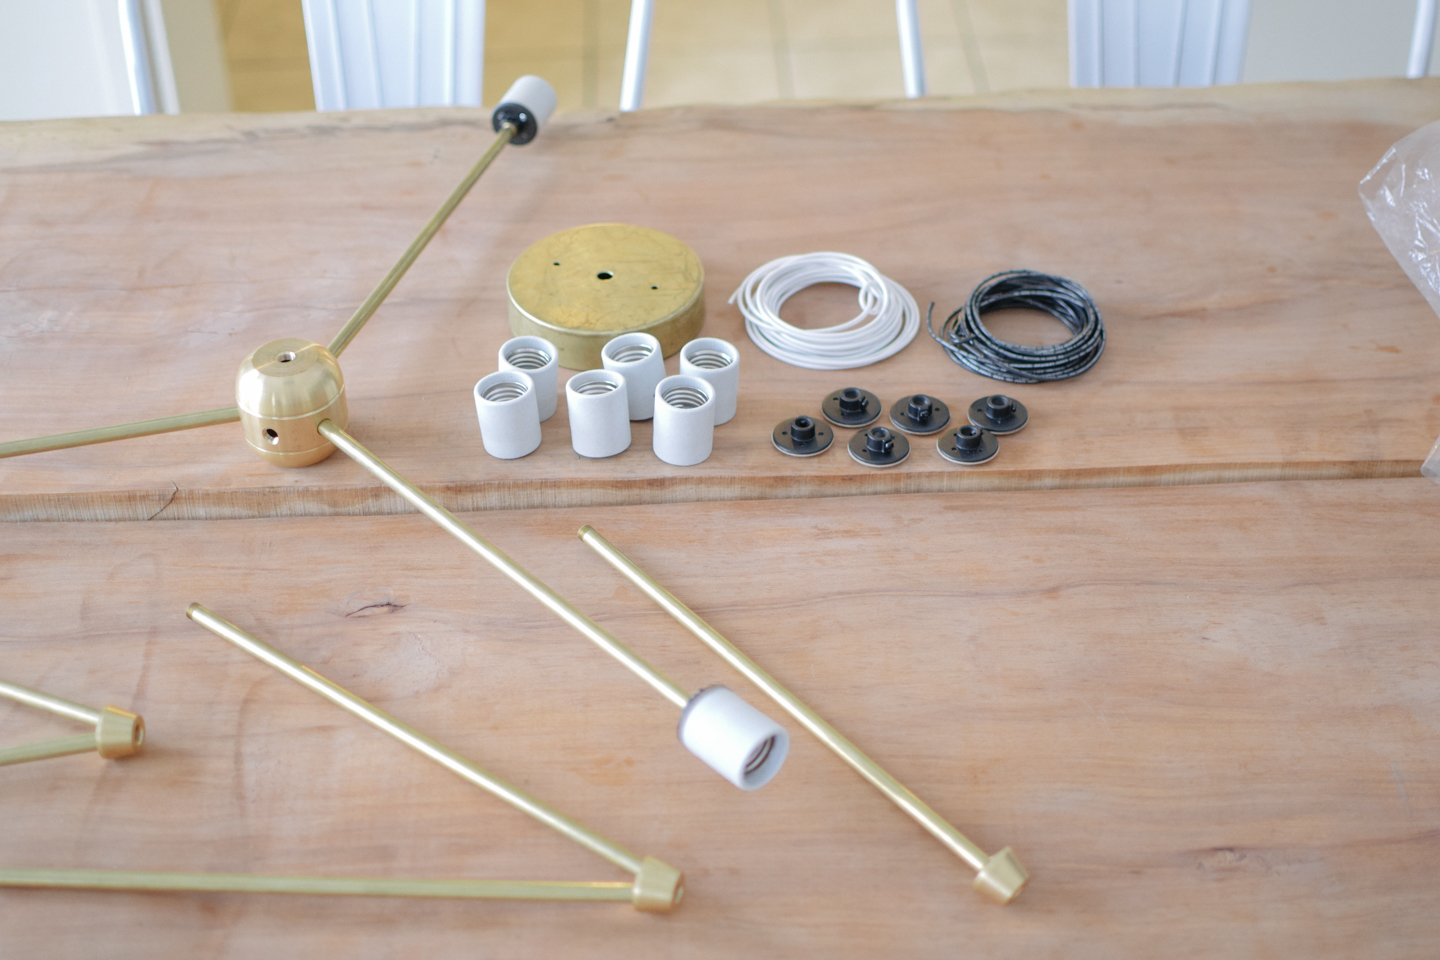
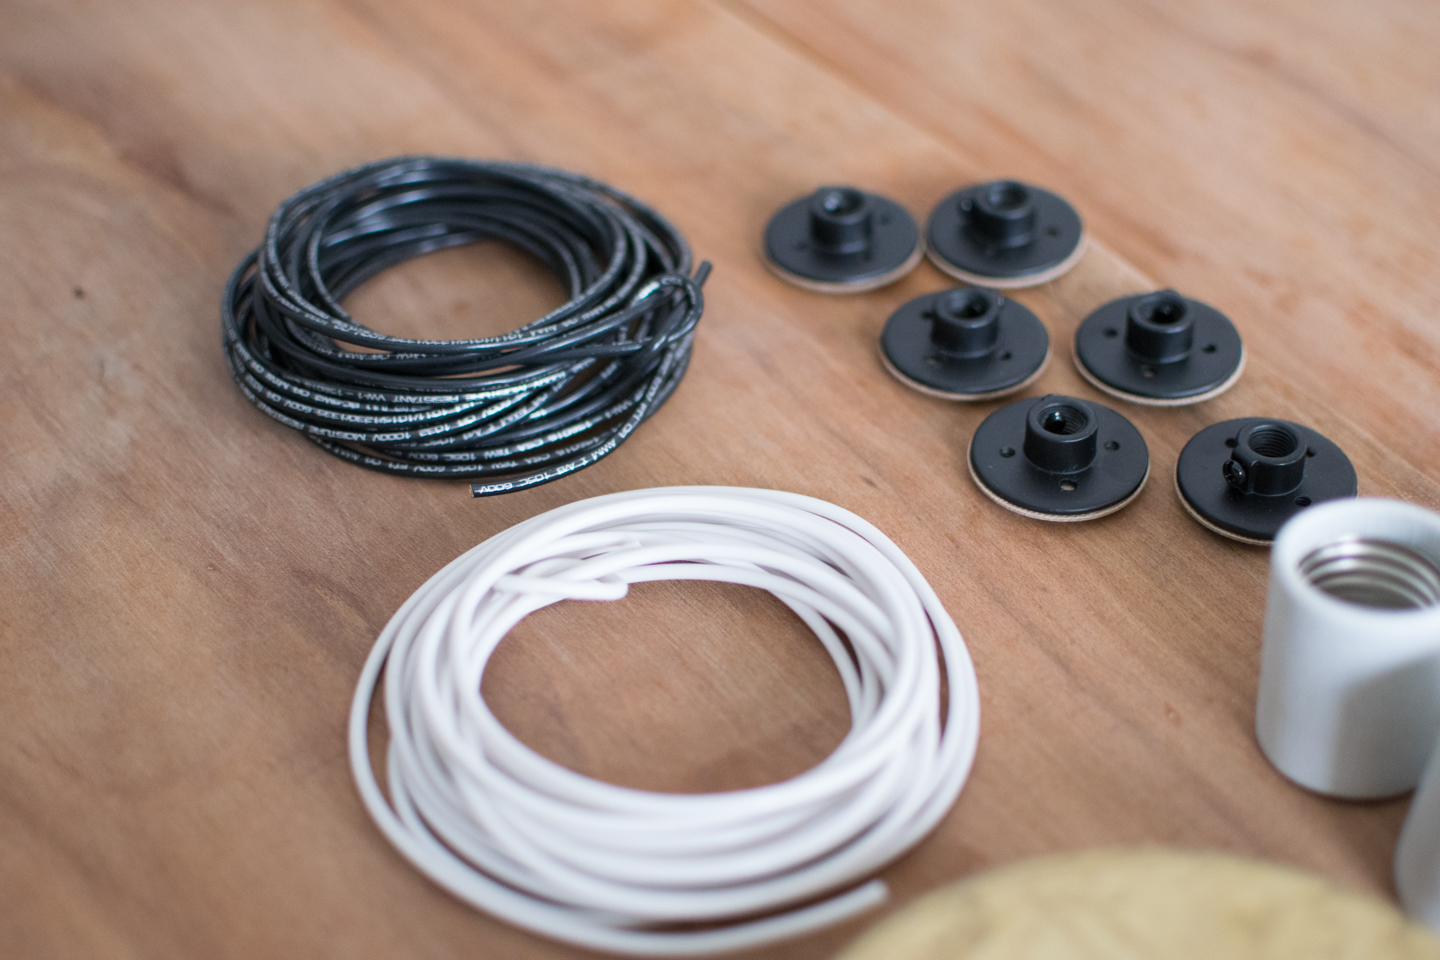
Sputnik Materials List & Pricing
- 1- Cluster Body
- 3-Tapered Cluster Bodies
- 1- 5" Canopy
- 10- 13" x 1/8" Pipe Stem
- 9 Porcelain (E26) Sockets
- 1- CrossBar Hanging Kit
- 10- 5" G-40 Globe Bulbs
- 20 ft Black AWM 105
- 20 ft White AWM 105
- 3- Threaded 1/2" long 1/8" pipe (available at local hardware store)
- TOTAL: $ 183.31
Sputnik Light: Assembling the Light
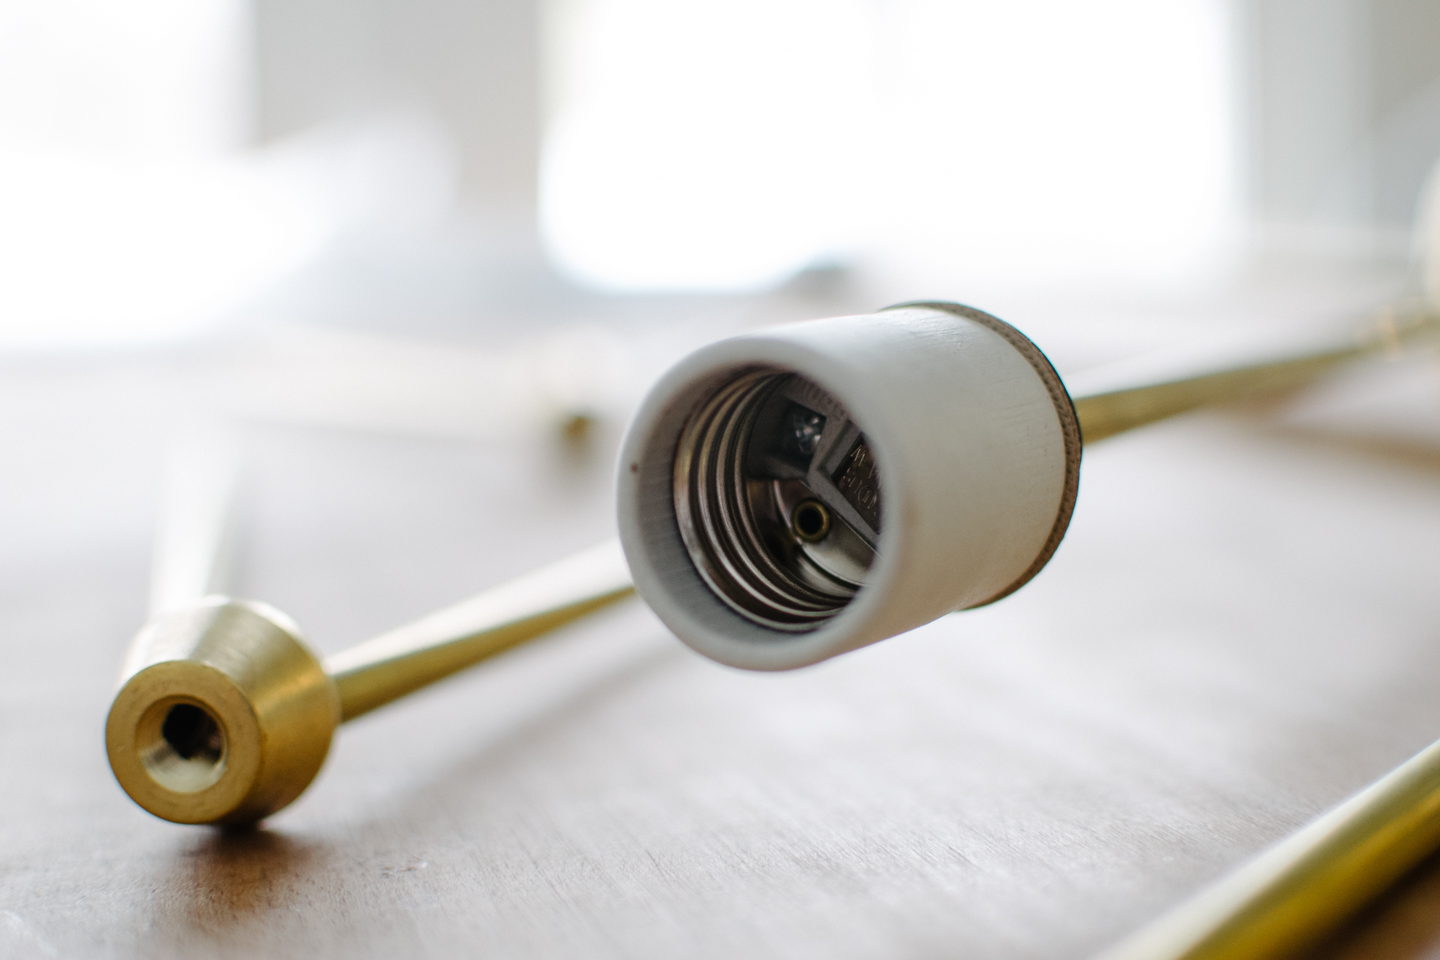
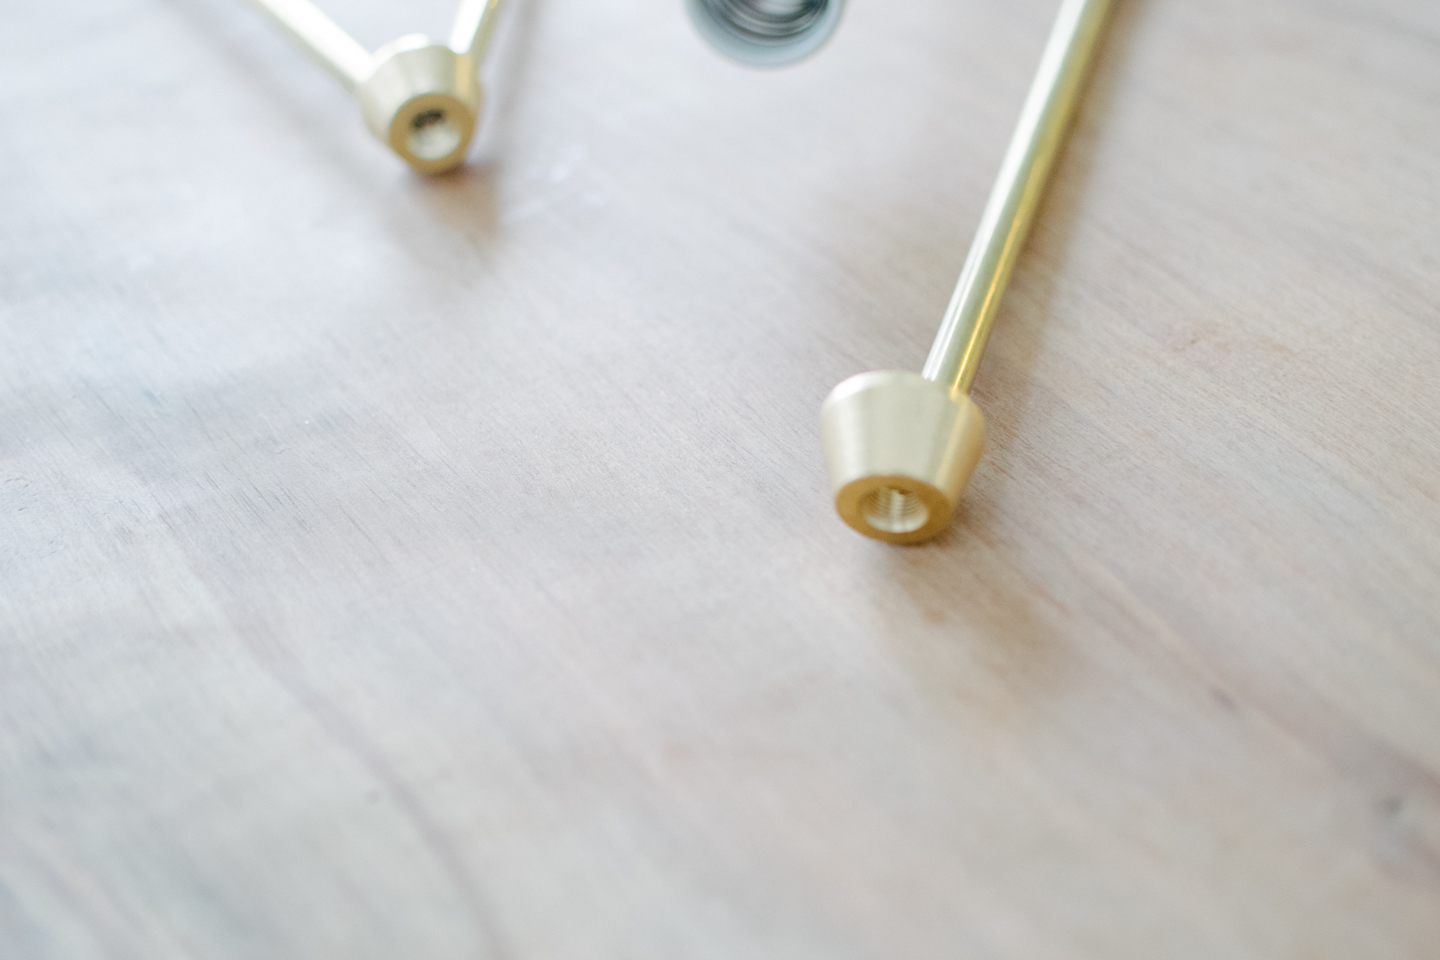
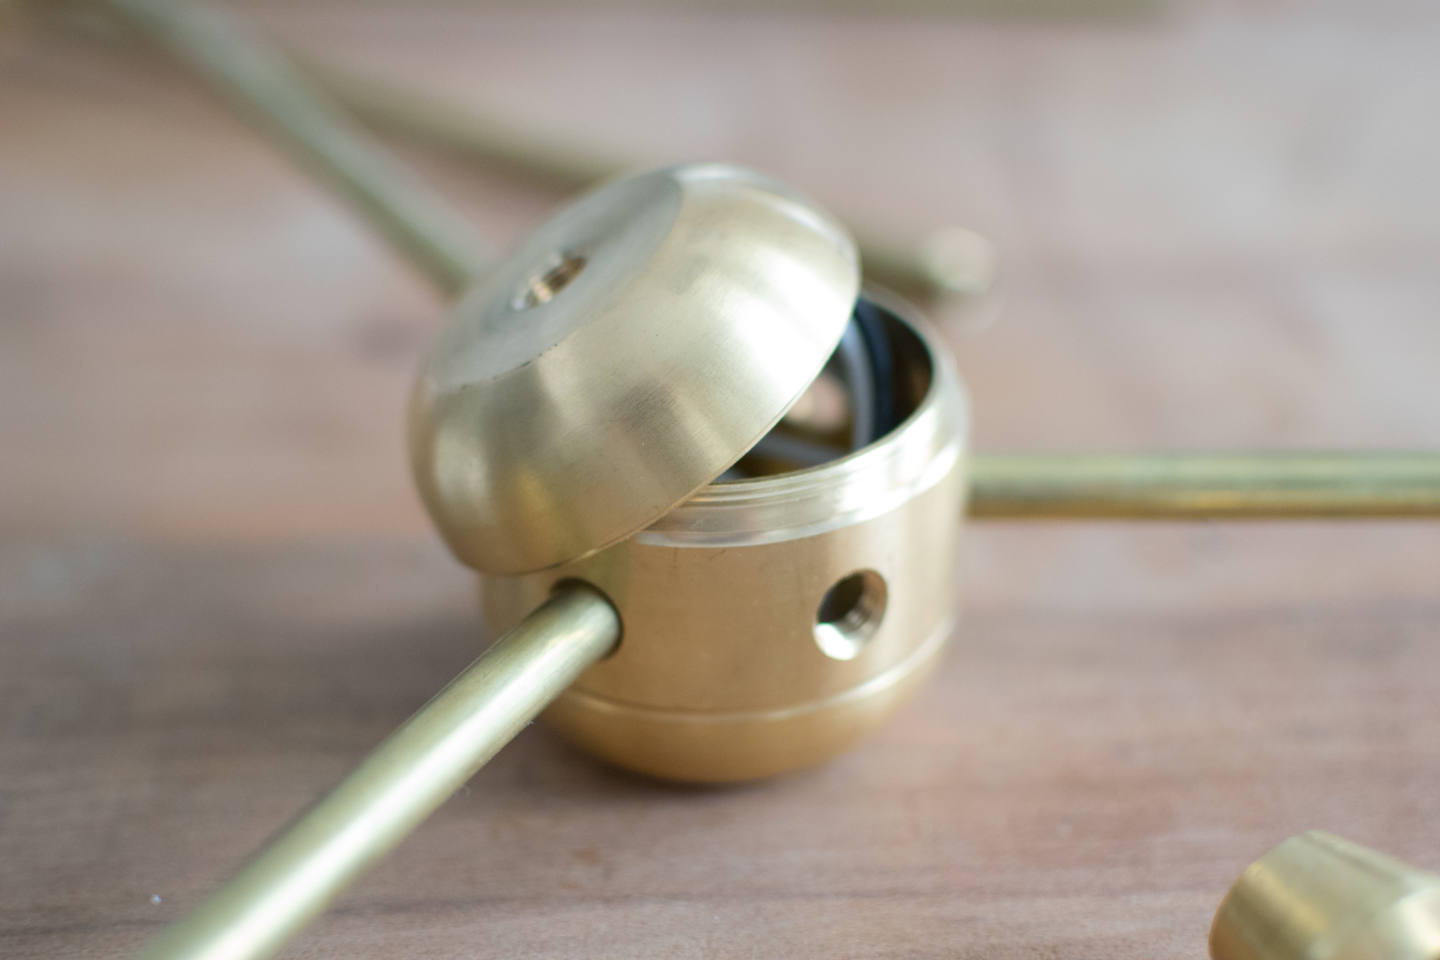
Putting all of the brass together is fairly straight forward; male threads to female threads. Before you connect anything to the main body, get the porcelain sockets wired and the wires run through the piping. Make sure you get all of the wires connected consistently, and leave yourself about an extra 20" of wire that will extend out of the main body. You can trim back later, but don't leave yourself short.
- Wire Porcelain Sockets (white wires to silver screws, black wire to gold screws)
- Run the socket wires through 13" male piping
- Connect the three small tapered cluster bodies (Picture below)
- Connect all male pipes, and small tapered cluster bodies to the main body
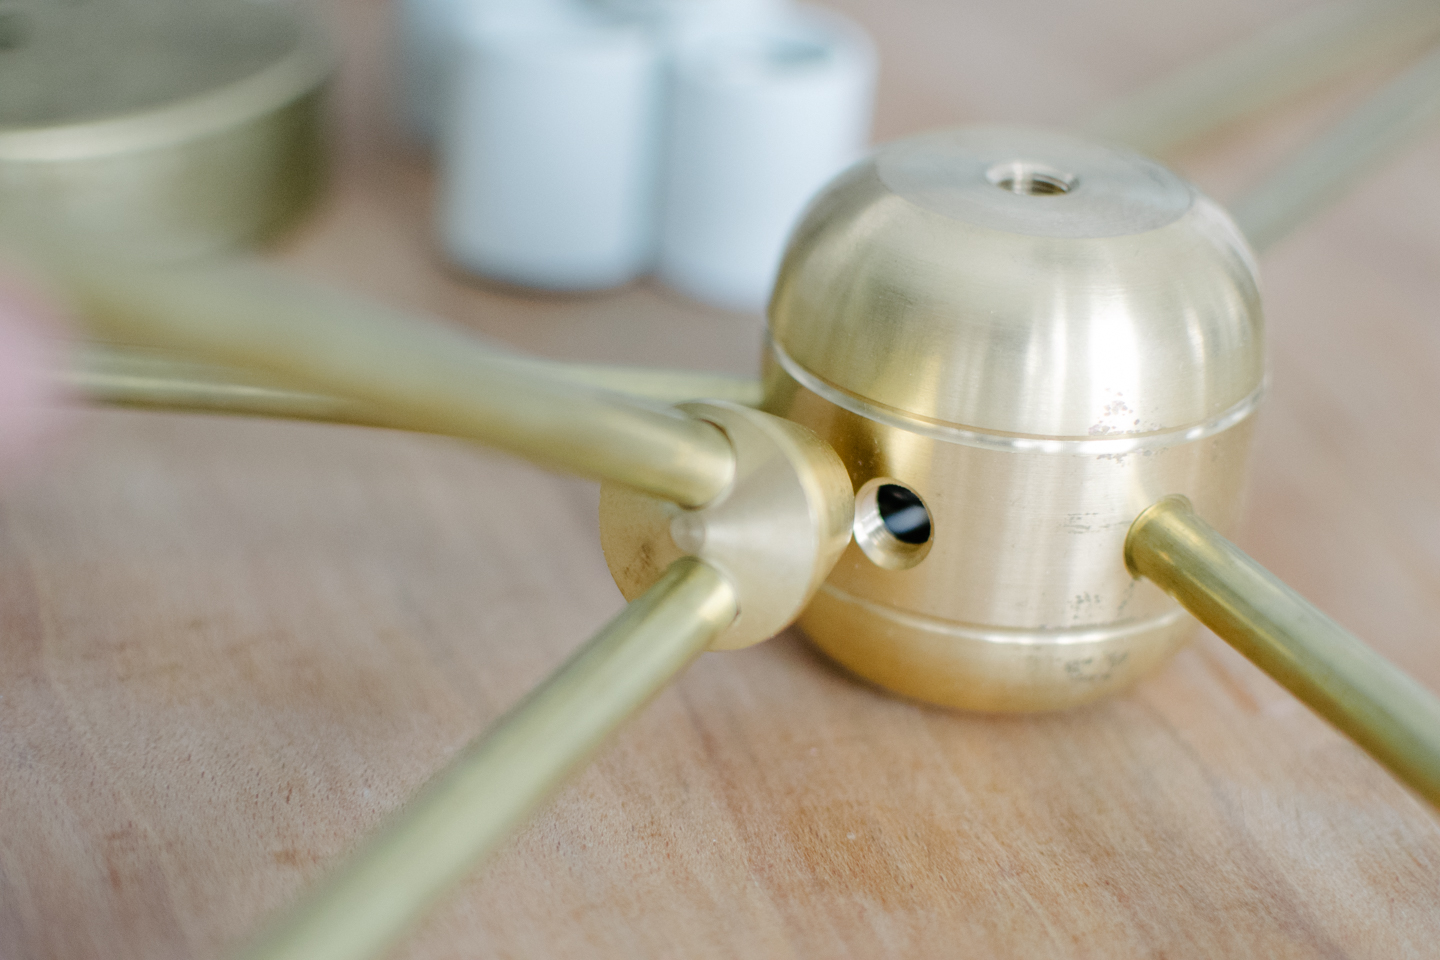
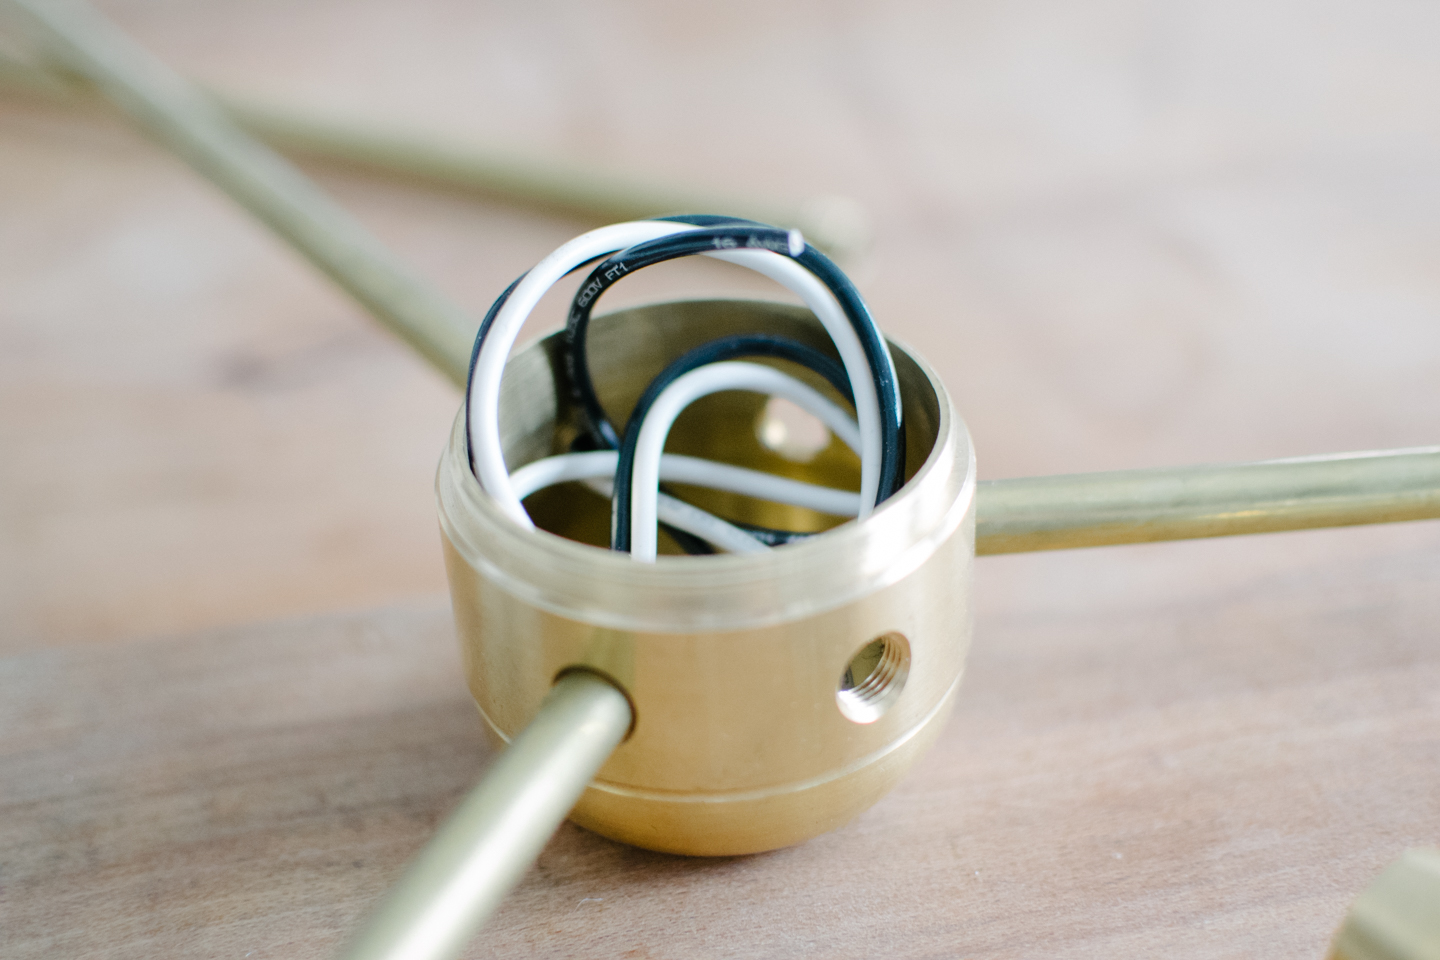
Once you get to the end, you are going to have two wires for every bulb sticking out of the main body. Keep this in mind while designing and adjust for a bigger body, the more bulbs you have. For us, 18 wires was a lot for this size body. We had not a millimeter to spare.
We had so many wires, we could not group them all together. In the end, we ran four total wires to the box, two black and two white; this way we could split the total number of wires we had to group in half.
- Connect wires as mentioned above, close top of cluster body
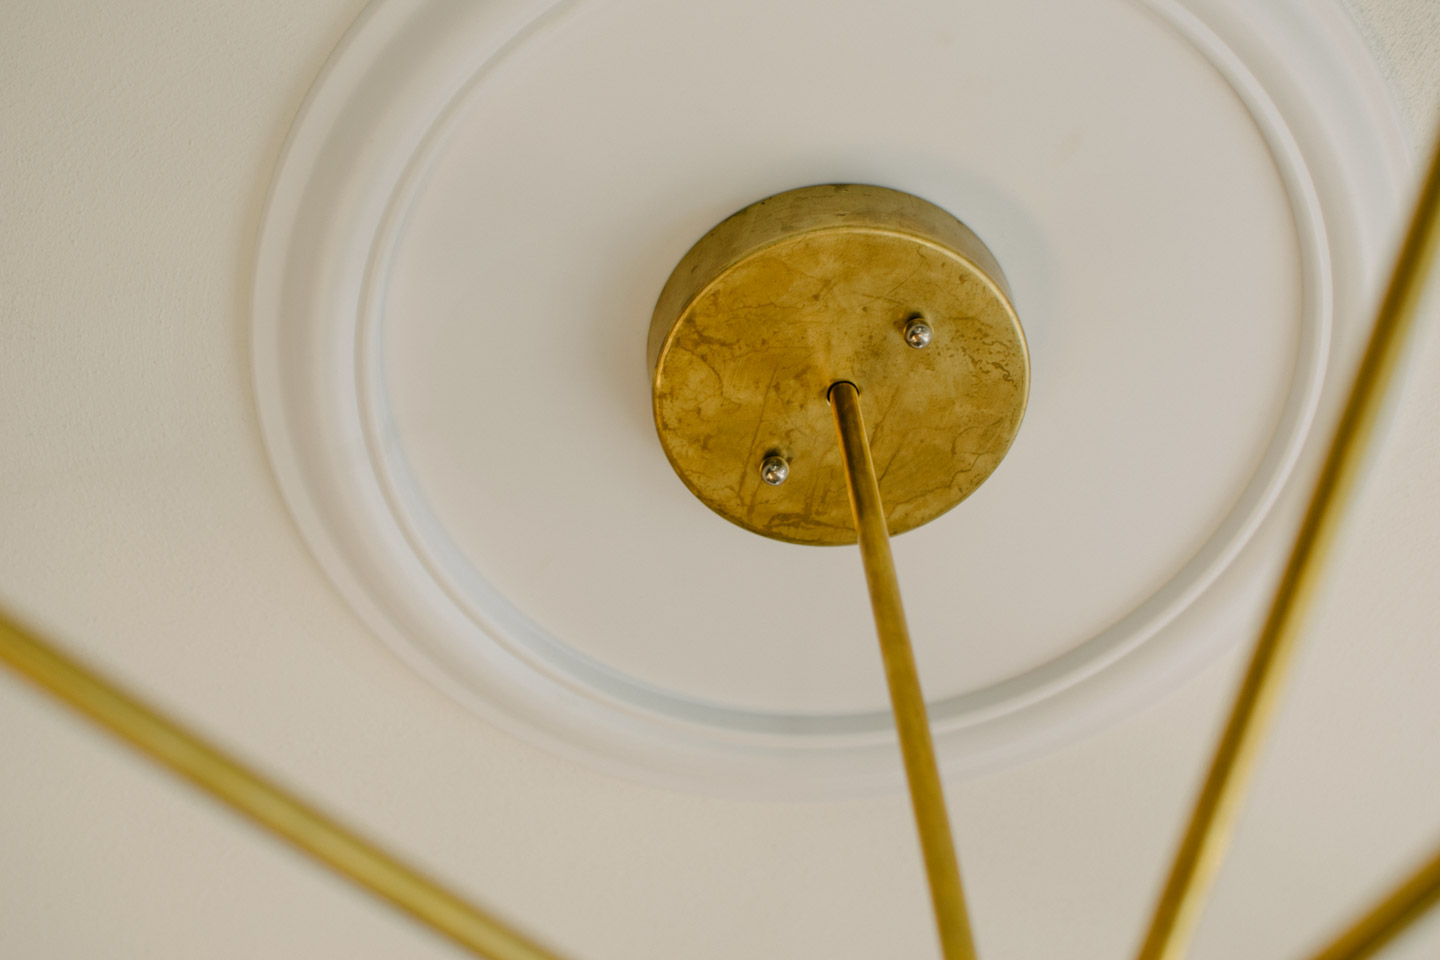
- Run the four wire's to the ceiling box
- Hang from the crossbar hanging kit
- Mount your canopy and optional medallion
Hyper lapse Video's of Assembly
**Disclaimer actions do not happen as quickly as hyper lapse depicts**
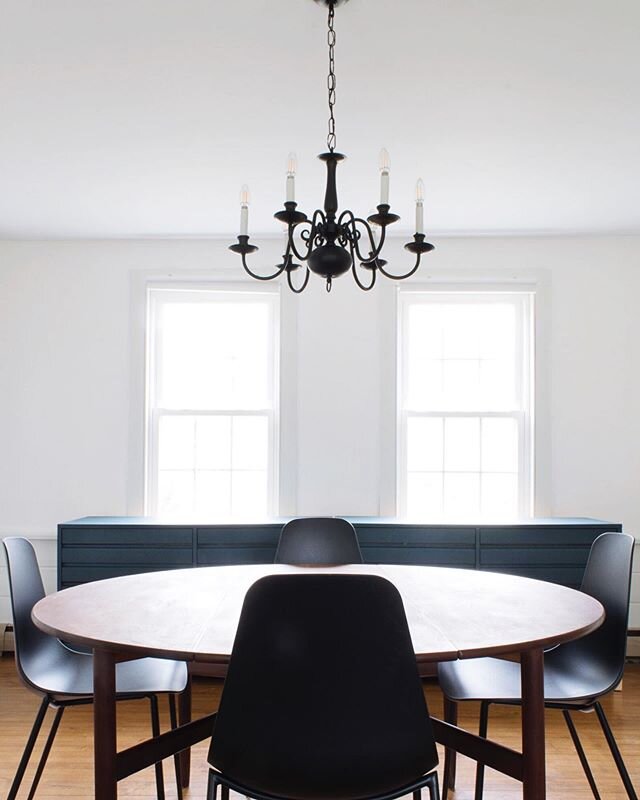
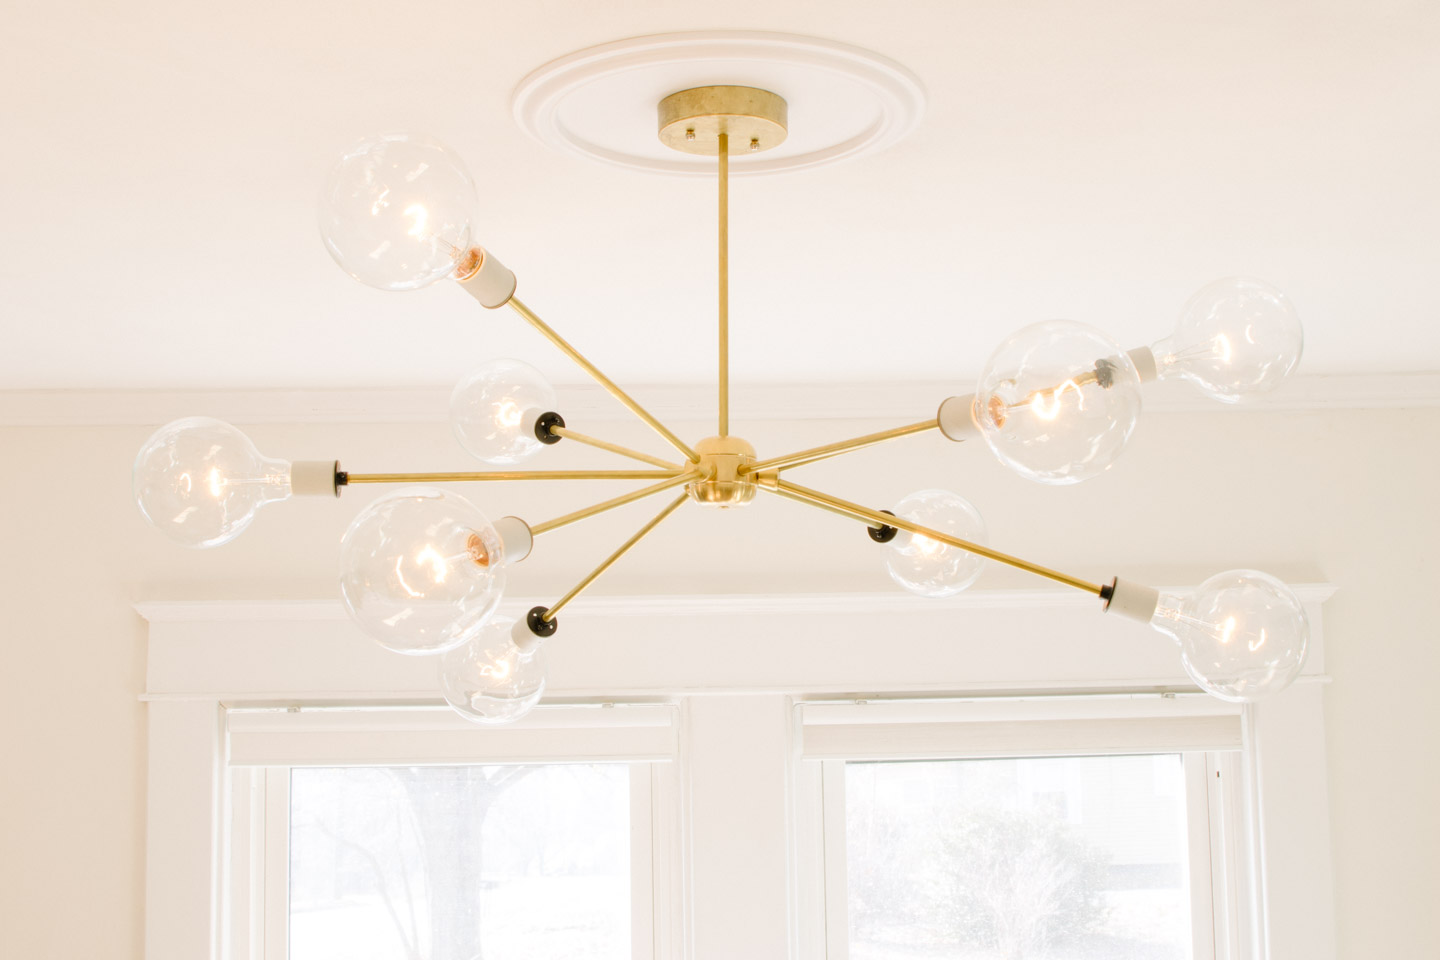
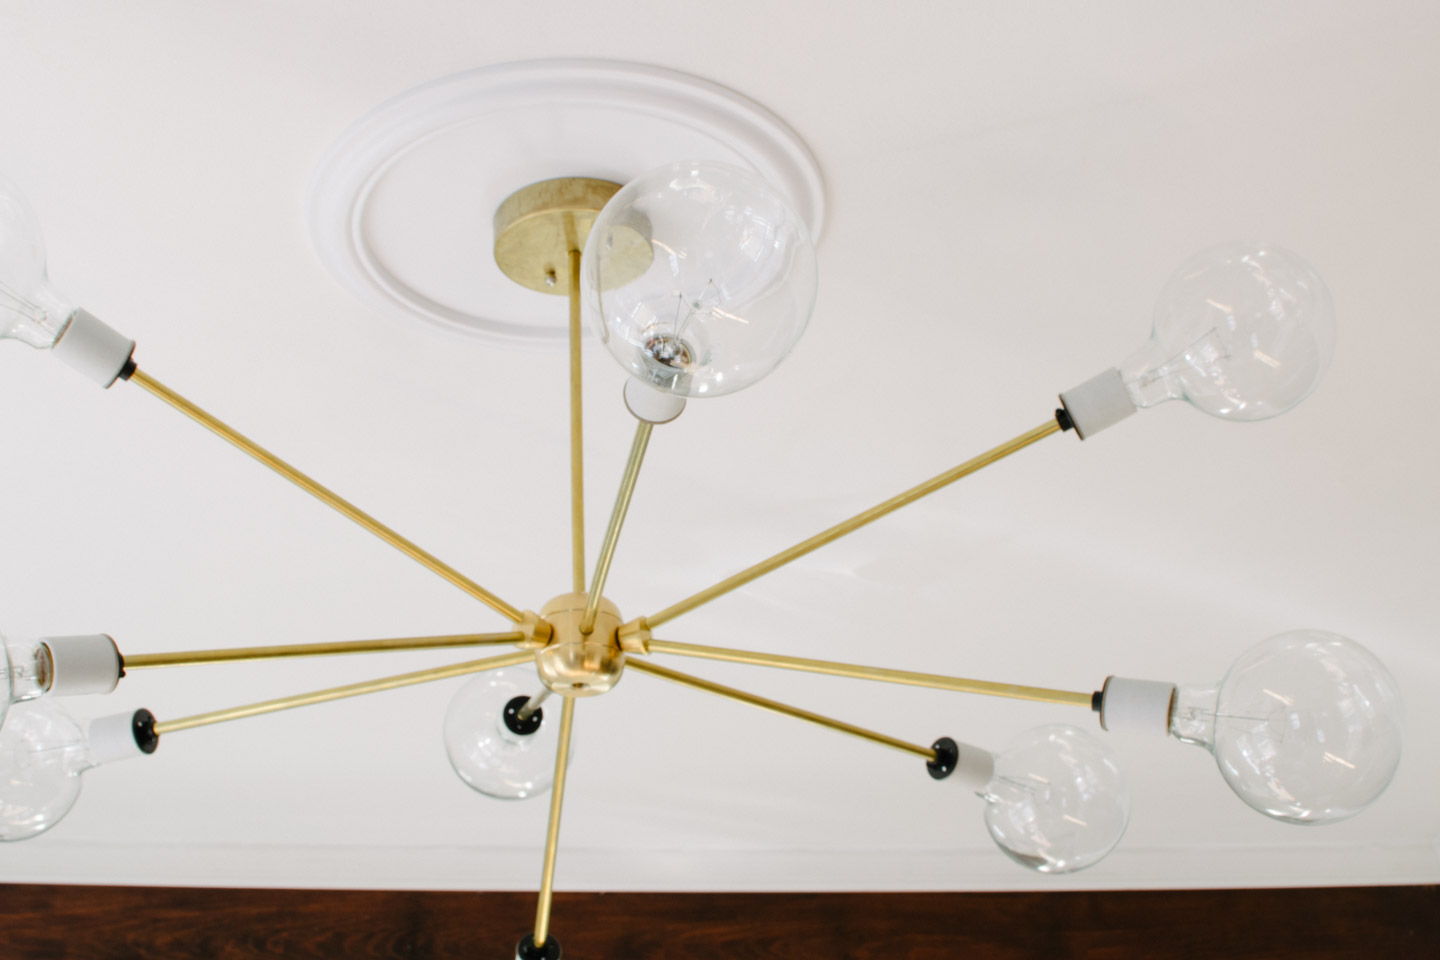
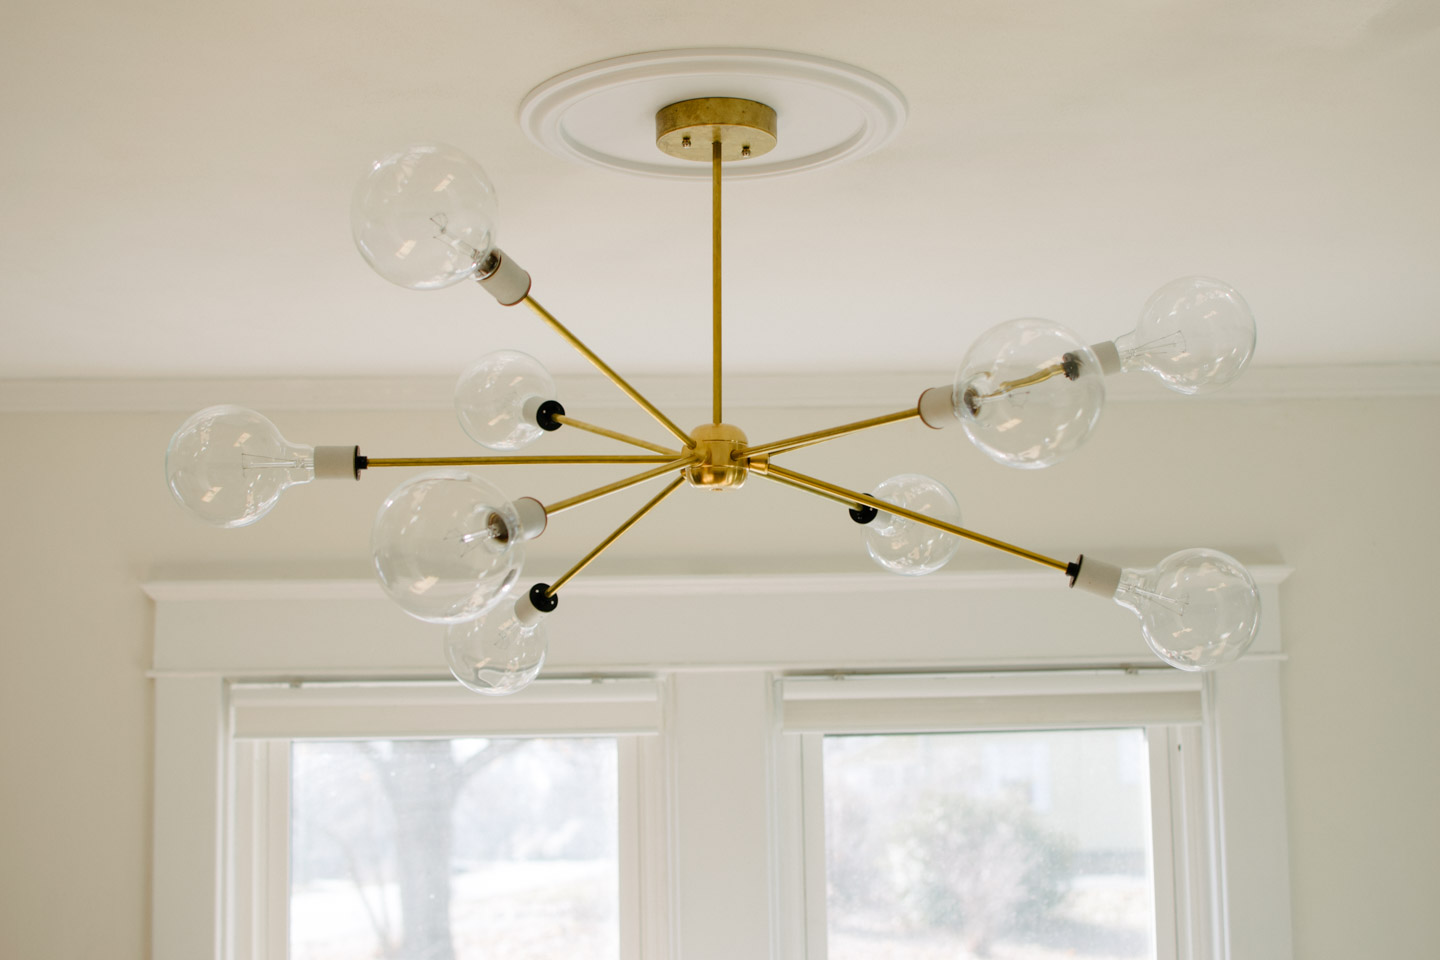
Reveal Pictures
Reality Check
You may have noticed the medallion on the ceiling in these picture's, that became a solution to a "problem" that couldn't have been avoided. Our light was never centered, on anything; not the original opening to the living room, not on the room in either direction, and not on the original window, nothing. So when we decided to spend this money (not to mention time and effort) on a grown up light fixture, we knew it would drive us crazy to not have it centered on the window in the dining room.
Of course this conversation didn't come up until we were ready to order all the parts (which were already adding up above the budget) and the solution ideas were seeming very complicated and therefore expensive.
- If we filled the hole in our ceiling after centering the light fixture you would see the patch job. The current ceiling's have a distinctive swirl finish which looks great and adds a bit of character.
- Building some type of cover would result in more holes into the ceiling and we really didn't want the plaster falling down on us (talk about a project getting bigger)
So if you can imagine, things got a little tense, Mitch and I sitting across from one another at the dining table. (Yeah we do argue about this stuff just like your average homeowner).
A ceiling medallion would seem an easy solution, but generally speaking they are very ornate, or tend to look like your covering something up. I was really, super unsure about putting more detail in such a small room. But in an effort to #finishthatspace, like we said we would this year, I sucked it up and ordered the simplest medallion I could find. We love it, especially what it cost us!
I sucked up drywall and blown-in insulation dust to move the damn light over 4". Although, I am glad we noticed this before going through all of the effort of getting the light up on to the ceiling....I HATE doing things over. So, two trips up into the attic, one to assess how the box was affixed, the other to pull the wire through the old hole and into the new.
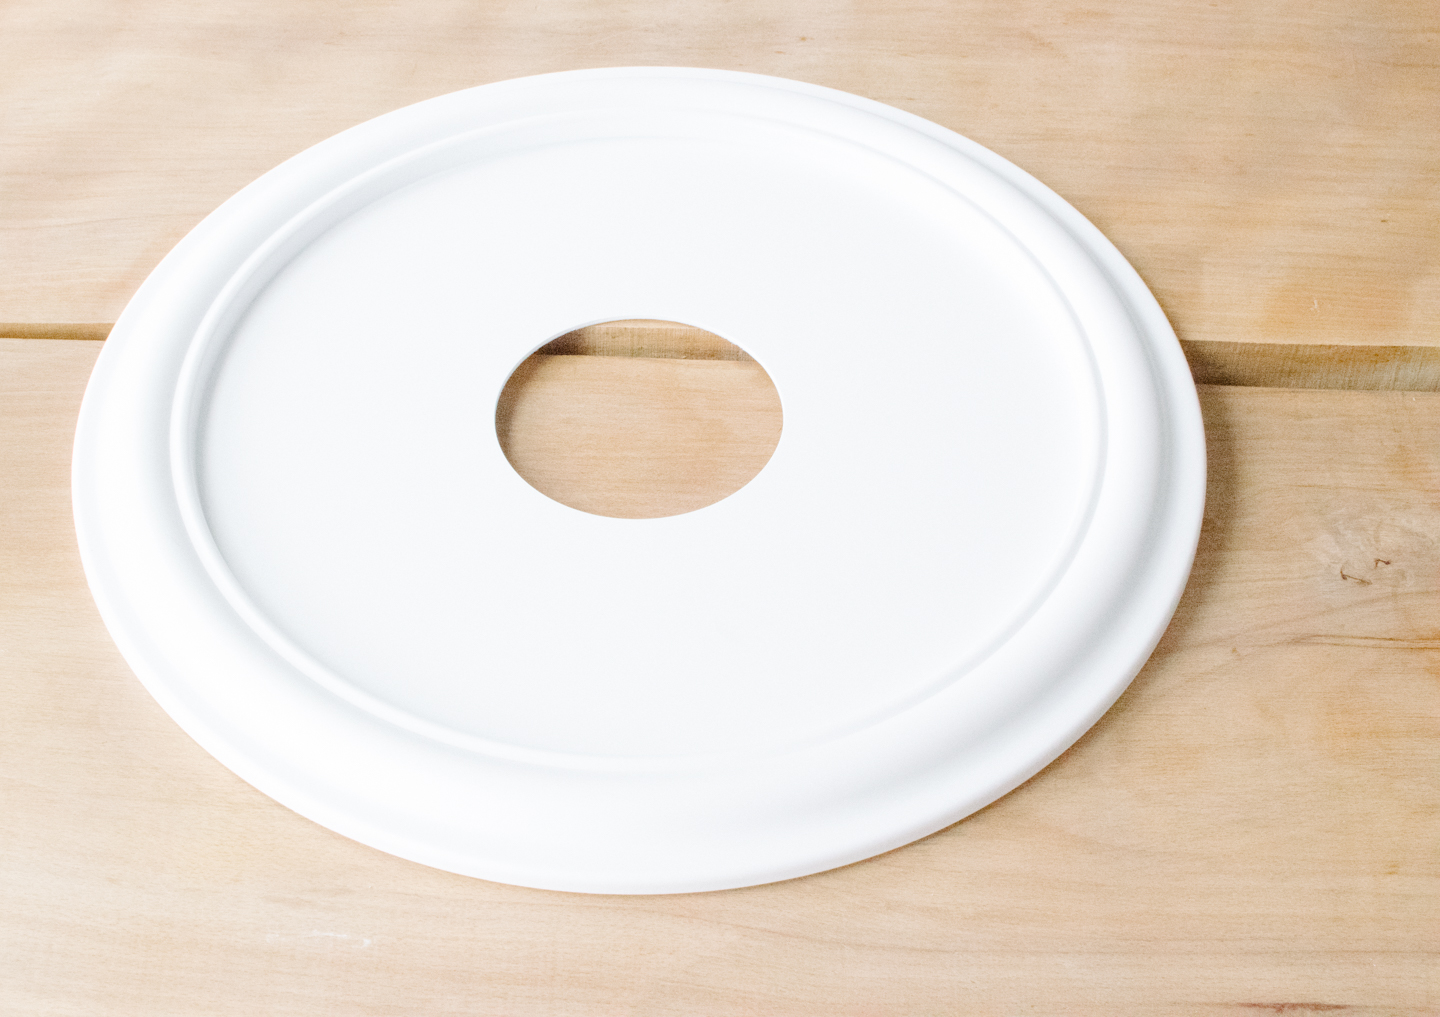
Do you think it needs a coat of trim paint? Mitch seems to think we should leave it as is, I'm worried it looks too plastic...
Want the Sputnik look but not the DIY work? Check these out...
This post may contain affiliate links. Read the full disclosure here.
- 9 Socket Mid-Century Brass Sputnik
- Large 36" Modern Gold Brass Starburst Chandelier
- Industrial chandelier light, 18 lights pendant light
- Midcentury Modern, industrial lighting, Sputnik Chandelier